Shrapnel in Sump

Status
Not open for further replies.
Lucas Industries exists but I don't know if it is the original.
Shrapnel in Sump


It may not have started as Lucas Industries but the legal entity that Joe Lucas first started 'Joseph Lucas Ltd' will be down a legal trail of name changes leading to Lucas Industries.
 
Do you remember if the box was green or red? The current red boxes have bubble wrap around the stator and the box is still has about 1/2" of head space. I don't know the details, but I think the other Lucas uses green and made Wassell stop, hence the switch to red which seem to all be a little oversized. My only fault with the current Lucas stators is the sleeving is not molded to the wire - that's good in that the cable is much more flexible, but bad in that it's bigger around so it can be hard to get started through the grommet.
Definitely green.
 
OK, shop is offering to cover costs of anything I feel needs replacing plus compensate for my hours.This is fair as if he was doing the work he'd need to cover transport back to his shop plus his labour hours and parts.
I've had a careful look at the state of rotor and stator. Appears to be a slight notch in the woodroffe keyway inside rotor plus the gouging on the face surface, so will replace. Stator has a visible crack on the inner bore parallel to the crank, so it's got to go too.
Thinking 3-phase might be nice to have for my urban environment, though I have LED headlight/tailight, so keeping batt happy has not been an issue. Which stator would be best to run my heated jacket liner? highest output 2 wire single phase or 3 wire 3 phase?
 
Just to add my two cents worth on the “ New Lucas “ quality bit I purchased a new cloth bound main harness from one of big Norton spares retailers in the UK for my Commando ( not a complaint against them - they were /are great IMHO) . This was the green box variety . While the harness itself is fine the supplied schematic was fraught with errors.
 
OK, shop is offering to cover costs of anything I feel needs replacing plus compensate for my hours.This is fair as if he was doing the work he'd need to cover transport back to his shop plus his labour hours and parts.
I've had a careful look at the state of rotor and stator. Appears to be a slight notch in the woodroffe keyway inside rotor plus the gouging on the face surface, so will replace. Stator has a visible crack on the inner bore parallel to the crank, so it's got to go too.
Thinking 3-phase might be nice to have for my urban environment, though I have LED headlight/tailight, so keeping batt happy has not been an issue. Which stator would be best to run my heated jacket liner? highest output 2 wire single phase or 3 wire 3 phase?
I would definitely go with the three phase stator . It will give you a more consistent power supply especially at lower rpm which will certainly be a big factor if you are using heated clothing.

Good to see that the shop are being fair with you ..
 
I would definitely go with the three phase stator . It will give you a more consistent power supply especially at lower rpm which will certainly be a big factor if you are using heated clothing.

Good to see that the shop are being fair with you ..
Got them the list of items to order with a 3-phase 14.5 Amp RM24 stator.
The shop owner had the actual mechanic call me and we chatted a while. He was very apologetic. I got to ask him lots of questions on unrelated items he worked on, and he sent me a set of images he made on the cylinders, cam etc. giving me some peace of mind.
 
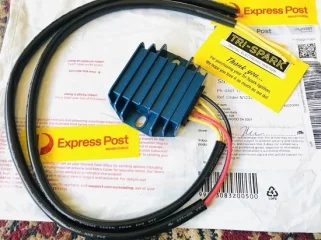
If you get a HO three phase stator, then you should also get a TS MOSFET reg/rect. Or a Shindengen.

Can the power leads be connected to the battery directly ? (If the Positive is earthed to the frame its the same thing in a rounder-bout sort of way ?)

With the conduit over both wires as delivered it seems that is the intended way perhaps. (battery direct and won't catch on fire or some other calamity ?)

Shrapnel in Sump
 
Can the power leads be connected to the battery directly ? (If the Positive is earthed to the frame its the same thing in a rounder-bout sort of way ?)

With the conduit over both wires as delivered it seems that is the intended way perhaps. (battery direct and won't catch on fire or some other calamity ?)

View attachment 85043
They can be and I sometimes do, but I put a fuse in line with the black wire when I do.

If you're using the standard harness, you can hook the red wire directly to the battery and the black to the Brown/Blue that used to go to the rectifier and Zener.

In general, the frame is not a ground on a Norton even though it might measure as ground - the red wires are ground (earth).

All assuming you are still positive ground.
 
All assuming you are still positive ground.

Yes it is still + ground.
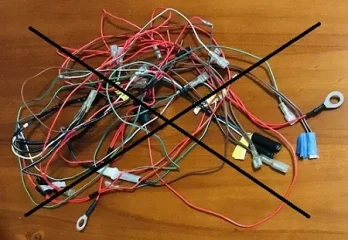
I have a new AN loom but removed the runs not needed along with the + wire run which will be replaced with a simplified version.
Shrapnel in Sump
I will find an old electrical thread and bump that later on to not muddle this one.
 
Ok, recieved new stator and rotor. Both Lucas. Plus ancillary parts.
I have spent today checking inner cover fitment, final drive sprocket torque, new timing scale installed and accuracy checked.
Then I hit an issue: new rotor refuses to go on the crankshaft. Gets maybe a few mm on then jams solid, very hard to remove it. This is without woodroffe key as a test fit. Original goes on nicely with no force needed. Have tried running some lapping compound on the inside of rotor with a buffing pad on a dremel. No progress.

Looking for net wisdom to proceed further.
 
Check carefully the crank, especially the edges of the key slot. Try the rotor backwards - if it goes on the same amount both ways, it's probably the crank, not the rotor. Yes, I know the old one goes on. I would take some 320 or 400 grit sandpaper can go around the crank like buffing shoes on all sides just once. You're not trying to remove metal and reduce the diameter, just trying to remove possible burrs or mushrooms.
 
Last edited:
Agree with the above sound advice - try LIGHTLY lapping the rotor and crank together a little at a time with fine paste . EASY does it - you don’t want to induce a sloppy fit .
 
Ok, recieved new stator and rotor. Both Lucas. Plus ancillary parts.
I have spent today checking inner cover fitment, final drive sprocket torque, new timing scale installed and accuracy checked.
Then I hit an issue: new rotor refuses to go on the crankshaft. Gets maybe a few mm on then jams solid, very hard to remove it. This is without woodroffe key as a test fit. Original goes on nicely with no force needed. Have tried running some lapping compound on the inside of rotor with a buffing pad on a dremel. No progress.

Looking for net wisdom to proceed further.
Before lapping, sanding, deburring, filing, polishing, fitting, fettling & all that, stop. Get some measuring tools. Measure the I.D. of the rotor and post it here.
 
Last edited:
Status
Not open for further replies.
Back
Top