'76 MK III Rectifier location?

Edfury828

VIP MEMBER
Joined
Jun 21, 2023
Messages
129
Country flag
Hello,
'76 MK III Rectifier location?


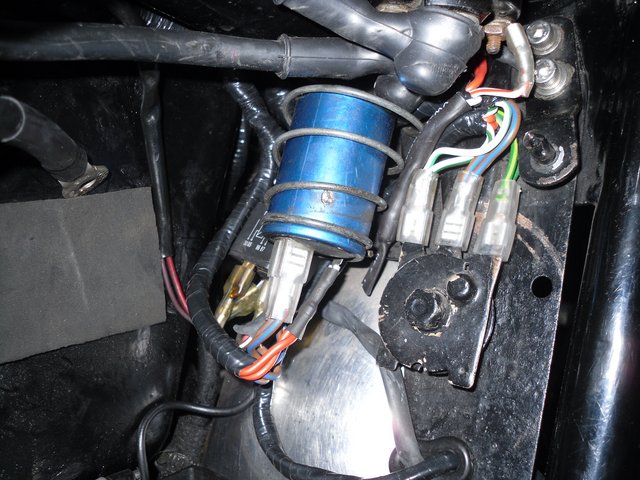
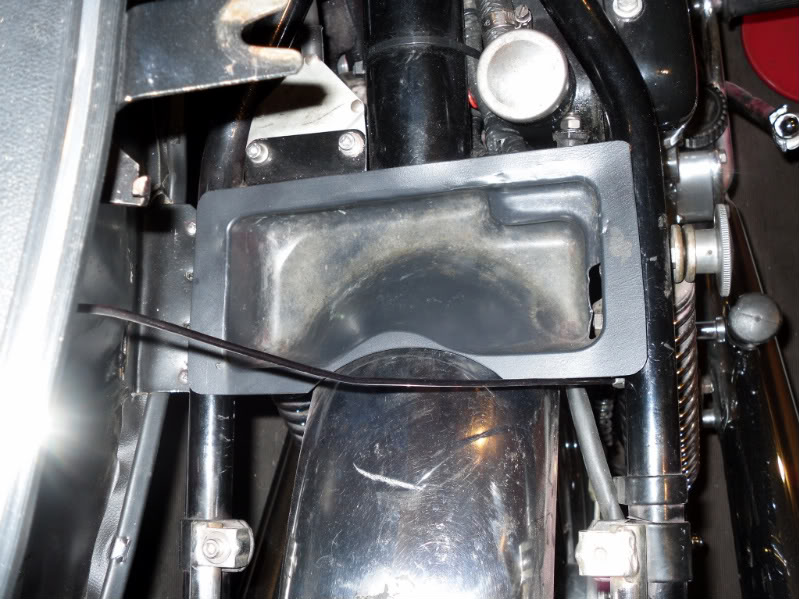
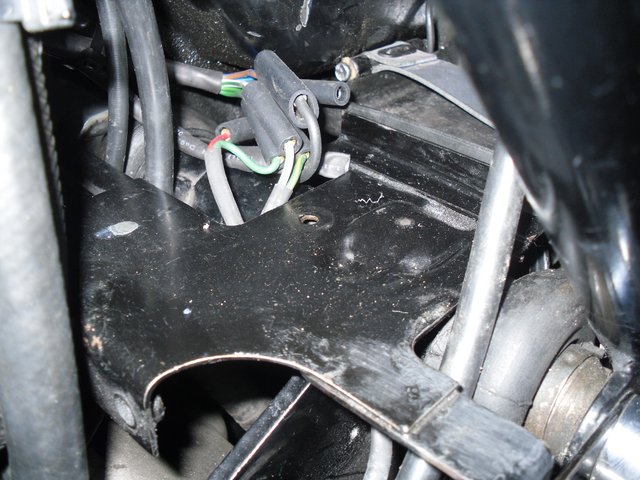
I just purchased a 1976 Mk III Commando and am curious about the PO's locating of this Podtronics Rectifier. Is there a better location than this for it, or is this a "high performance set up", lol? I don't mean to be overly critical, maybe there is some advantage to this method, but it looks funky to me.

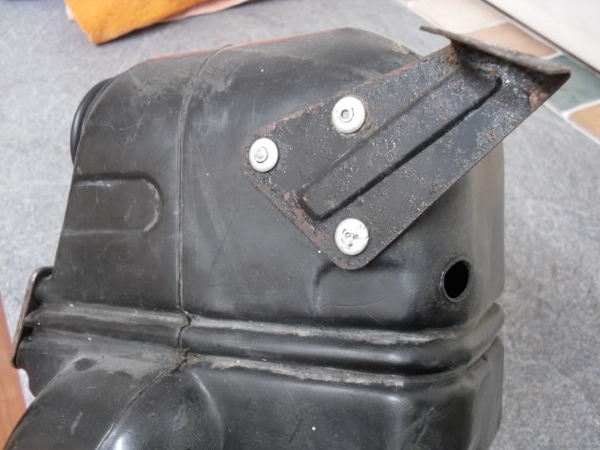
Also in the pic a bracket can be seen attaching the left side cover to the frame with a grey rubber coated strap. It was bare silver aluminum, but I have painted it black for now. Is this brackets presence due to the air box having been removed, or am I missing another stock part which could be replaced?
 
Yes, the bracket was attached to the Mk3 airbox (by rivets).

'76 MK III Rectifier location?
Ah, thanks L.A.B. Now I recall reading that many sidecovers have come off due to Dzus fasteners failing. That's where the Dzus was! Mine cover is now securely bolted on, so I think I'll just leave that be, at least until I can get around to making a bracket that looks a bit nicer.

I'll see if there's an Andover exploded diagram for Rectifier location. Sorry I'm so new that I don't even know where a rectifier goes, doh!
Ok, now I've found a 24b Podtronics Rectifier Mount kit. Did that bolt to the airbox, or could it bolt up to my airbox-less Mk III?
 
'76 MK III Rectifier location?

The original Mk3 (half-wave) rectifier (the black item) attached to the plate in the battery compartment. The (two on the Mk3) Zener diodes (the voltage regulators) attached one to each Z-plate.

Ok, now I've found a 24b Podtronics Rectifier Mount kit. Did that bolt to the airbox, or could it bolt up to my airbox-less Mk III?

I'm not exactly sure about the Podtronics mounting kit but with no airbox, the reg/rec. could be attached to the the battery tray or anywhere that has some airflow.
 
Last edited:
Thanks again L.A.B., I appreciate your help! It looks like I have an open slate for creativity!

The 24b plate I mentioned is on the exploded diagram from Andover for my bikes electrical components. I couldn't tell where anything goes though, so I thought I'd ask.

I am enjoying learning, and finding a few things yet to be done on my "Sorted Norton". As soon as my new rose nut spanner arrives I'll be tightening my loose pipes with a 2' bar, woo-hoo!
 
The 24b plate I mentioned is on the exploded diagram from Andover for my bikes electrical components.

Ok, although 24d is the mounting plate. 24b is the 3-phase reg/rec with bracket. Your Podtronics looks like 3-phase so the alternator stator should also be 3-phase. The original stator would have been the high(er) output single-phase RM23.

I am enjoying learning, and finding a few things yet to be done on my "Sorted Norton". As soon as my new rose nut spanner arrives I'll be tightening my loose pipes with a 2' bar, woo-hoo!

Ok, but take it easy with the 2' bar as the threads inside the head can strip which is some learning best avoided if possible and I suggest you do the tightening with the head hot, preferably with the engine running.
 
Last edited:
Also, you mentioned in a previous thread...
...the bike has spent it's whole life in Canada...

...therefore, would have (originally) had the Canadian "automatic headlight on after starting" 06.6392 warning light control unit and Canadian model ignition switch.
https://andover-norton.co.uk/en/shop-details/16803/w-light-control-unit-canada-

See Mk3 factory manual section J8 and wiring diagram for more information. My apologies, of course, if you were already aware of this.
 
That 24d mounting plate looks nice, but I don't know where it mounts to on the bike. I'm noticing Andover gives the most minimal descriptions of their items too. I also buy parts from Hitchcocks in England for my Enfield and they are the same. You just get a picture and maybe one sentence. Could be an English, or European thing? They do say the tool tray (which I recently ordered) will require some modification...

I agree my Rectifier does look like the 3-phase. My electrical knowledge is pretty minimal, and I admit, I don't understand, but I thought 3-phase was an upgrade.

Even with having a rebuilt Prestolight starter motor, upgraded harness, and larger battery, I would ideally want all of the power I could get out of the alternator stator for charging after a difficult start. I will have to look into my choices on that subject later!

I did not know about the Canadian headlight parts which should be on my bike. Is there a thread about that? I could search that myself and see what I can learn there.

I will say this, the PO put an LED headlight bulb in, and now it is always on as long as the key is on. There are 3 detents in the headlight switch. The first makes a dim beam, second is a brighter beam, and the third goes back to dim. He said it only did that after the new LED was put in. Another mystery for me!

I am at work now, but I will look up section J8 of my original Factory service, or workshop manual tonight and see what I can find.

Oh, and I do have new threaded inserts in my (motorcycle) head. Also single 750 type type pipes with no crossover, and longer threaded rose nuts.

I may double up the copper donut gaskets, or use some Suzuki steel spacers that a forum post said were reccomended in the Tech Digest. After ordering them I found no mention of them in my copy of the TD...

The proper tightening process as I understand it is, use anti-sieze on the threads and tighten rose nuts using Norton spanner (which I now have) and a two foot pipe, with bike on centerstand, and engine warm and running.

Pull on pipe / spanner until bike lifts, but does not tip over. Go for long ride, then repeat until nut stays tight on its own. Check tension periodically from then on out.

I may also fabricate some exhause support brackets as Concours did, which would connect the engine cradle to the exhaust pipe near the silencer joint. That would be a little later on the priority list, but looks like a good idea to me!

In gratitude,
Ed
 
That 24d mounting plate looks nice, but I don't know where it mounts to on the bike. I'm noticing Andover gives the most minimal descriptions of their items too. I also buy parts from Hitchcocks in England for my Enfield and they are the same. You just get a picture and maybe one sentence. Could be an English, or European thing? They do say the tool tray (which I recently ordered) will require some modification...

Yes, as it's not "factory" then the fun part of how to mount it is basically left up to you. :)

I agree my Rectifier does look like the 3-phase. My electrical knowledge is pretty minimal, and I admit, I don't understand, but I thought 3-phase was an upgrade.

Yes, so your Mk3 appears to have been upgraded to the higher output RM24 3-phase charging system.

Even with having a rebuilt Prestolight starter motor, upgraded harness, and larger battery, I would ideally want all of the power I could get out of the alternator stator for charging after a difficult start. I will have to look into my choices on that subject later!

Seems like that's already been done (3-phase).

I did not know about the Canadian headlight parts which should be on my bike. Is there a thread about that? I could search that myself and see what I can learn there.
I am at work now, but I will look up section J8 of my original Factory service, or workshop manual tonight and see what I can find.

Yes, I suggest you read J8 first.

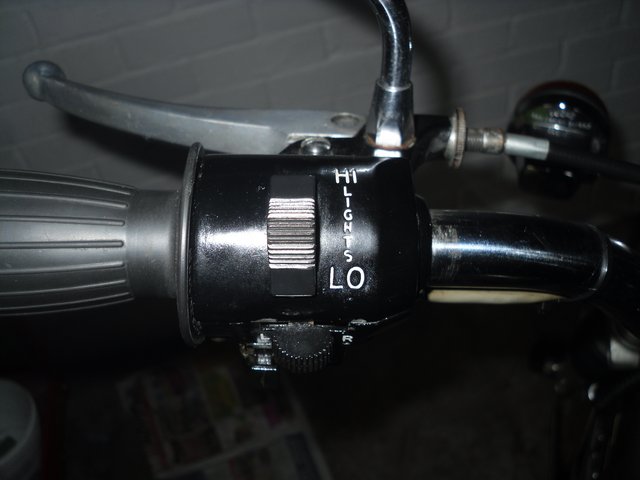
I will say this, the PO put an LED headlight bulb in, and now it is always on as long as the key is on. There are 3 detents in the headlight switch. The first makes a dim beam, second is a brighter beam, and the third goes back to dim. He said it only did that after the new LED was put in. Another mystery for me!

There should be two detents, Main/High and Dip/Low beams (marked HI - LO on the LH switch cluster).
'76 MK III Rectifier location?
 
Last edited:
Could be an English, or European thing? They do say the tool tray (which I recently ordered) will require some modification...

I don't know why the Mk3 tool tray would require modification. What's shown in AN's picture should fit as it is (or it did!).

'76 MK III Rectifier location?
 
I don't know why the Mk3 tool tray would require modification. What's shown in AN's picture should fit as it is (or it did!).

'76 MK III Rectifier location?
Oops, my fault on the headlight switch. I was using the red one on the right grip. Probably because that's where the headlight switch is on my other bikes. Maybe I should pay attention? Doh!

I will look at that tonight too. The PO did agree with me that the new LED doesn't work right though... and he must've thought I was using the correct switch?
 
Though the reg/rec looks to be three phase, it will work fine with a single phase alternator. To check what you have, just look how many wires are coming out the primary to the R/R unit....two or three?

The reason for Pod mount instruction to modify tool tray is likely b/c a common location for the mount is rear side of the frame plate before the rear mudguard, basically near the tool tray location. But I'd just find a suitable location with some airflow...I think the pod unit likes to be fully in contact with a metal surface to aid heat transfer. I run a Trispark RR that has lower operating temp and does not need a heat sink mounting.
 
The PO did agree with me that the new LED doesn't work right though...

Yes, there have been problems with (BPF?) LED headlamp bulbs not working as they should.
Example:
 
The reason for Pod mount instruction to modify tool tray is likely b/c a common location for the mount is rear side of the frame plate before the rear mudguard, basically near the tool tray location. But I'd just find a suitable location with some airflow...I think the pod unit likes to be fully in contact with a metal surface to aid heat transfer. I run a Trispark RR that has lower operating temp and does not need a heat sink mounting.

With no standard airbox then there are two threaded potential Pod bracket mounting holes at the front of the battery tray (one not visible in the picture) or a third hole (visible further back) if the warning light control unit (Canadian) or standard assimilator isn't fitted. Edit: However, I think I can see it in one of your previous pictures.

'76 MK III Rectifier location?
 
Last edited:
Yes, that location pictured is available! I just ran a zip tie through that hole to hold a smart charger plug, but it can be adjusted. The reg/ rec can be mounted there! That's got to be better than the present location (zip tied to the frame).

I may make my own mounting plate also. Maybe paint the plate with black radiator paint to help dissipate the heat just a little better?

I have reached out to the LED headlight site from that link, to obtain a proper bulb. I had never even heard of BPF headlights. I did know LEDs can be polarity sensitive, but I didn't realize my wiring was even different from H4. I really appreciate all the help on these things. It will make a big difference for me and my bike!
 
I have reached out to the LED headlight site from that link, to obtain a proper bulb. I had never even heard of BPF headlights. I did know LEDs can be polarity sensitive, but I didn't realize my wiring was even different from H4.

You might want to check it is BPF before ordering if you haven't already done so as the PO could have upgraded the headlight assembly (to H4 LED, etc.).
 
Thanks Bilko! The location picture is worth 1,000 words, as they say. I like it! Luckily, I haven't gotten into the job yet, being distracted by other things...

I wondered what AN meant by how I may need to slightly modify the tool tray. Now I can find out :) That's a very spotless bike you have. I will be cleaning mine up as time allows, working toward something like yours. Mine's in pretty good shape, but the PO was more of a "patina" guy, doh!
 
Back
Top