
You are using an out of date browser. It may not display this or other websites correctly.
You should upgrade or use an alternative browser.
You should upgrade or use an alternative browser.
P11 basket case
- Thread starter Junglebiker
- Start date
Junglebiker
FULL MEMBER
- Joined
- May 2018
- Messages
- 267
Got it sorted now--looks like I had a couple of mismatched gears in there--I did think it odd that the number of teeth on the gears I put in were not the same as the number in the Haynes manual I was using (Haynes manual for Norton Twins other than Commandos). Remember that I had assembled that trans from parts, and I obviously didn't put together a combo that worked the first time. All the parts I was using were nice, good condition parts, they just didn't all work together.
Anyway, I had a pre-1963 trans (Atlas? N15? Definitely not P11, whatever it was) available to me that shifted nicely, so I opened it up and discovered that it was indeed very nice inside, so I simply transferred the contents to my P11 gearcase, into which I had already installed new bearings from RGM. Now it shifts nicely into all 4 gears and neutral, the shafts spin nicely, etc. All good. Tomorrow hopefully I'll get a chance to finish assembling the shift mechanism.
Anyway, I had a pre-1963 trans (Atlas? N15? Definitely not P11, whatever it was) available to me that shifted nicely, so I opened it up and discovered that it was indeed very nice inside, so I simply transferred the contents to my P11 gearcase, into which I had already installed new bearings from RGM. Now it shifts nicely into all 4 gears and neutral, the shafts spin nicely, etc. All good. Tomorrow hopefully I'll get a chance to finish assembling the shift mechanism.
Mismatched gears doesn't sound likely unless you assembled the gearbox with a sledge! The pitch circles of both gear wheel pairs will be tangent to another and the gear teeth need to have the same shape. Unless these two criteria are met, you wouldn't be able to mate the gears and turn them, so the error would be instantly recognizeable. My bet is bent shafts, dogs of the wrong shape, or bent selector forks.
You should be able to detect the cause upon a close examination.
Early checks of the meshing is advisable when rebuilding a transmission.
- Knut
You should be able to detect the cause upon a close examination.
Early checks of the meshing is advisable when rebuilding a transmission.
- Knut
Junglebiker
FULL MEMBER
- Joined
- May 2018
- Messages
- 267
The gears in my first attempt all slid on to the shafts just fine, the dogs all looked good and engaged nicely. On thing I did notice was that the teeth on the large gear on the lay shaft and it's corresponding gear on the mainshaft did not engage very deeply. When I took the shafts out of the box they were in, they looked great except for a little galling on a couple of the gears, gears, so I replaced those with better looking gears that were in also in the box. I admit (to my shame) that I did not carefully check to make sure that they all had the same number of teeth! As a result I had 14/28, 18/24, 21/21, 24/18 rather than what I ended up with in my second attempt, which was 14/28, 18/24, 21/20, 23/18.Mismatched gears doesn't sound likely unless you assembled the gearbox with a sledge! The pitch circles of both gear wheel pairs will be tangent to another and the gear teeth need to have the same shape. Unless these two criteria are met, you wouldn't be able to mate the gears and turn them, so the error would be instantly recognizeable. My bet is bent shafts, dogs of the wrong shape, or bent selector forks.
You should be able to detect the cause upon a close examination.
Early checks of the meshing is advisable when rebuilding a transmission.
- Knut
Whatever the reason, I could not get attempt number one to shift properly and in 3rd and 4th gears they would rotate easily for a revolution or so before stopping. They could be forced to continue turning, but it felt very much as though something in there was rubbing very tightly against something else.
Anyway, today I finally got a good working gearbox all together. I think that I have found every difference between pre-'63 and '63-on gearboxes, since parts from both were available for me to pick from.
Junglebiker
FULL MEMBER
- Joined
- May 2018
- Messages
- 267
The final assembly I came up with started as a nearly complete pre-63 gearbox intended for an Atlas or the like, at any rate not for a P11 or Commando. It shifted nicely and appeared to be in good condition, so I took it all apart, was impressed with how nice the gears were, and then installed both shafts and all the gears in my P11 gear case (into which I had already installed new bearings from RGM). I went with a '63-onwards kickstart shaft, '63-onwards Atlas (not Commando) inner and outer gearcase covers and shift mechanism. Finally at the end I had a complete, functional gearbox that shifted nicely and spins easily. Big thanks to Motorson for giving me the opportunity to learn so much about these things!!
Now it has to sit while I go on a 7000 mile road trip. When I get back in a few weeks I'll have to decide between getting started on the engine or making the frame into a roller.
Now it has to sit while I go on a 7000 mile road trip. When I get back in a few weeks I'll have to decide between getting started on the engine or making the frame into a roller.
Junglebiker
FULL MEMBER
- Joined
- May 2018
- Messages
- 267
Teaser pics--I like it, let the haters scoff! No cutting has been done on the frame! I still fully intend for all my mods to be reversible. I don't know how to add pics yet, I'll see if I can't get motorson to add a couple he took today.
Last edited:
Junglebiker
FULL MEMBER
- Joined
- May 2018
- Messages
- 267
Okay, here are the adapters I made to enable me to use tapered roller bearings. I should point out several things here:
1.) the original bearing races appear to be made one piece with the frame and do not appear to be replaceable. Even if I put new balls in there, I doubt that they would ever be very good, and lousy steering head bearings are not something I am willing to put up with.
2.) this is not my first rodeo, so to speak. I have made adapters like these before, as well as other parts of similar and greater complexity.
3.) I have been a motorcycle rider for 37 years and a motorcycle mechanic for 35 years. I have confidence in my abilities. Most of what I work on gets pretty heavily used in pretty rough, fire road environments. I have a good idea of what breaks and what doesn't. I have modified and even built frames. Mixing and matching parts to get something back on the road is second nature to me. I know my way around a lathe, a mill and can weld pretty well. This P11 is my first british bike (except for the Armstrong MT500 I have in the UK, and it's really an Austrian Rotax engine in an Italian SWM designed chassis).
Anyway, here we go. The finished product, with a light coat of paint on it:

from above, made to seat the external race, which you can see on the bench to the right:

from below--this is the end that gets driven into the steering head:

here it is with the bearing and seal fitted, but not greased yet, this was just a dry assembly to see if everything fit:

installing the upper bearing cup--this was a tight hammer fit into the steering head, and the lower bearing cup was similar. Knut is right, line boring the steering head would make a more accurate hole, but I wasn't looking for that level of accuracy:

installed, top and bottom:

and with the triple clamps (yokes) installed. It steers left and right without any odd tightening or stiffness that might indicate the bearings were misaligned. The steering stop has not been installed yet:

1.) the original bearing races appear to be made one piece with the frame and do not appear to be replaceable. Even if I put new balls in there, I doubt that they would ever be very good, and lousy steering head bearings are not something I am willing to put up with.
2.) this is not my first rodeo, so to speak. I have made adapters like these before, as well as other parts of similar and greater complexity.
3.) I have been a motorcycle rider for 37 years and a motorcycle mechanic for 35 years. I have confidence in my abilities. Most of what I work on gets pretty heavily used in pretty rough, fire road environments. I have a good idea of what breaks and what doesn't. I have modified and even built frames. Mixing and matching parts to get something back on the road is second nature to me. I know my way around a lathe, a mill and can weld pretty well. This P11 is my first british bike (except for the Armstrong MT500 I have in the UK, and it's really an Austrian Rotax engine in an Italian SWM designed chassis).
Anyway, here we go. The finished product, with a light coat of paint on it:
from above, made to seat the external race, which you can see on the bench to the right:
from below--this is the end that gets driven into the steering head:
here it is with the bearing and seal fitted, but not greased yet, this was just a dry assembly to see if everything fit:
installing the upper bearing cup--this was a tight hammer fit into the steering head, and the lower bearing cup was similar. Knut is right, line boring the steering head would make a more accurate hole, but I wasn't looking for that level of accuracy:
installed, top and bottom:
and with the triple clamps (yokes) installed. It steers left and right without any odd tightening or stiffness that might indicate the bearings were misaligned. The steering stop has not been installed yet:
Junglebiker
FULL MEMBER
- Joined
- May 2018
- Messages
- 267
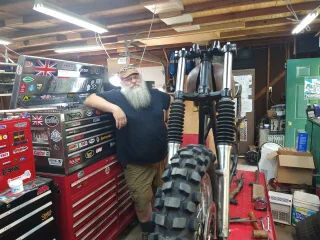
My rear wheel with the Buchanan spokes and the Akront repop rim. Also a Tusk tire, which I would not normally go with, but what the hey. It was competitively priced, DOT approved, and super heavy duty. I have the same type and size on the front wheel.

Longtimegone
MEMBER
- Joined
- Sep 2017
- Messages
- 101
So the original ball races are still in the steering head? Our bikes are pretty close; mine's 122551.
Not so. The headstock contains elliptical bearing seats (pictured) into which "floating" bearing races were fitted. The bearing seat thus replicates the condition of an angular bearing, providing self-alignment at the same time.1.) the original bearing races appear to be made one piece with the frame and do not appear to be replaceable. Even if I put new balls in there, I doubt that they would ever be very good, and lousy steering head bearings are not something I am willing to put up with.
It's an adequate arrangement for bikes travelling at modest speed. Some people glue the bearing race to the respective bearing seat. I doubt that is a lasting solution.
- Knut
Junglebiker
FULL MEMBER
- Joined
- May 2018
- Messages
- 267
Yes, the original outer races are still there--I considered putting balls in them just so that the new bearing cups would seat on them and hopefully be held in alignment that way, but I really don't think that would be necessary. I can always go back and put them in later if I decide I need to.So the original ball races are still in the steering head? Our bikes are pretty close; mine's 122551.
Interesting about your serial number, I think that may be the closest one I have seen to mine yet. Mine had a 1972 issued New Mexico title when I got it, and according to that title, my bike was sold new in Kansas in 1968. Do you know where yours was originally sold?
Junglebiker
FULL MEMBER
- Joined
- May 2018
- Messages
- 267
Knut, I don't think your picture came through--I'd like to see it though.Not so. The headstock contains elliptical bearing seats (pictured) into which "floating" bearing races were fitted. The bearing seat thus replicates the condition of an angular bearing, providing self-alignment at the same time.
It's an adequate arrangement for bikes travelling at modest speed. Some people glue the bearing race to the respective bearing seat. I doubt that is a lasting solution.
- Knut
The referall was to your picture (#68 no. 5) actually. Please find an image of the corresponding race in this link:
- Knut
- Knut
Junglebiker
FULL MEMBER
- Joined
- May 2018
- Messages
- 267
yeah, that's the first time I've seen a pic of the original style bearings not installed in a frame. Interesting. If I had removed them, I might have been able to keep my overall steering head length a little shorter, though the strength of the new cups might have been reduced. Hard to explain without drawing a diagram. At any rate, it's assembled now, I'll leave for now and focus on other stuff, will maybe revisit the steering later.
Longtimegone
MEMBER
- Joined
- Sep 2017
- Messages
- 101
I believe it was Oklahoma. I have the Oklahoma title transferring it to my brother-in-laws name, when he bought it in 1970.Interesting about your serial number, I think that may be the closest one I have seen to mine yet. Mine had a 1972 issued New Mexico title when I got it, and according to that title, my bike was sold new in Kansas in 1968. Do you know where yours was originally sold?
Schwany
FULL MEMBER
- Joined
- Apr 2020
- Messages
- 3,885
You should be able to throw one hell of a rooster tail of dirt with that tire on the P11. They are probably a kick in the pants to use off road. I never did it myself (had a Falta replica CZ for dirt), but my P11 was stripped right off the showroom floor and raced in the dirt according to my brother whom I bought it from in pieces. Everything used for mounting except the rear brake stay was ground off the frame. This I why it never attempted a restoration. Well, that and in the early 1970's parts for restoring P11's were in short supply. Either that or I was too cheap to find out. Can't remember.My rear wheel with the Buchanan spokes and the Akront repop rim. Also a Tusk tire, which I would not normally go with, but what the hey. It was competitively priced, DOT approved, and super heavy duty. I have the same type and size on the front wheel.
View attachment 95058
")
Junglebiker
FULL MEMBER
- Joined
- May 2018
- Messages
- 267
JSM parts going in, I went with the long, lightweight Carillo rods, the lightweight moly coated pistons, etc, etc. Rebalanced the crankshaft to 65% balance factor:

Getting the bottom end assembled took more time than I was expecting because of the set-up required for the JSM lifter blocks and lifters. Once I had the blocks clearanced for the lobes and had double checked that the lifters were adequately supported at 0 degrees lift, then I could get the bottom end together. I attempted to measure the width of the crank and the width of the crankcase so that I could put in whatever shims were required and thus avoid having to pull the bearings out over and over, but I failed. In the end I needed no shims at all for about 0.007" endfloat.

Tomorrow I attack the timing chest!!! Lots of opportunity to learn, I think. It seems to me that the timing chest is probably the most complicated part of a Norton engine build. It is certainly the most intimidating part to me. Just to make my life even more interesting, I'm going with a Hunt magneto, and this will be my first time setting one of those up.
Getting the bottom end assembled took more time than I was expecting because of the set-up required for the JSM lifter blocks and lifters. Once I had the blocks clearanced for the lobes and had double checked that the lifters were adequately supported at 0 degrees lift, then I could get the bottom end together. I attempted to measure the width of the crank and the width of the crankcase so that I could put in whatever shims were required and thus avoid having to pull the bearings out over and over, but I failed. In the end I needed no shims at all for about 0.007" endfloat.
Tomorrow I attack the timing chest!!! Lots of opportunity to learn, I think. It seems to me that the timing chest is probably the most complicated part of a Norton engine build. It is certainly the most intimidating part to me. Just to make my life even more interesting, I'm going with a Hunt magneto, and this will be my first time setting one of those up.
Schwany
FULL MEMBER
- Joined
- Apr 2020
- Messages
- 3,885
End float, never use the stuff myself.
Nortons are not precision formula 1 racing equipment in my opinion. It's a common working man's motorcycle. Well at least it started out that way. I didn't check end float on my gearbox rebuild or my crank. The crank I basically left alone except for the R&R on the JSM rods. Bearings were good. My crank was already balanced at 62% by somebody that knew what they were doing in the previous century. Still smooth as it ever was after the rebuild. Only looked at end float with my eyeballs pulling with my fingers on the new JS2 cam. It didn't move back and forth in the bushes, so I figured it was close enough. Seems to haul butt without any weird noises. I probably have my priorities wrong and should be an end float evangelist.
Don't sweat the timing chest. You can do it easy peasy. Mags are not difficult although fiddly having to work both sides of the timing chest.
Do the timing gears all straight up as described in the manual and don't get caught up in the anal cam timing BS. Huge waste of time unless you are attempting to break a land speed record. The cam timing instructions are for perfectionists. Jim says straight up is the right way to do it for a street ride. That is not mentioned in the instructions. I told him how I did it and he said straight up is what the cam was designed to support.
Have fun. You are going to like that motor!!
Edit: What cam is that?
Last edited:
Junglebiker
FULL MEMBER
- Joined
- May 2018
- Messages
- 267
Thanks for the encouragement--I have found so far that Nortons are generally simpler than I was expecting. The cam I am using is a JS0 cam, nothing too exciting; just a little better than stock, and I needed to get a cam that would work with the JSM radiused lifters. I also went with a compression ratio somewhere between 8:1 and 9:1, again, nothing extreme, I'm shooting for mild mannered, but respectable, reliable and smooth if possible.End float, never use the stuff myself.
Nortons are not precision formula 1 racing equipment in my opinion. It's a common working man's motorcycle. Well at least it started out that way. I didn't check end float on my gearbox rebuild or my crank. The crank I basically left alone except for the R&R on the JSM rods. Bearings were good. My crank was already balanced at 62% by somebody that knew what they were doing in the previous century. Still smooth as it ever was after the rebuild. Only looked at end float with my eyeballs pulling with my fingers on the new JS2 cam. It didn't move back and forth in the bushes, so I figured it was close enough. Seems to haul butt without any weird noises. I probably have my priorities wrong and should be an end float evangelist.
Don't sweat the timing chest. You can do it easy peasy. Mags are not difficult although fiddly having to work both sides of the timing chest.
Do the timing gears all straight up as described in the manual and don't get caught up in the anal cam timing BS. Huge waste of time unless you are attempting to break a land speed record. The cam timing instructions are for perfectionists. Jim says straight up is the right way to do it for a street ride. That is not mentioned in the instructions. I told him how I did it and he said straight up is what the cam was designed to support.
Have fun. You are going to like that motor!!
Edit: What cam is that?
I read up on your P11 a little while ago--I remember that your crank was set up with a balance factor of 62%, I assume that would have been with stock rods and pistons--with the JSM stuff your new balance factor is probably something over 62%, but obviously you are not suffering horrible vibrations, which is encouraging; the margin of error seems relatively high, unless one is building a serious race bike, which I am not.
Similar threads
- Replies
- 3
- Views
- 705
- Replies
- 14
- Views
- 766
- Replies
- 15
- Views
- 3,465
- Replies
- 97
- Views
- 17,187