Isolastic Mk3 Check and adjust

Status
Not open for further replies.

p400

VIP MEMBER
Joined
Jul 14, 2014
Messages
1,296
Country flag
Riding my Mk3 today about 100 miles and noticed more vibration than in past.
Decided to check isolastic front as a check.
Backed off the front bolt 06-3213.
then looked the manual and found I was push the engine to the right.
what? didnt make sense.
Didnt push engine , found I could not find any clearance at the plastic washer.
backed off the right side multiholed adjuster 1.5 holes, found 0.010" clearance.
tightened the mounting bolt, found no clearance.

Am I on the right track?


IsoAdjust1.jpg
 
Last edited:
I found these articles quite helpful:


Based on that advice and others I've read on INOA, I set my front iso to 20 thou and immediately got a nice smooth out of pretty harsh vibration from 3k rpm onwards. No discernible change in handling.
Still getting excess vibs in foot rests below 3k, so might try further loosening of rear iso.

BTW, I find it quite difficult to gauge the spacing using feelers...a 10 will fit with smooth resistance but a 20 will also fit with a bit more resistance. Might try the dial guage on engine plate near iso mount while levering engine assembly away from frame. Seems to be how DynoDave does it.
 
Backed off the front bolt 06-3213.
then looked the manual and found I was push the engine to the right.
what? didnt make sense.

No, read F13 again as the levering should be done with the bolt (or rear Iso. stud) fully tightened or you are likely to get a false clearance measurement due to the play in the adjuster threads.

The bolt (or rear Iso. stud) should then be loosened if an adjustment is required (F13, 4) "Slack[en] of[off] the main mounting central bolt...", therefore, the bolt should be tight up until this point.

Recheck the clearance after the bolt/stud has been retightened and at various stages during tightening because it will tend to close up slightly due to the aforementioned thread play.
 
I have never bothered checking the gap but start off with the adjusters closed down. Next I back them off two holes & take the bike for a ride. If it vibrates too much I back them off another hole, & usually this sorts the job.

Martyn.
 
I tightened bolt
measured clearance at zero.
Backed off bolt, adjusted 2 holes back, tightened nut 30ftlbs, measured at 0.007" no more.
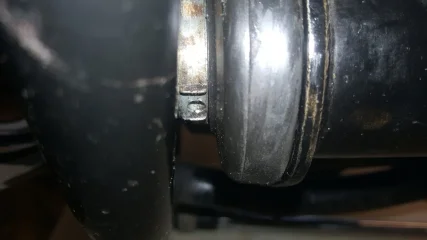
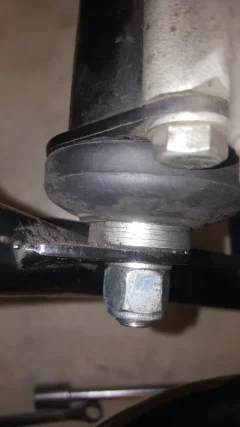
Put boots back on and noticed right boot does not cover clip/holes ??

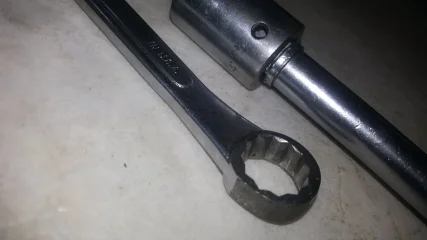
Right side bolt head requires ground down 5/8 box to fit past engine.
Pics show Right side, Left side, tool 5/8 box.

20220904_IsoRightSide.jpg20220904_IsoLeftSide.jpg20220904_IsoRightSideTool.jpg

Gotta put tank back on to test.
Why would this front Iso seem to have tightened back up?
 
Put boots back on and noticed right boot does not cover clip/holes ??

It isn't supposed to. The outer end of the Vernier/Mk3 boot (all Mk3 boots) is supposed to fit in the groove inboard of the adjuster holes (as Fig. F21 below). The same for the fixed abutment. Also, look at diagram Fig. F20 in the manual.
Isolastic Mk3 Check and adjust


The adjuster holes (front or rear Iso.) should be accessible without disturbing the boot. Only the spring clip 06.4723 has to be moved to gain access to the adjuster holes. Therefore the clip should also be outside the boot.
Isolastic Mk3 Check and adjust

We've done this before.
 
Last edited:
Is there guidance on which adjuster, front or rear, should be tweaked for handlebar vs foot rest vibrations?
 
Thanks LAB, I never read the instruction, simply jump into "I can fix this" mode and start turning wrenches, hit a question spot and then read instructions.

Looking back at the front iso clearance check - What is the method of "lever the engine to the right and hold it" with a one person shop?

Wooden wedge?
rubber wedge?

Wood lever with tie down strap keeping tension?
Anyone got a photo of such holding?

Where applied?
-------------------------------------
by the way my total holes backed off is at 3 holes on the front adjustment to achieve 0.007"
 
Last edited:
My method of reseating the front iso boots is to "thread" them on while following with getting a portion of the boot seated.
Just continue rotating the boot and feeding it back on.
 
My method of reseating the front iso boots is to "thread" them on while following with getting a portion of the boot seated.
Just continue rotating the boot and feeding it back on.

Ok, but once fitted then the boot only needs to be disturbed if you are checking with a feeler gauge in which case a short inner section of boot needs to be lifted enough to insert the feeler. If setting by the 'holes' method then the boot doesn't need to be disturbed at all.
Isolastic Mk3 Check and adjust


Looking back at the front iso clearance check - What is the method of "lever the engine to the right and hold it" with a one person shop?

Wood lever with tie down strap keeping tension?

Yes, something that isn't going to damage the frame paint, however, personally, as I'm also a one-person shop then I don't bother with levering.

I find it just as easy/quick to slacken the bolt (or rear stud), back off the adjuster, insert the feeler, turn the adjuster back to the feeler and then begin tightening the bolt/stud.

If the feeler becomes clamped at any stage during the tightening then I slacken the bolt and back off the adjuster by a hole or so and repeat as necessary until the feeler slides with the bolt/stud fully tightened.
 
I've never bothered checking the gap
I just tighten it up and then back it off until the engine moves freely up and down
 
Status
Not open for further replies.
Back
Top