What did you do with your P11 today. he he

So two days ago I cut 1/2" off my side stand and silver solder sweat a new foot on it. Had to do it to support lowering the suspension a little and it's actually been too long forever anyway. So far from the original it'll hurt your sensitive eyes. 🤣
Whatever works! My N15's stand is tolerable but could do with an inch more length and a fix to the toe angle. The centerstand has been a nightmare, but I'm ready to try again. I need to grind down the feet to make it a proper height. It requires a hernia-inducing pull to lift it as the stand is too long.

On my Laverda 3C, the center stand is perfect. I step on the lever while sitting on the bike and give a bit of a pull on the bars, and it's up, just enough to get the rear tire off the ground. The stops are adjustable. The kickstand is an atrocity. It passes through a frame lug with an M8 bolt into the engine case, and due to the lean angle, it can damage the case. The mounting hole in my bike's case has been slightly bent, so I've removed the stand. It is very far forward, near the front of the engine, and to make matters worse, it's prone to retracting on its own. I have ordered a bracket from the UK that mounts to the footpeg lug, and a fits a Kawasaki ZX6-R (ZZR 600) stand. Once I get these two corrected, I'll be a happy camper.
 
Whatever works! My N15's stand is tolerable but could do with an inch more length and a fix to the toe angle. The centerstand has been a nightmare, but I'm ready to try again. I need to grind down the feet to make it a proper height. It requires a hernia-inducing pull to lift it as the stand is too long.

On my Laverda 3C, the center stand is perfect. I step on the lever while sitting on the bike and give a bit of a pull on the bars, and it's up, just enough to get the rear tire off the ground. The stops are adjustable. The kickstand is an atrocity. It passes through a frame lug with an M8 bolt into the engine case, and due to the lean angle, it can damage the case. The mounting hole in my bike's case has been slightly bent, so I've removed the stand. It is very far forward, near the front of the engine, and to make matters worse, it's prone to retracting on its own. I have ordered a bracket from the UK that mounts to the footpeg lug, and a fits a Kawasaki ZX6-R (ZZR 600) stand. Once I get these two corrected, I'll be a happy camper.
I ended up melting the silver solder off with a propane torch and welding it. Bought and taught myself how to use flux core wire on a MIG multi-process welder in about 4 days. Not that great at it, but good enough. Most expensive weld ever. Fortunately, I have more plans for welding projects. Also got welding off my bucket list better late than never.

Getting my '96 R1100GS BMW up on the center stand was difficult if done wrong. No way I could have ever done it sitting on the bike. Too short. That said, I later went into a BMW dealer looking at new 20XX GS models and they are really easy to get up on the center stand. Didn't buy one though. They have gone up in price at least 300%.

The '74 Commando I had for a few months was fairly easy to get on the center stand. I remember starting it, putting it up on the center stand, and watching it spin around in circles in the driveway from the good old Norton vibration. Idling never hurt it contrary to internet wisdom.

I actually can't remember what putting my other motorcycles that had center stands up on the center stand was like. Must have been so easy I never logged it in my head. None of the dirt bikes I had came from the factory with center stands, nor did my Ducati 996S or the P11.
 
Made a set of u-hooks for springs that I welded on the bottom of the exhaust headers to hook springs to in order to hold the headers tight in the collector. The collector already had a single hook on it. Headers actually have hooks on them on the top, but the springs were vibrating on the edge of the sump plug. U-hook welds are kind of crappy, since I just recently got a welder, but the welds are holding. Used a MIG setup with flux cored .030 wire with the wire speed and volts turned down a little and did not burn through the headers. Anywho, been meaning to do that for about 4 decades. If I had more patience and wanted to play with a Argon gas mix I would have done it with TIG. I have some other complicated (for me) exhaust work planned, so might end up doing that with the TIG process.
 
A stupid is as stupid does moment:

Sun is out up in he PNW, so had to go for short loop. I moved the key from where it hangs on the Feked anti-sump valve handle and put it in the ignition, opened up the Feked valve and turned on my fuel valves. I turn them all the way to reserve by the way. Started the engine and it was running terrible, and dying when letting off the throttle. I figured well I finally broke it. Looked at it and thought maybe it was the little bit of exhaust flow work I did yesterday making it run lean at idle, but that didn't make a lot of sense. Turns out my fuel valves had been left turned On from the previous day when I was thinking about riding, but didn't get to it. No the cylinders were not full of fuel. My FCRs still work like they are supposed to. What happened was I actually turned the fuel valves off. I'm amazed it ran as long as it did with the valves turned off. Anywho, I turned the fuel valves on and went for a ride. Other than the engine sounding like a bucket of 1/4 pound steel balls on paint shaker, the thing runs perfect. I'm really hard on rear tires. Cant make my throttle hand act its age.

As far as what did I do with my P11 goes... I took the baffle setup I made out of the megaphone and removed and blended the edge created on the end cut ID of thin wall metal exhaust pipe when using a manual pipe cutter rather than a band saw. Also replaced some fasteners used on the exhaust with stainless.
 
Lot of pics coming. They will be hosted on my end so some day in the future could disappear.

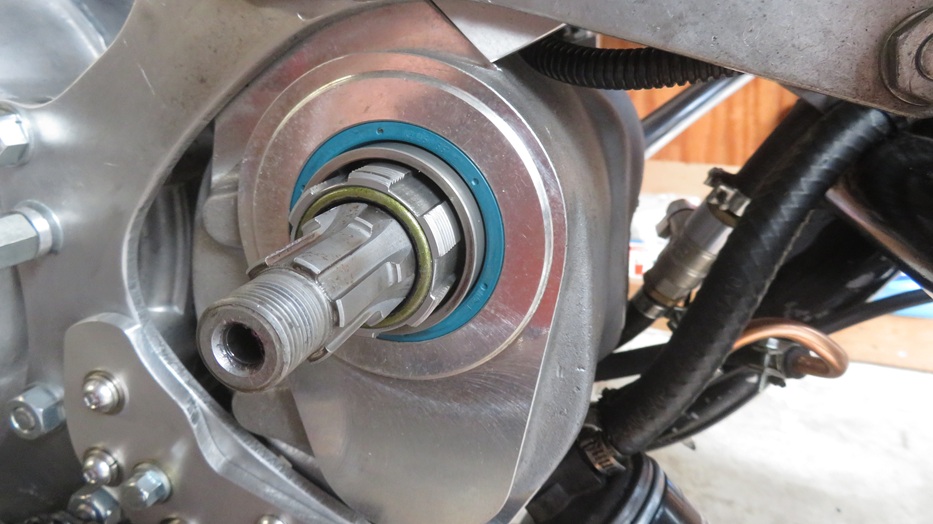
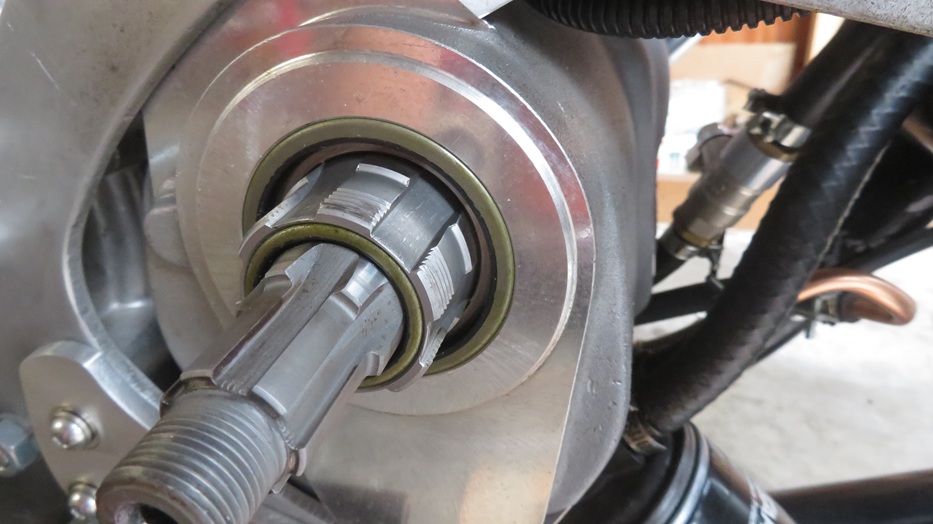
Stripped down the the seal. Still have to pull it out with a skinny hook. Key point for me today is the seal that is in there is not the same as the one that comes in the TTi rebuild kit. Size is correct but the build of the seal is different. I'll show how they differ tomorrow evening along with a bunch of other pics taken. There is a spacer behind the sprocket that goes over the sleeve gear and slides into the gearbox until it butts up against a bearing inner race I think. Anywho, the spacer has uneven shiny wear on it. Not sure what that is all about, but it would definitely make the seal weep a little like it does. Also these gearboxes are actually designed for 520 chain and sprockets. With the 530 optional drive sprocket the nut securing the sprocket only has 2 threads fastening it to the sleeve gear. If a 520 sprocket is used all the threads on the nut would engage. Not a huge deal at all since 2 threads is about half the threads on the nut. It is a thin 2 inch OD nut.

Wife is calling me to dinner. More tomorrow.

Somebody that did this every day could probably complete the job in 4 hours if they cleaned everything before they reinstalled it. It'll take me 8 hours total. I'd get fired for sure. lol
 
Different TTi seals

Seal in gearbox when purchased.
What did you do with your P11 today. he he


Seal in gearbox refresh kit (installed)
What did you do with your P11 today. he he


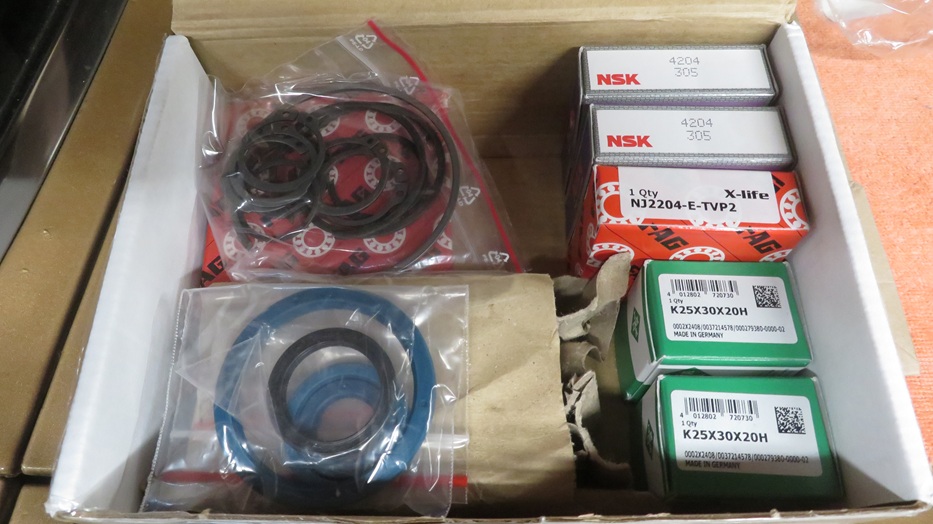
The TTi bearings, seals, and circlips refresh kit.
What did you do with your P11 today. he he
 
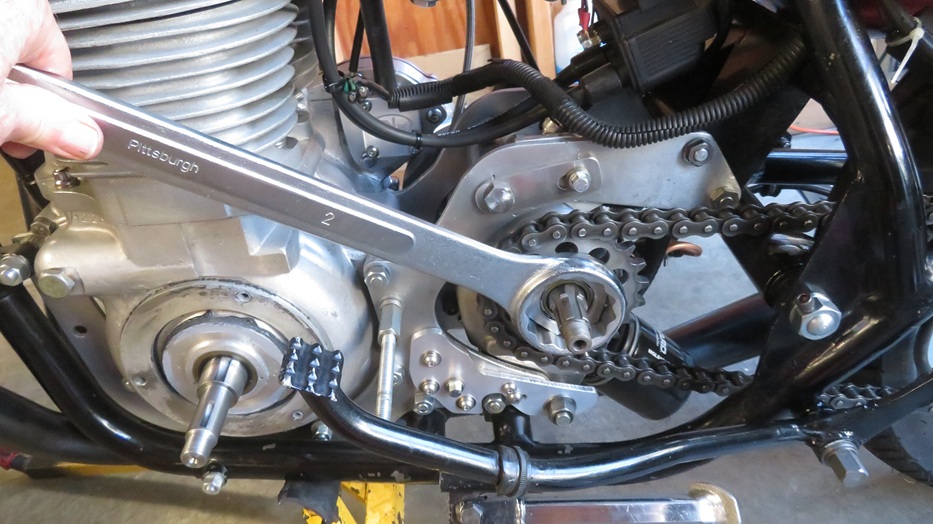
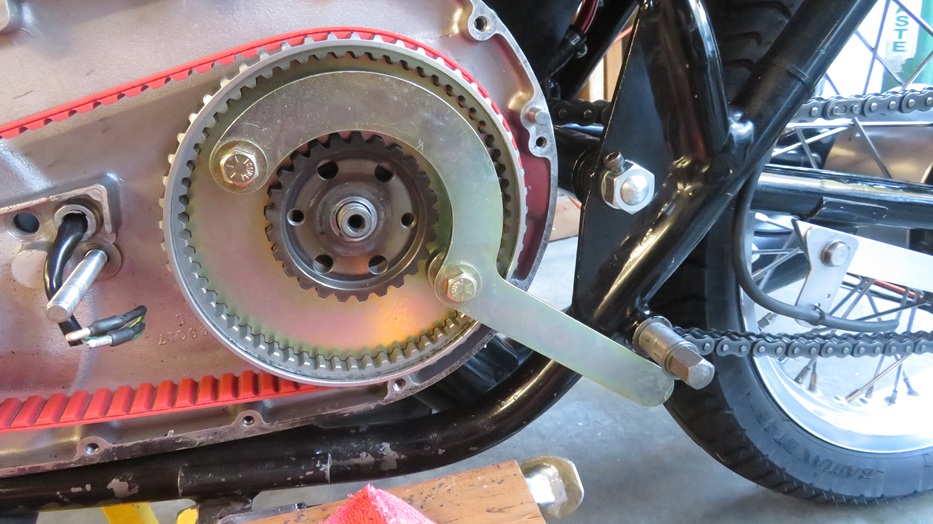
2" box end wrench used for removal and installation of the sprocket nut. Also acts as a torque wrench. Torqued sprocket back down somewhere between 50 and 60 ft lbs based on muscle memory. As accurate as my seat of the pants dyno. hardy har har

I have to stand on the rear brake pedal with one foot to get er done.
What did you do with your P11 today. he he
 
2" box end wrench used for removal and installation of the sprocket nut. Also acts as a torque wrench. Torqued sprocket back down somewhere between 50 and 60 ft lbs based on muscle memory. As accurate as my seat of the pants dyno. hardy har har

I have to stand on the rear brake pedal with one foot to get er done.
That's only a couple of ugga duggas with the rattle gun, that's how I do it. I've never ponied up the scratch for a good torque wrench, and I don't trust the cheap ones I have acquired all that much. I have my dad's SK Tools old beam-type 1/2" drive, and I compared (not really calibrated) with one of my Harbor Freight click types. I have two, never bought either. My neighbor used to do yard sales of stuff he got from the senior community estate sales, and he specialized in geezer left-behinds. I have a TON of tools haha. Prob from him.

I did use the HF one on the Norton top end studs, well, all but one, which can't be reached w/o complexity I didn't care to bother with. For that, I broke out the well-calibrated right arm, which has never done me wrong after many years and many, many vehicles. All seems fine. Hope that seal works out, looks the business.
 
That nut on the TTi sprocket is 2". I'd need a really deep 2" socket I do not currently have. I'm choked up near halfway on the wrench in the pic. I forget how big the nut is on the AMC box, but I know I did not need a 2" anything to tighten it up. I might even have the official Brit tool for the AMC box. I did torque the rotor nut with a 1/2 torque wrench I got on Amazon 6 years ago. It's not junk, but it is not high end either. I also have the Harbor Freight stuff. I had a torque wrench I picked up at a flee market in San Jose I was using for 50 years. It died when I was doing something on the El Camino dino fuel guzzler.

Thanks for the well wishes on the seal working. I used a seal I got on ebay for 1/4 the cost of the TTi seal alone and kept the one in the TTi kit as a should work perfectly backup. $76US shipped just for the seal from TTi. I paid an unbelievable amount for the refresh kit, but the gearbox is so nice modern shifting wise compared to the AMC 4 speed long throw box I caved and bought the kit just in case.

Couple more pics for grins.

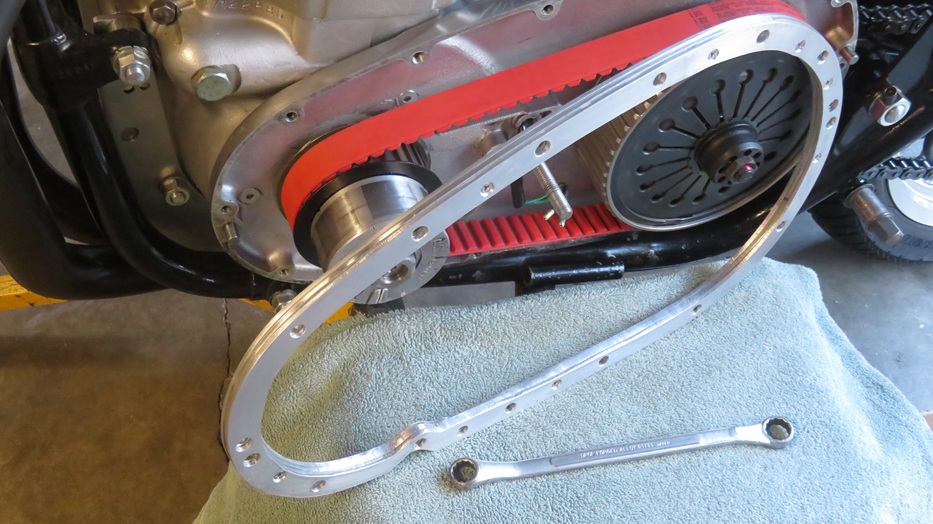
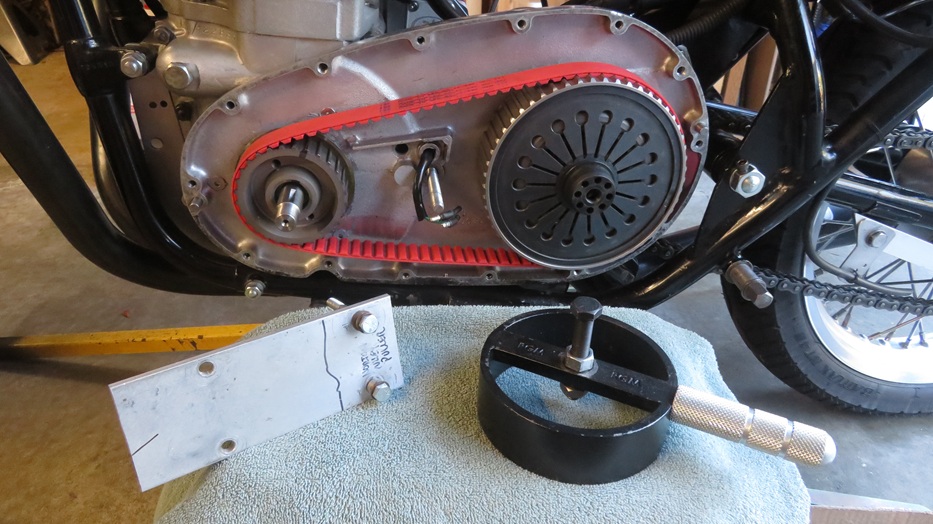
3/8" spacer required for a Commando style dry belt clutch inside a little P11 primary.
What did you do with your P11 today. he he


What did you do with your P11 today. he he

What did you do with your P11 today. he he

What did you do with your P11 today. he he
 
After a very short round the block ride with a 1st, 2nd, and 3rd gear thrashing to warm up the gearbox a little. No leaks so far. I need to do a longer loop that use to get a dribble out of it to be sure.
 
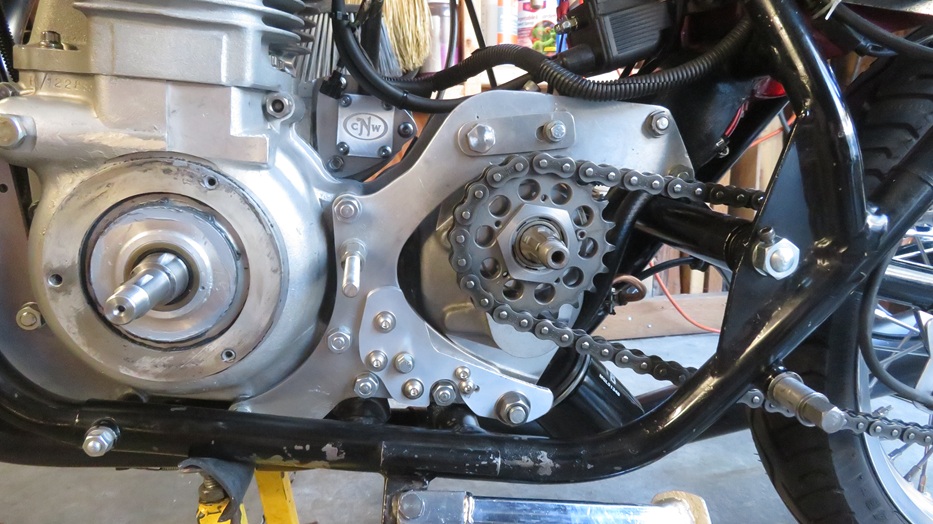
After some in house honey do work I will probably get out in the garage and cut a new 530 chain to length. Really need to follow through one of these days on modifying the rear sprocket for using 520 chain though. I initially had to do a lot of grinding on the back side of the inner primary to get good clearance for the 530 chain after moving things around to install the RGM clutch and TTi gearbox. Fortunately there is no interference at all with the gearbox and 530 chain, so I am procrastinating.

I did some MIG welding on the bike yesterday, but not on the frame tube. I rewelded cracked welds on the cross over mount for the rear fender. It is a thin 18 or 16 gauge piece of strap actually used by Norton for the P11a and Ranger rear fender and seat. Crazy thin for the weight on the seat, which his what cracked he welds. I don't use it for the seat anymore. The seat is now fastened at the top shock mounts.

Oh better mention I really do like the TTi 5-speed gearbox. Expensive but a huge improvement over the AMC 4-speed gearbox for my use. Snick snick gonna make you quick.
 
Last edited:
I've just mail ordered a couple of different diameter lengths of tube for the O/E crankcase breather, easiest and quickest way to see which fits best... Most 'new' hose now is spec'd way beyond necessary and very thick walled, making the oil tank connection an awkward call...
Want it sorted by Friday as there's a charity 'Coffee and cake' bike meet at a pub nearby (The 'Norton' at Cold Norton!), not my usual 'thing' but hoping to meet up with an old pal from way back.. A Triumph owner, but I don't hold that against him!
 
I've just mail ordered a couple of different diameter lengths of tube for the O/E crankcase breather, easiest and quickest way to see which fits best... Most 'new' hose now is spec'd way beyond necessary and very thick walled, making the oil tank connection an awkward call...
Want it sorted by Friday as there's a charity 'Coffee and cake' bike meet at a pub nearby (The 'Norton' at Cold Norton!), not my usual 'thing' but hoping to meet up with an old pal from way back.. A Triumph owner, but I don't hold that against him!
When I used that timed breather I used whatever was around for a 3/8" tube fitting that could deal with hot oil in the 70's, and it was durable stuff. I think I still have that piece of hose. It's probably hard enough to use as a weapon by now. Anywho, I don't have a cam with timed breather machining and I'd have to look at what I'm using now on the reed valve on the back of the timing side case in the old magneto hole and the valve cover vent, but I'm fairly certain most of it is thin walled automotive crankcase breather hose.

Have fun at the coffee and cake meet up.
 
Back
Top