YukoNorton
MEMBER
- Joined
- Sep 2017
- Messages
- 128
what are the views on spray welding the rod journals? Say if at last grind, or to repair damaged surfaces, build them back up, and grind them... to standard size?

so far, the plentiful supply of used cranks makes it a non-issue.what are the views on spray welding the rod journals? Say if at last grind, or to repair damaged surfaces, build them back up, and grind them... to standard size?
We had very thin black plastic conveyor belting , I cut a piece welding lense size and slipped it in to a helmet , there was a lot of swearingFoam ear plugs hidden under the welding ground clamp was always sure to inspire a raging hissey fit.....
especially after lunch on payday, when most of the shop was drunk/stoned.
, another good one is to , replace the tig tungsten with some sharpened stainless 1.6 tig wire  ..
..An evenly applied coat of Dykem blue layout on the filter plate brought it to about a shade 25....We had very thin black plastic conveyor belting , I cut a piece welding lense size and slipped it in to a helmet , there was a lot of swearing

Hilti caps under the earth clamp with a bit of card isolating the other side work wellFoam ear plugs hidden under the welding ground clamp was always sure to inspire a raging hissey fit.....
especially after lunch on payday, when most of the shop was drunk/stoned.
now that is just plain evil …One of Les William's tricks was to leave a gudgeon pin circlip (wrist pin circlip if you're a septic) lying on the mechanic's bench of a freshly built engine.
Exactly what I thought !now that is just plain evil …
....only if you don't let 'em off the hook in a timely fashion.now that is just plain evil …

Never Seize was the popular choice on the plant I worked in.filling the underside of cup type drawer handles with grease was one of our favourites. messy...
I don’t mind about the derail. I have sourced a good used connecting rod from a forum member and will be ordering bearing shells, rod bolts/nuts, piston/ring set and gasket/seal kit tomorrow. I’m in no rush now. As soon as I have all parts and materials on hand I will assemble the motor by the book paying double attention to detail. Good thing I like wrenching I guess.Sorry Larry I led this group off the path. As to return , what's new with your Uh-oh?
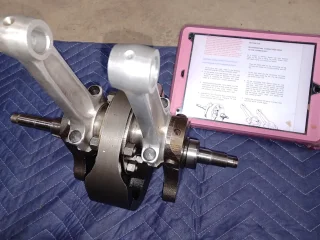
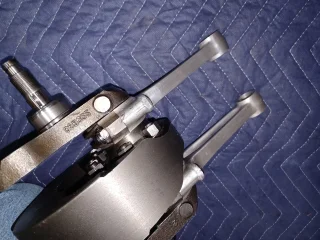
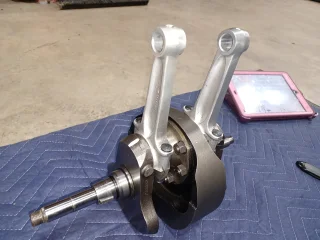
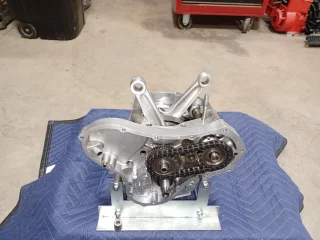
I've been excoriated for using Loctite on rod nuts. Recommended method is dry torqued.I started the reassembly last night. Cleaned up the crankshaft and reassembled using red loktite on all nuts. New +10 shells lightly smeared with oil inserted in the connecting rods and caps. Reused the rod bolts with new nuts. I didn't use any loktite on the rod bolts as the book did not specify doing so. And yes, I inserted the rods with the oil holes facing outwards. Ready to assemble the cases tonight!
All good.Did the radius check out OK?