
Join the Access Norton Community
- Thanks for visiting Access Norton
- 3 free views left
- Create a free account (more details)
- Already a member? Click here to login
You are using an out of date browser. It may not display this or other websites correctly.
You should upgrade or use an alternative browser.
You should upgrade or use an alternative browser.
John Player Special restoration project
- Thread starter grandpaul
- Start date
Brownymark
MEMBER
- Joined
- Apr 2015
- Messages
- 67
Looking good - will be great for me to be able to follow what you are doing and pick up tips along the way.
grandpaul
FULL MEMBER
- Joined
- Jan 2008
- Messages
- 14,129
It can go any number of ways. I've seen some folks string nuts, washers, spacers or other parts with wire.jaguar said:Always wondered how replating all the hardware on a bike went.
In the past, I've just dumped all the bits in a double box; then when they got back I'd just start fishing for them as I needed them.
Now, I'm careful to inventory everything in case of A) insurance claim for lost bits and/or B) claim for missing bits with the platers.
In this case, it's not worth the hassle to pursue a claim for a small handful of easily replaceable stuff.
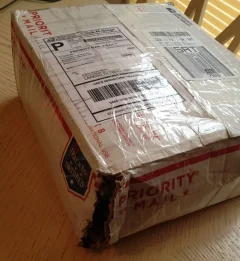
As it is, the box was split when I got it back (and not double-boxed as it was when I sent it), and a couple of the plastic bags inside were also split open...
Attachments
grandpaul
FULL MEMBER
- Joined
- Jan 2008
- Messages
- 14,129
(Monday 1/4)
I finished the wicking plugs and welch plugs on the swingarm today. Got distracted and only managed one other task, picking up the wheels from the tire shop.

When I went to pick up the wheels with the new tires mounted, the shop owner called me over to see an old frame I might want. Turned out to be a Triumph T100 (500) frame with good fork lowers and folding footpegs. It went in the back of the truck with the Norton wheels!

I finished the wicking plugs and welch plugs on the swingarm today. Got distracted and only managed one other task, picking up the wheels from the tire shop.
When I went to pick up the wheels with the new tires mounted, the shop owner called me over to see an old frame I might want. Turned out to be a Triumph T100 (500) frame with good fork lowers and folding footpegs. It went in the back of the truck with the Norton wheels!
grandpaul
FULL MEMBER
- Joined
- Jan 2008
- Messages
- 14,129
I pulled the plug on the right side of the rear wheel and see that the bearings are still decently packed. They roll very smoothly, so I'm not going to disturb them and invite potential issues.

Topped off the grease to the point where it squeezed out nicely when I nipped up the plug.

Gave the knave plate a quick clean-up, this side is done.

Topped off the grease to the point where it squeezed out nicely when I nipped up the plug.
Gave the knave plate a quick clean-up, this side is done.


grandpaul
FULL MEMBER
- Joined
- Jan 2008
- Messages
- 14,129
Rear brake rebuilt; original shoes are in great shape. Everything that needs it, has a nice smear of grease.

Spiffy rear brake plate.

I also washed and re-packed the speedometer drive. Gave it a couple of pumps with the grease gun after tapping the retainer cup back on.

Basically done back here.

Spiffy rear brake plate.
I also washed and re-packed the speedometer drive. Gave it a couple of pumps with the grease gun after tapping the retainer cup back on.
Basically done back here.
Nater_Potater
FULL MEMBER
- Joined
- Apr 2013
- Messages
- 1,338
It may be due to the grease masking what we're seeing here, but it appears that the top hat (#34) is inside the drive, rather than from the outside as shown ingrandpaul said:
Of course, it wouldn't be the first time I was wrong...
Nathan
grandpaul
FULL MEMBER
- Joined
- Jan 2008
- Messages
- 14,129
Nater_Potater said:It may be due to the grease masking what we're seeing here, but it appears that the top hat (#34) is inside the drive, rather than from the outside ...
No, It's outside. That's the inner shoulder of the rivet plate or a stepped part of the body.
I neglected to get a shot of the face of the speedo gearbox after I spiffed it up, looks nice.
grandpaul
FULL MEMBER
- Joined
- Jan 2008
- Messages
- 14,129
Re: Eliminate doubt on this JPN
(EDIT) O.K. No illustrations, but the parts lists do show part numbers for the MkIIA bits.
thanx.
All I found there was the MkII, not the IIA.kommando said:The Issu link to the MK2A parts supplement is a flash shockwave which cannot be downloaded.
The trick is to go to the page source and you can pull out what it links to which is a series of JPG files
This is the first
http://image.issuu.com/150113041017-71b ... page_1.jpg
(EDIT) O.K. No illustrations, but the parts lists do show part numbers for the MkIIA bits.
thanx.
grandpaul
FULL MEMBER
- Joined
- Jan 2008
- Messages
- 14,129
Horn has to be bolted to the battery tray before installation, but I had the wrong bolts in here. They need to be 1/2" longer, and pointing rearward here, to catch the rear fender after it is installed.

Rear fender & tail light plate installed. There are so many "Rube Goldberg" attachment methods on this bike, it's not funny!

Oil filter in place, but the hose you see missing will need to be replaced. Also, I still need to slip on the hose protectors, the paint is still drying.

Rear fender & tail light plate installed. There are so many "Rube Goldberg" attachment methods on this bike, it's not funny!
Oil filter in place, but the hose you see missing will need to be replaced. Also, I still need to slip on the hose protectors, the paint is still drying.
grandpaul
FULL MEMBER
- Joined
- Jan 2008
- Messages
- 14,129
Airbox tentatively in place. It doesn't seem to want to line up with the battery tray at the bottom, unless it's supposed to have long bolts with 1" spacers in between.

This is what happened to that oil hose, the steel sheath was kinked also.

This is what happened to that oil hose, the steel sheath was kinked also.
L.A.B.
FULL MEMBER
- Joined
- Nov 2004
- Messages
- 21,455
grandpaul said:Airbox tentatively in place. It doesn't seem to want to line up with the battery tray at the bottom, unless it's supposed to have long bolts with 1" spacers in between.
That's because the upper bracket is fixed the wrong side of the frame plate. There would normally be a spacer between the bracket and the plate.
kommando
MEMBER
- Joined
- May 2005
- Messages
- 7,968
All I found there was the MkII, not the IIA.
(EDIT) O.K. No illustrations, but the parts lists do show part numbers for the MkIIA bits.
That's the best that is available sadly, they have merged the MK2 part illustrations with the MK2A part number lists and there is nothing else issued by Norton to add in MK2A specific part pictures. The only other possible improvement would be to take the MK3 illustrations where it shows parts common to the MK2A and merge them in to help identify the MK2A parts. As the MK2A production went on some MK3 parts drifted in anyway such as the felt oil reservoir and the welch plugs for the swingarm.
What have you done with the old shell bearings, they look to be VP trimetal and a piece of history.
L.A.B.
FULL MEMBER
- Joined
- Nov 2004
- Messages
- 21,455
kommando said:All I found there was the MkII, not the IIA.
(EDIT) O.K. No illustrations, but the parts lists do show part numbers for the MkIIA bits.
That's the best that is available sadly, they have merged the MK2 part illustrations with the MK2A part number lists and there is nothing else issued by Norton to add in MK2A specific part pictures. The only other possible improvement would be to take the MK3 illustrations where it shows parts common to the MK2A and merge them in to help identify the MK2A parts. As the MK2A production went on some MK3 parts drifted in anyway such as the felt oil reservoir and the welch plugs for the swingarm.
The illustrated Mk.1A supplement can be used as a reference along with the Mk.2/2A supplement (because not all 1A parts are identical to 2A).
Mk.1A supplement: gallery/album.php?album_id=5
grandpaul
FULL MEMBER
- Joined
- Jan 2008
- Messages
- 14,129
L.A.B. said:That's because the upper bracket is fixed the wrong side of the frame plate. There would normally be a spacer between the bracket and the plate.
Yes, I went back and fixed it. Just not sure how long of a spacer to use without a reference.
At least it more or less lines up with the sidecover hole, seems like the pin bracket is too low...
Similar threads
- Replies
- 11
- Views
- 2,133