Get out the straight jacket

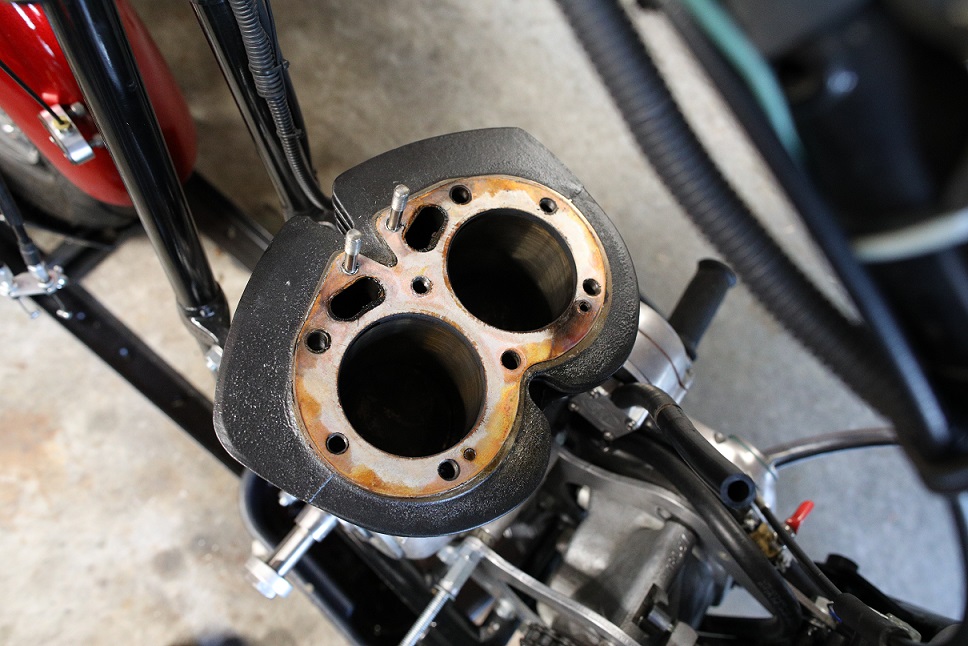
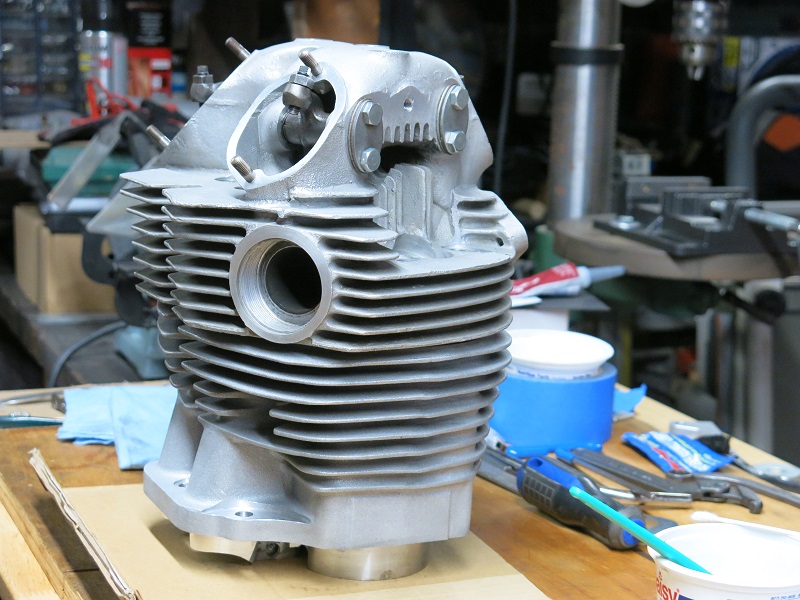
For giggles I put a spare Commando head on top of the Molnar barrels. Should look good when I get it all done and in the frame. Not in a big hurry on this one. Too cold in my uninsulated garage to get overly excited about working with cold steel. Heater is not adequate when it hits 25F.

Get out the straight jacket
 
Regarding my wet/dry clutch conundrum: I found out from an excellent source that has experience racing Manx and other motorcycles with NEB clutches like mine that there are two sets of Red clutch friction plates for the NEB clutch. The Red frictions I have are in fact for a wet clutch, and they work with plane steel plates, which I also have. The other Red frictions for dry clutches are a different thickness and work with aluminum plane plates.

What does it all mean? After doing the parts measurement and material checks, I have a wet clutch and my initial problem with the clutch was not using dry plates in an oil bath, it was the bearing failed to spin freely once it got really hot because it was not greased, only oiled prior to installation. The oil bath in a wet primary although splashing all over the place does not reach that bearing like it does with the AMC clutch design. So I'll get a sealed bearing for it and give it another go with a new bearing. The sealed version of the same bearing lasts longer. This clutch came with an open bearing, and no documentation at all. After I determine that it is functioning on the street like it should, I'll start looking into finding a suitable cush rear hub.

Note: When the bearing went at around 125 miles it was almost like having a gearbox with no neutral, and definitely like having a really crappy clutch. The motor would stall at stops with the clutch lever pulled in or in neutral if the revs were not increased. It would not go into 1st gear if in neutral at a stop. I had to shift into first before stopping and rev the engine the entire time I was stopped. Plus it wanted to creep forward when at stops with the clutch lever pulled in, or in neutral. Had to ride it home that way for 125 miles. Really annoying. And if it stalled it was hard to start because of the bearing drag wanting to spin the rear wheel. Essentially the clutch drum and hub were simi locked up with a failed bearing. No news there. On a positive note, it was slightly less annoying that having to ride home 125 miles with a broken clutch cable and no spare.
 
I may have mentioned before but have you considered a Commando primary, case and all? Is the P-11 frame longer between the engine and swing-arm than the G-15/G-80 frame? I ask because if it is you could run the Commando Primary without a lot of die-grinder work. Of course you would lose the original look of the P-11 primary but you'd have a tripple-row primary chain and the various Commando clutch options. I did that to my G-15 and it worked out well.
 
I may have mentioned before but have you considered a Commando primary, case and all? Is the P-11 frame longer between the engine and swing-arm than the G-15/G-80 frame? I ask because if it is you could run the Commando Primary without a lot of die-grinder work. Of course you would lose the original look of the P-11 primary but you'd have a tripple-row primary chain and the various Commando clutch options. I did that to my G-15 and it worked out well.
Oh yeah, I've thought about all of that. Aside from the machine work and unknown length issue between the engine and swingarm, the other issue is one of the legs on the foot rest mount on the drive side goes through the primary cases on a P11. That might be a mild challenge to work around, but not too difficult.

It is unlikely that I will install a belt clutch in 2023. I'll get by with the NEB clutch next year and continue to fantasize about a belt clutch.
 
You can get a belt drive NEB clutch. Not sure they fit your primary tho
 
You can get a belt drive NEB clutch. Not sure they fit your primary tho
NEB makes bolt-on belt drive kits for all kinds of motorcycles, but not the P11. The primary on a P11 is too narrow for a belt to fit in between the inner and outer primary covers when bolted together. It is doable with extensive modification to use a kit that works on an N15, G15 and a couple of others, and has been done, but I am not motivated enough to put in the work in to make it happen right now.
 
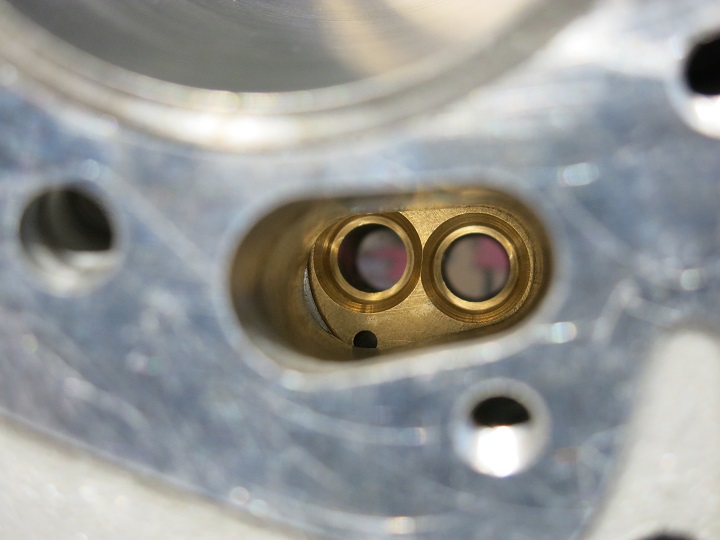
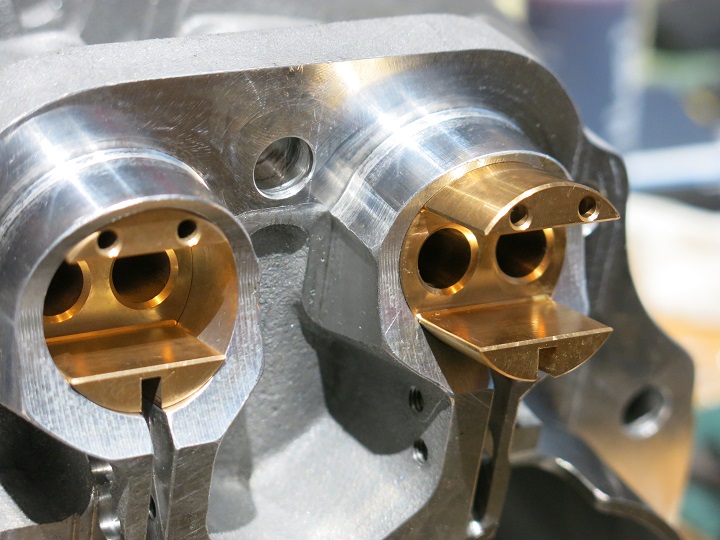
Molnar barrels are a little different from the stock Norton twin barrels with regard to the shape of the pushrod tunnel. As machined the shape of the tunnel blocks clear drainage of oil coming down into the tunnel from the head on one of the holes in the JSM BSA lifter block. I can make it work by using a long Dremel bit to open up the tunnel a little just above the blocked hole. Mentioning it for anyone that might want to go the JSM cam and lifter route and use Molnar barrels. The alternative is get the stock lifters radiused for the JSM cam and use them with the stock pushrods instead of the BSA lifters. Not doing that, but it is an option. 3rd even easier option is use stock lifters, stock pushrods, and not a JSM cam.

View into the push rod tunnel showing the top of the JSM BSA lifter block. Oil drain hole for cam lob on the right blocked. Edit: that right side hole is only completely blocked when the lifter block is all the way up in the tunnel as far as it will go. It will be very close to or all the way up once the motor is together.

Get out the straight jacket


Still adding content until I finish up this project.
 
Last edited:
Turns out after looking at the lifter bore in the Molnar barrels from the bottom instead of from the top there is a shallow dome cut at the top of the lifter bore, and that hole I thought was blocked is not actually blocked. I thought the lifter bore had a flat-topped surface in it that covered up the hole. My bad. I went off halfcocked again. I'd feel terrible about it if I had feelings.
 
This is the second set of BSA lifter blocks I've dealt with. Both sets get wider at the bottom and do not go into the standard size bores without excessive force. They need a little bit of light sanding and then polishing with scotchbrite or whatever one's favorite fitting tools are to get them to slide in.

As far as the BSA block will easily go in on the Right. Left side block has been fit.
Get out the straight jacket
 
Warmed up enough for me to actually start on the next "re-build" of my P11 engine. I like to think of my P11 as a P11 Special, but I think I'm going to rethink that and call it a Blue Flag Special. :)

Got as far as getting the head off. I may have mentioned that I ran the little thing up over 7000 RPM a few times. As luck would have it that didn't work out so well. Results are I did blow out a little section of the head gasket. Unfortunately, it was right where the oil return drain is. I think I might have put one of a big end rod bearings in the hurt locker as well. Bores look OK. Pushrod tunnels are disgusting. Will no more tomorrow.

Ouch
Get out the straight jacket
 
This is the second set of BSA lifter blocks I've dealt with. Both sets get wider at the bottom and do not go into the standard size bores without excessive force. They need a little bit of light sanding and then polishing with scotchbrite or whatever one's favorite fitting tools are to get them to slide in.

As far as the BSA block will easily go in on the Right. Left side block has been fit.
Get out the straight jacket
If you think about it, this is the only way. The only other way would be to make them a nice easy fit… which means that in many used bores, they’d be sloppy and work loose !
 
Warmed up enough for me to actually start on the next "re-build" of my P11 engine. I like to think of my P11 as a P11 Special, but I think I'm going to rethink that and call it a Blue Flag Special. :)

Got as far as getting the head off. I may have mentioned that I ran the little thing up over 7000 RPM a few times. As luck would have it that didn't work out so well. Results are I did blow out a little section of the head gasket. Unfortunately, it was right where the oil return drain is. I think I might have put one of a big end rod bearings in the hurt locker as well. Bores look OK. Pushrod tunnels are disgusting. Will no more tomorrow.

Ouch
Get out the straight jacket
How often is “a few times” ?

Going to 7,000 shouldn’t cause the failures you mention… the stock crank or gearbox or etc may explode yeah… but head gaskets and big ends? They should be absolutely fine way beyond 7k…
 
Last edited:
If you think about it, this is the only way. The only other way would be to make them a nice easy fit… which means that in many used bores, they’d be sloppy and work loose !
By DESIGN? Or by virtue of a phenom of the part "spreading" (stress releiving) when the slot is milled across a turned part?
I'd guess the latter, and it still works ok. Verify lifter side clearance in situ.

JMWO🍻
 
By DESIGN? Or by virtue of a phenom of the part "spreading" (stress releiving) when the slot is milled across a turned part?
I'd guess the latter, and it still works ok. Verify lifter side clearance in situ.

JMWO🍻
Could be either. But my point is that it is often required to ‘fettle to fit’ if aiming for blue printed standards. However, these days, folk seem to think it shouldn’t be necessary.

Example: Neil Beadling (top Tri/BSA triple builder in the U.K.) sources cam followers that are very slightly oversize, then stones them down to a perfect fit. He won’t use other ‘ready to fit’ ones as, by definition, 9 times out of 10 they’ll be too loose.
 
The machining of the slot as mentioned by concours is the culprit on the BSA blocks being a little tight. Doesn't bother me having to do it. That was not the purpose of my post. It just has to be done. It is minimal work. Right or wrong I'm letting people know they don't slide right in. The set screw and lifter tab hold them in place in theory once fit. I still have to push them in. They don't fall out on their own without the tab or set screw. I know which end of a hammer is the smart end. However, I'm still very creative at making mistakes. I did not make any mistakes with the lifter blocks... yet.

Pliobond was not used on the head side surface of that copper gasket on final assembly. Pliobond was used the first time I put the motor together, but had to pull the head and barrels because I forgot to safety wire the lifter block tab screws. Stupid mistake, but I don't build Norton engines every day. After having to pull the top of the motor apart I was not very excited about using Pliobond again. Getting the head off was a major pain in the butt. Pliobond holds flat surfaces together like nothing else I've used. The surface of the head was within spec based on talking with Jim Schmidt. I may lap the head a little on a big sheet of sandpaper on a very flat surface this time. Getting it surfaced by a machinist is not something I want to deal with. Depends on whether or not it is actually badly warped if I will go to the machinist extreme.

What I think is shell bearings getting worn some could be piston slap or something else. A little silver color in the oil that came out of the sump is a good indicator though.

I know if I'd ridden the bike like an old man the head gasket would have held. How many times did I go to 7000+ RPM? Enough times is the answer, and it could have been more than 8000 RPM. I don't have a tach. I guesstimated the RPM based on my gearing and the speedo when I looked down at it. The bike was geared low when I was doing that. I've geared the bike up since I did the high RPM stuff on the HWY where I had some space. It feels a lot nicer to ride geared up. I may go one more tooth on the gearbox sprocket to make HWY riding less frantic for the motor. I thought gearing it up would make is sluggish on in town and residential surface streets, but it just smoothed it out. Very pleasant to ride before parking it and deciding to tear it apart.

Time to stop jabbering on the net and get out in the garage and finish getting that lump torn down some more and out of the frame.
 
Turns out the surface of the head is as flat as it can be based on my straight edge. I can't get a feeler gauge under the straight edge anywhere. Pistons looked fine and the bores looked good all the way down as they should. The head gasket leak I am not blaming on JSM parts at all. There are a multitude of reasons possible. Timing was retarded initially, and it ran too hot during early test rides, and other errors made during break in. For example, beating on the motor before retorquing the head. That kind of thing. Hope to avoid all that on this engine re-build and future engine break in.

Ran into some fluster cluckery (in my opinion) today with the Molnar barrels. I'm going to keep it to myself and see if Mr Molnar has a solution. His 750 barrels do drop right onto the older P11 cases. That was nice, but he told me he thought they would.

The iron barrels are a lot heavier. I'll weigh them tomorrow for anyone that wants to know the difference in weight between the Molnar iron lined aluminum barrels and the iron Norton barrels used on the P11 and other pre-Commando models.

I did not pull the lump all the way out of the frame and check the big end shells. Lots of getting sidetracked got in the way.

You do you, I'll do me.
 
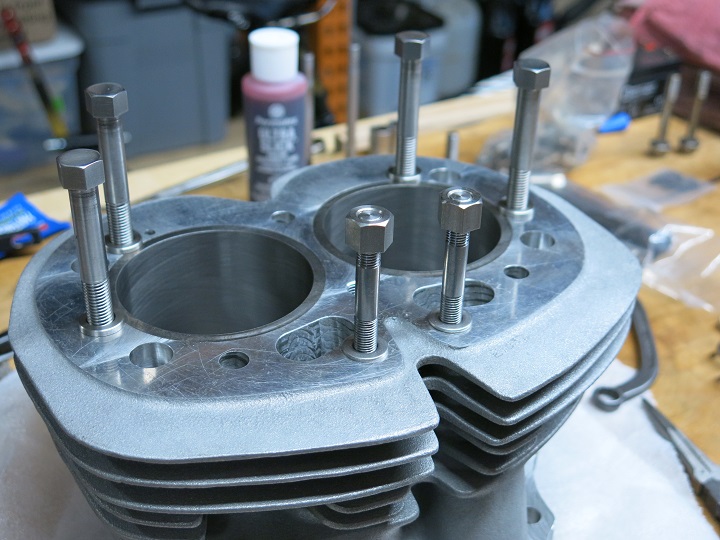
Note about the Molnar barrels. The thread pitch is not the same for the 4 head fasteners next to the spark plugs or the two smaller diameter studs in front in the aluminum barrels as it is in the Norton iron barrels. This may be common knowledge for anyone that has installed aluminum barrels on a Norton that came from the factory with iron barrels. The Molnar aluminum barrels use a courser thread than the iron barrels. Not sure what it is. His bolt kit is a good thing to purchase if swapping from iron barrels. The nice looking cNw stainless 12-point fasteners I was using don't work. All of the cNw barrel studs and nuts other than the through bolts for the Molnar barrels can still be used on the barrel base flange.

Picture showing the head to barrel fasteners that differ.

Get out the straight jacket
 
Note about the Molnar barrels. The thread pitch is not the same for the 4 head fasteners next to the spark plugs or the two smaller diameter studs in front in the aluminum barrels as it is in the Norton iron barrels. This may be common knowledge for anyone that has installed aluminum barrels on a Norton that came from the factory with iron barrels. The Molnar aluminum barrels use a courser thread than the iron barrels. Not sure what it is. His bolt kit is a good thing to purchase if swapping from iron barrels. The nice looking cNw stainless 12-point fasteners I was using don't work. All of the cNw barrel studs and nuts other than the through bolts for the Molnar barrels can still be used on the barrel base flange.
3/8 x 20 tpi BSF for the 4 head bolts and 7/8 x 26 tpi CEI for the two front studs. If made right, those studs have a longer thread engagement than stock. Reducing stress in the threaded joints is particularly important for an alu barrel, and use of reduced shank bolts is suggested. Maybe JSM can be talked into making a bolt kit which suits the Molnar barrel?

As for the 4 long barrel to crankcase bolts, they are as per 1972/73 Commando 850 design, which means your crankcase will need to be tapped and Helicoils inserted for 3/8 UNC as per 1972 Norton spec. Alternatively you may consider having 4 Allen bolts made with 3/8 BSW (16 tpi) threaded sections, but I'd still use Helicoil inserts. Use of reduced shank bolts is worth considering due to the additional stretch caused by the alu barrel. Underside of Allen bolts should be trued in a lathe, and use of turned washers (064147) is suggested, ensuring complete and even contact.

- Knut
 
Last edited:
3/8 x 20 tpi for the 4 head bolts and 7/8 x 26 tpi for the two front studs. If made right, those studs have a longer thread engagement than stock. Reducing stress in the threaded joints is particularly important for an alu barrel, and use of reduced shank bolts is suggested. Maybe JSM can be talked into making a bolt kit which suits the Molnar barrel?

As for the 4 long barrel to crankcase bolts, they are as per 1972/73 Commando 850 design, which means your crankcase will need to be tapped and Helicoils inserted for 3/8 UNC as per 1972 Norton spec. Alternatively you may consider having 4 Allen bolts made with 3/8 BSW (16 tpi) threaded sections, but I'd still use Helicoil inserts. Use of reduced shank bolts is worth considering due to the additional stretch caused by the alu barrel. Underside of Allen bolts should be trued in a lathe, and use of turned washers (064147) is suggested, ensuring complete and even contact.

- Knut
I'll check, but other differences aside I think the Molnar bolts have the same amount of thread engagement as the cNw bolts did in the iron barrels. Edit: There is more thread on the Molnar head to barrel bolts, but they won't penetrate the barrels anymore than the cNw bolts did.

Yes the through bolts are going to require the inserts. Knew that, but have been blocking thinking about it. :) Alternatively, I can buy Molnar cases that are stronger and have the inserts in them already. Might be less painful buying new cases that having to deal the frustration involved with putting my cases in machinist jail for a month to get 4 inserts installed. I could do the inserts myself, but if they are out of alignment at all, I'll be fighting getting the through bolts started and properly torqued.

No washers were supplied with the Molnar through bolts. Hmmmm.

The Molnar through bolts are 3/8-16, which I have helicoils for. I think I'll do the deed and if I mess it up, buy the Molnar cases. Good excuse for doing so.

Thanks for making me check on this stuff Knut.

Anywho, I'm dialing back on rushing through this project. Might as well try to do something right for a change. Edit: That theory didn't last long. lol
 
Last edited:
Back
Top