Replacing air filter and screen

Joined
Jan 1, 2024
Messages
139
Country flag
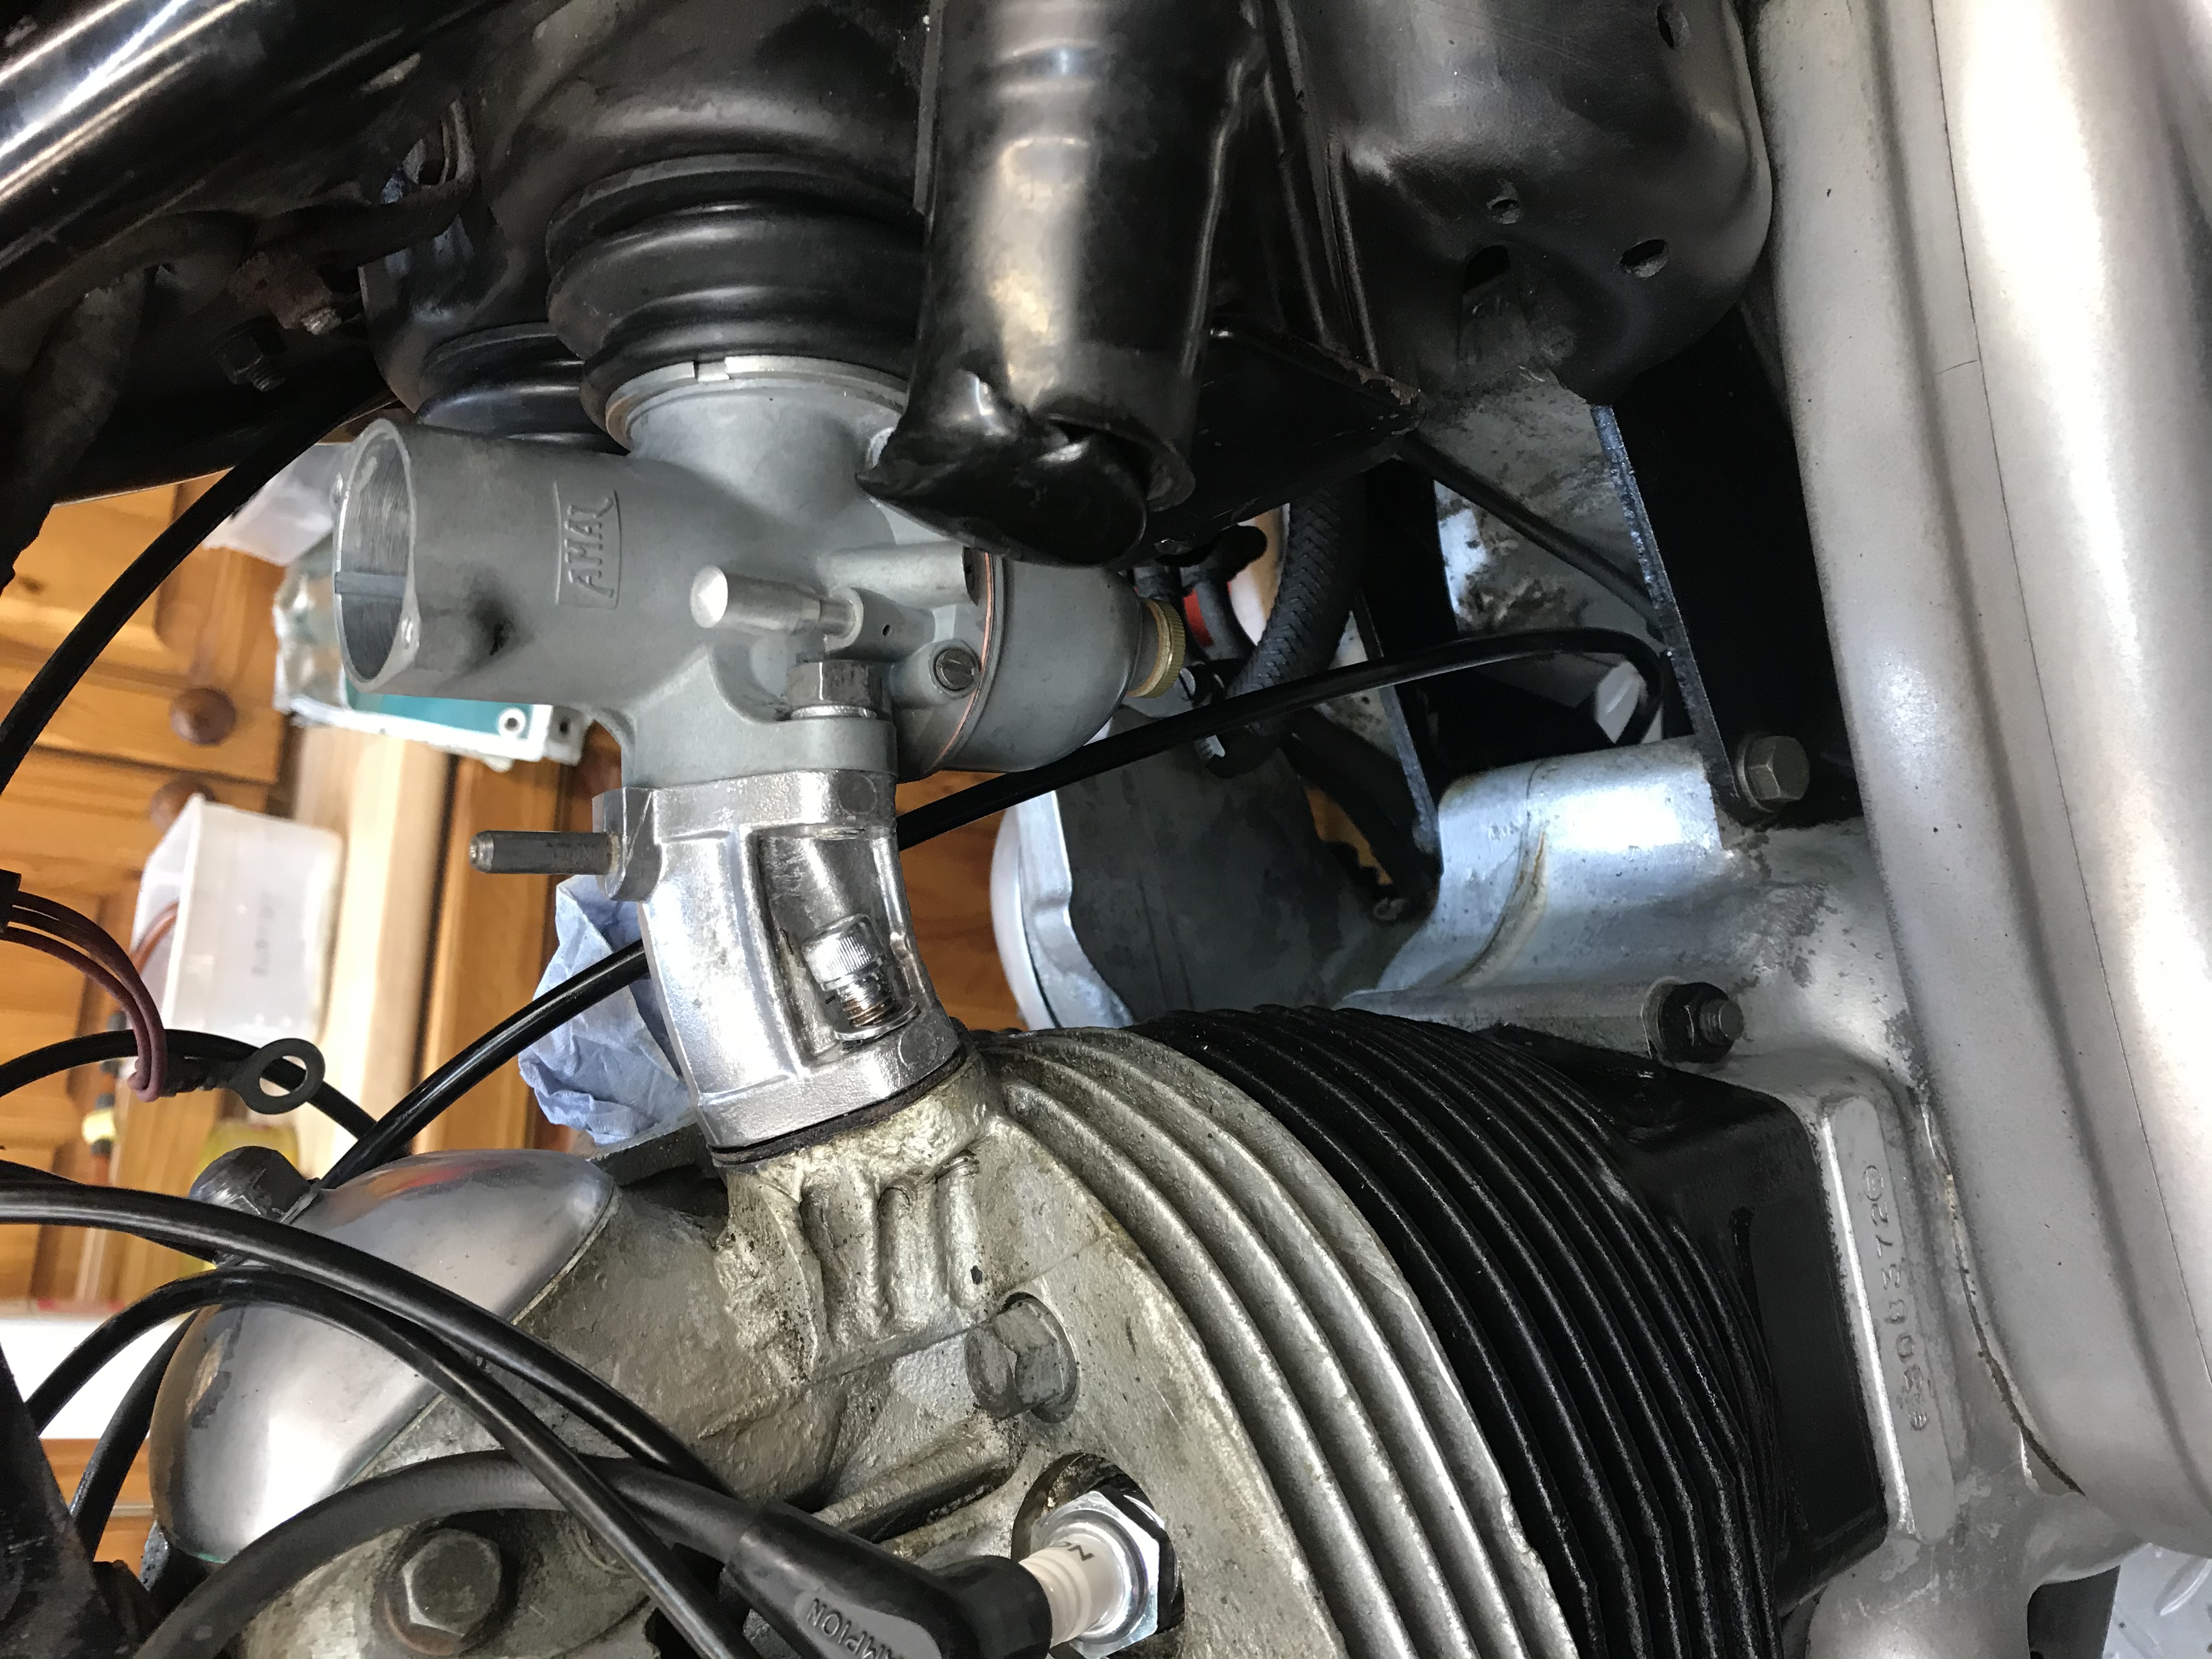
When I wrote the title to this thread, I then read the related posts that popped up about this issue. Having read the associated posts, I found some info that relates to questions I was going to ask aout the replacement procedure. I had removed the air filter some time ago to go through the carbs on my recently purchased 1973 750. After getting it started and running I am/was in the process of installing a new air filter element (NOS Crosland brand) a new mesh screen, the repainted front plate, and new carb to filter plate boots installed in the front plate. When I removed the original old filter, I did bend/distort/tweak the filter and mesh screen to get them out, but wasn't concerned as they were beyond reusing. But upon attempting to install the new filter parts I didn't want to bend or scratch up the new assembly, even if this bike will never be a show bike or anything close. After spending considerable time, effort, and head scratching, and just couldn't find a way to get it installed without bending or scratching things up, I eventually did, what I now see some others have done, and pulled the carbs and manifolds at the cylinder head, and placed them to the side, out of the way. This does give you plenty of room to install the filter assembly, reinstall carbs and manifolds, and then slip the lips of the boots around the carb throats. Having new boots, which are very flexible, helped tremendously in being able to do this. Having just been through the ordeal of horn removal, repair, and replacement, and now having to remove the carbs just to fit the air filter, it reafirms my view that Norton made what should be simple, routine tasks, unnecessarily difficult. Upon reading others' posts about these topics it seems I'm not alone. Don't know how the sevice manual says to do this, but this is how I wound up doing it, as I see some others have. I'll probably never put enough miles on this bike that I'll ever need a new filter, so this, at least, may be a one time chore.
 
Last edited:
When I worked as a line mechanic that was a job I dreaded and it may be the reason so many bikes ended up with K&N air filters. All this taken in to account, I converted by MKIII to a Ham Can filter to accommodate the pre-MKIII battery box so I could fit a GL1500 Gold Wing battery. BTW I had to reclock the starter motor to get it to fit under the filter. I'm not sure it was worth it now as I read there are batteries that fit the original box that will drive a four-pole starter. I was unable to install the filter element and screen without distorting it; nor was I able to do that in my for-hire wrenching days. Can one even get a hex key between the manifold and the Ham Can for the left hand carb? (or whichever one you take off first) I never tried.
 
Can one even get a hex key between the manifold and the Ham Can for the left hand carb? (or whichever one you take off first) I never tried.
It can be done, but you will, as they say need to hold your mouth just right, and you may very well, as I did, create some new words, .....maybe a whole new language. I cut down a L-shape hex wrench and hand filed the short end that actually fits into the socket head
 
I usually put the front plate / rubber boots in place on the carb intakes and then fiddle the filter / mesh in from the RH side of the bike, between the front and rear plates of the filter box. It seems easier than assembling the air filter, then trying to get the carb intake rubber boots in place. 'easier' is open to interpetation though...

I have a 'special' hex key for the carb manifolds, it has a shortened leg and is bent to allow it to turn. I posted a photo of the thing in the tools thread, you will need a friendly welder with an oxy actylene torch to make the hex key red hot to bend it.

 
Last edited:
The thought of it is almost enough to make me go back to the factory setup.... but it starts so well now; even in freezing weather in which I have no intent on riding, though I did back in my commuting days. All this is just wool gathering for me as I probably will never put enough miles on the bike to need a filter change. Now, if and when I find a roadster tank I can straddle without pain the story may change.
 
Remove rubber carb boots, front plate out to R/H side, followed by air filter. Reverse procedure for assembly, make sure carb boots are warm & flexible.
Carb boots can be tricky to fit first time around, but you do get better with repetition and patience. šŸ˜œ
 
Remove rubber carb boots, front plate out to R/H side, followed by air filter. Reverse procedure for assembly, make sure carb boots are warm & flexible.
Carb boots can be tricky to fit first time around, but you do get better with repetition and patience. šŸ˜œ
Added to this, many times, the carb boot adapter rings are incorrectly fitted backwards, with the flange furthest from the carburetor.
 
Last edited:
I take the carbs off. I have never successfully removed the air filter by myself otherwise. By successfully, I mean without scratching, or bending anything and without cutting myself. With a helper, one can collapse the boots while the other slips the filter out.

I have two ball end Allen wrenches and a sawn-off regular Allen wrench. I crack the drive side inner Allen loose with the sawn-off Allen and the rest is done with ball ends. The ball ends are one with a long, long-end and short, short-end and one normal. If the tank is off, I can get the carbs off in less than two minutes.

The three biggest keys here:
1) Be absolutely sure the screws will go in with fingers until home on the manifolds - if not, it's a battle.
2) When installing the drive side, put in the outer screw and finger-snug it. Then wiggle the carb while putting the inner drive side screw in. When both are home, tighten the outer enough to hold things in place and finish tighten the inner. Finally finish tighten the outer. This makes it much easier next time to do 3).
3) Do not loosen the drive side outer screw until the inner drive side screw is out.

For the smart-asses about to tell me how easy it is with the carbs in-place: Tell me your age, your level of arthritis, and your bionic parts count :)
 
Removing and replacing the air filter with the carbs in place is easy, the hard part is reinstalling the second rubber boot. A long handle skinny screwdriver and patience is the key. I can normally do the whole thing in 20 minutes unless the second rubber boot does not want to play ball and in that case, I take a break and come back to it later.
 
"Success" also depends on your tolerance for scratching and deforming the end plates and mesh screen. If you are working on somebody else's bike and you are not OCD, no problemo.
 
Added to this, many times, the carb boot adapter rings are incorrectly fitted backwards, with the flange furthest from the carburetor.
Never really noticed this until I went in and had a good look at Andovers part diagram. My carb boot adapters are indeed fitted backwards with the flange furthest from the carb. Will having the carb adapters like this make any real difference to ease of fitting the boots?
 
All this is just wool gathering for me as I probably will never put enough miles on the bike to need a filter change.
As I said in my last post, I too, will probably never put enough miles on this bike to ever need to change the filter again. I, by the way, like the "all this is just wool gathering for me" reference. Had never heard that one.
 
I do as per post #4 and have never had much trouble doing so. I doubt it has ever taken me more than a minute or two to work the air cleaner/mesh into position. Maybe that's because I have done it many times, beginning back in the day with my original '71 750. OR... maybe the Norton manufacturing/assembly tolerances makes a bike-to-bike difference between a fairly easy and nearly impossible installation! IOW, if you were lucky, you got a bike with a bit more clearance for the filter/mesh; if you were unlucky, you installed pod filters! :)
 
I am now facing this task and wondered why they couldn't have made the air filter box 1/2cm thinner - it would be so much easier getting it all together.

Question : should the rubber boots be over the flange on the carb or simply snug against it?
 
I am now facing this task and wondered why they couldn't have made the air filter box 1/2cm thinner - it would be so much easier getting it all together.

Question : should the rubber boots be over the flange on the carb or simply snug against it?
The flange goes towards the carb and the boot goes against the flange.
 
Thought so until I saw this on NOC forum which certainly looks easier to achieve. But over I guess is more air tight?

Replacing air filter and screen
 
Thought so until I saw this on NOC forum which certainly looks easier to achieve. But over I guess is more air tight?

Replacing air filter and screen
Easy to look at the rubber boot and flange, and see it was designed to go over the flange.
 
Thought so until I saw this on NOC forum which certainly looks easier to achieve. But over I guess is more air tight?

Replacing air filter and screen
This is plenty airtight and how many (most?) do it. The boots are snug on the adapter, and they press against the flange.

Since LAB says over, he probably has a reference that says that, but I won't be adhering to it :)
 
Back
Top