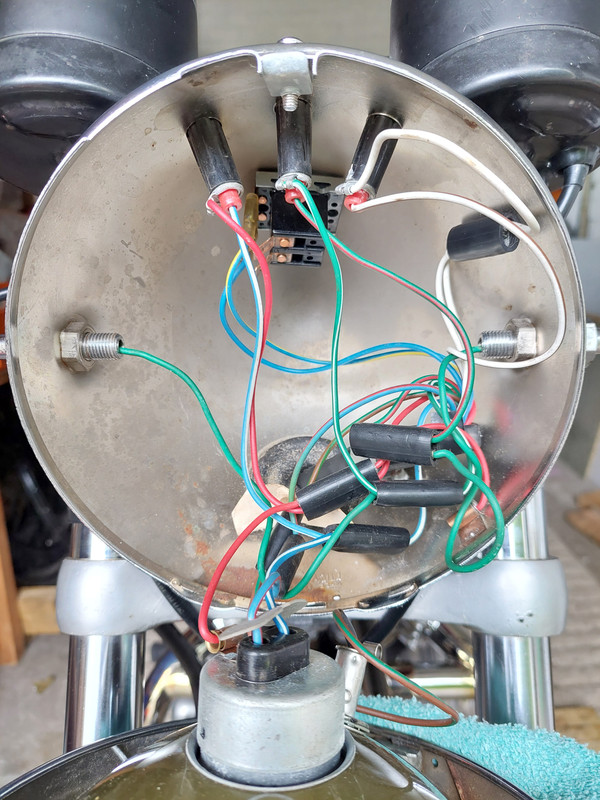
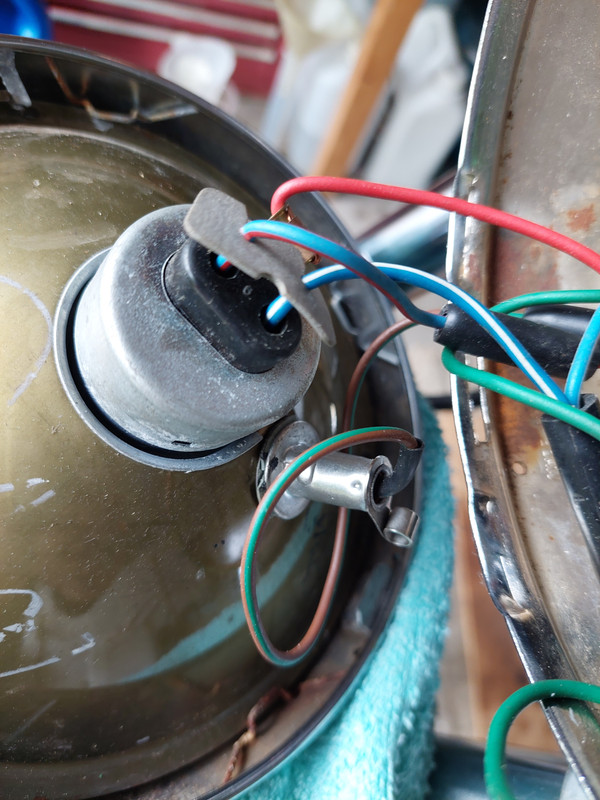
LED main, pilot & stop/tail light upgrade.

The only difference it makes is that I don't see the green light ;)

Ok, well it was worth a try.
You could try disconnecting the headlamp bulb holder earth/ground and connecting a jumper wire between the battery terminal and the bulb holder.
But, why/what would removing the warning light bulb achieve?

Just a theory, it didn't work so never mind.
 
I'd love to post a pic, but it's impossible to photograph. It's difficult to even look at without imprinting a pattern on your eyes for 10 minutes.

The top bank of LEDs definitely go off when switched to high beam though.
Your top bank may be the dip beam.

I urge you to try the light assembled and see what the beam is like before you do any further fiddling. You don’t yet know that you actually have a problem…
 
Your top bank may be the dip beam.

I urge you to try the light assembled and see what the beam is like before you do any further fiddling. You don’t yet know that you actually have a problem…
Tried that Nigel.

Shut the garage door and used that for an impression of the beam.

Definitely the reverse of what it should be.

I've sent an email to Goffy and I'll post any notes that come up. In the meantime I'll try Les's jumper suggestion.
 
I have experienced the same, but since I want to be clearly seen when I ride (I don't ride at night) I don't worry about using the dip beam at all.
But, why/what would removing the warning light bulb achieve?
All the polarity agnostic bulbs I've tried have the problem with the warning light. Sometime a standard bulb warning light works right but never an LED warning light with one of those bulbs. So, is the BPF bulb you bought polarity agnostic?
 
For those with an H4 shell and an incandescent high beam indicator bulb this one works fine in my positive ground Commando...got it at Amazon

LED main, pilot & stop/tail light upgrade.
 
Last edited:
For those with a H4 shell and an incandescent high beam indicator bulb this one works fine in my positive ground Commando...got it at Amazon

LED main, pilot & stop/tail light upgrade.
Glad to hear it - Amazon delivered mine yesterday - will try it as soon as I finish the wiring.
 
Tried that Nigel.

Shut the garage door and used that for an impression of the beam.

Definitely the reverse of what it should be.

I've sent an email to Goffy and I'll post any notes that come up. In the meantime I'll try Les's jumper suggestion.
Bonzo,
I have the Paul Goff bulbs in my shell but I didn’t change the indicator bulbs to LED and it all works fine.
Positive ground with standard switches.Let us know when you find out what is askew.
Thanks,Mike
 
Will do Mike.

I didn't change the indicators either, they're the original bulbs.

So far I've changed out the pilot, main and speedo & tacho bulbs to LED.
 
Bonzo,
I have the Paul Goff bulbs in my shell but I didn’t change the indicator bulbs to LED and it all works fine.
Positive ground with standard switches.Let us know when you find out what is askew.
Thanks,Mike
Same here. I like the vintage look of rise & fall turn signal lamps.
Also, it shows my system voltage for my constant reassurance.
 
O.P., any chance a negative lamp had previously been fitted? (By changing the wires at the lamp only? Did you make the swapover to a 3-prong plug yourself?
 
OK, so there was no reply to my email, so I called Goffy and explained the situation.

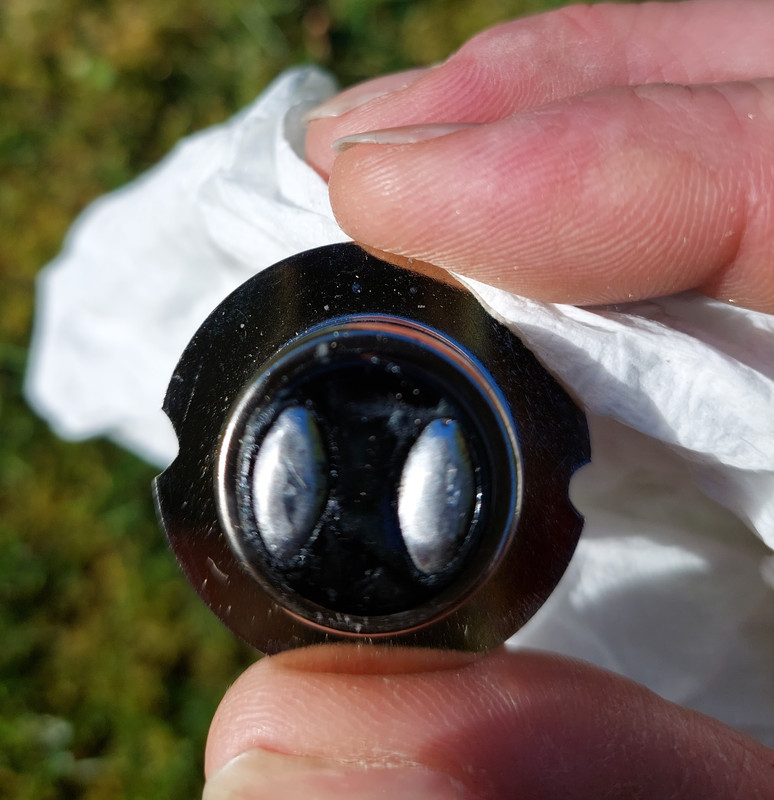
He said it was unusual, but had a similar problem previously, (high beam on dip beam & vice versa) and it turned out that the bulb had been manufactured incorrectly whereby the base of the unit was 180 degrees from where it should be. That made sense (I'll refrain from calling it a lightbulb moment).

He advised me to swap the wires in the switch, (rather than having the hassle of postage return etc.) but then came up with a plan to make it easier, just get a small round file and take a chunk out of the opposite side of the base.

LED main, pilot & stop/tail light upgrade.

That's gotta be right :rolleyes:

Nope. The mail beam is still on, but when the high beam switch is flicked (or the flash button pressed) the top row go out for a split second, then go back onto full again.
 
Maybe I messed it but did you try without the green warning light connected? The bulb it appears you have is available many places and always has problems in my experience if the warning light is connected.
 
Maybe I messed it but did you try without the green warning light connected? The bulb it appears you have is available many places and always has problems in my experience if the warning light is connected.
Yes, Les suggested that in post #18,.alas it made no difference.
 
He advised me to swap the wires in the switch, (rather than having the hassle of postage return etc.) but then came up with a plan to make it easier, just get a small round file and take a chunk out of the opposite side of the base.

But that would invert the bulb in the reflector assembly so it would dip 'upward' (Edit: or in the opposite direction?) if it actually focused at all.
 
Last edited:
But that would invert the bulb in the reflector assembly so it would dip 'upward' (Edit: or in the opposite direction?) if it actually focused at all.
Very good point.

I can't be certain, but to my eyes, the top and bottom of these bulbs appear identical and Goffy's advice re the filing would appear to confirm that.
 
I can't be certain, but to my eyes, the top and bottom of these bulbs appear identical and Goffy's advice re the filing would appear to confirm that.

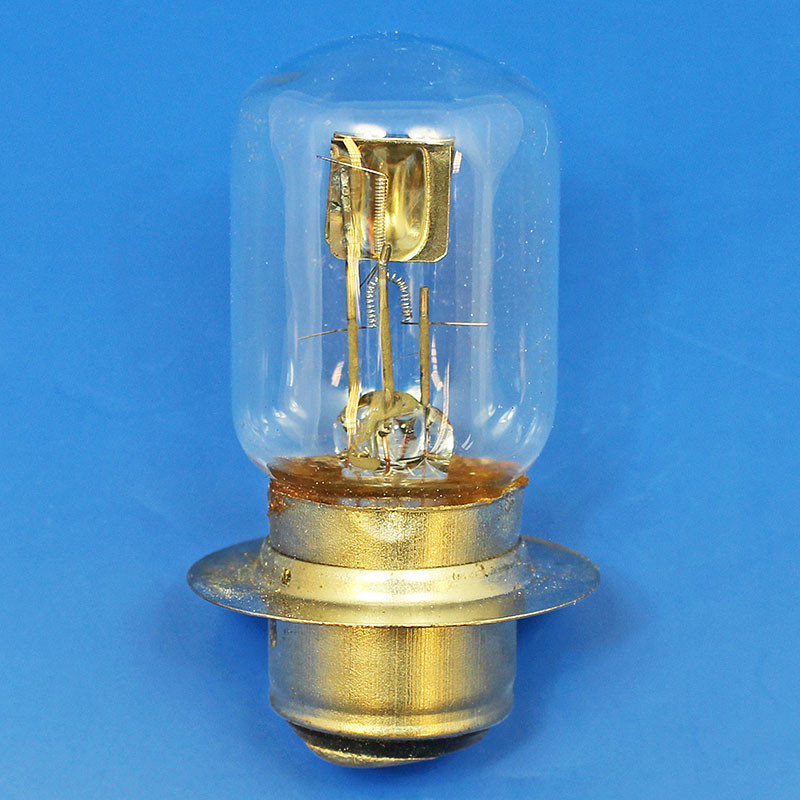
I'd have thought there has to be some physical difference in the LED positioning, either further away from (dip) or closer to the bulb base (main) just as there is with the standard '370' bulb (below) filaments or I fail to see how the beam changes. 'Car' BPF bulbs have their filaments arranged differently to the '370').

"One transverse and one hooded axial filament with filament shield."

LED main, pilot & stop/tail light upgrade.


LED main, pilot & stop/tail light upgrade.
 
It's possible I missed something in this thread, but, would it be possible to :

1) install the new LED in the correct position
2) unplug the pilot and warning bulbs
3) reverse the blue/white blue/green connections in the headlight shell to the LED
4) install the headlight ring on the shell

just to test the LED function
 
Back
Top