'66 N15 coming together

Joined
Sep 15, 2020
Messages
396
Country flag
It's inspiring to me when a project starts to resemble a motorcycle, so I set the two tanks on for a look. Not original but I like it. I just pressed in the swingarm pin in and threw on some old SuzukiGS850 (13.4") shocks for garage purpose. The oil tank was painted directly, not on the cover, oh well.

The project has been an archeology puzzle, what fitting/bracket/bolt goes where and what do I have? Turns out I have most of it, and in pretty nice shape to boot. I've scoured pics high and low. I found pics of some crusty old frames that turned out to be quite helpful. I still don't know a few things, like where does the ignition switch go? I have a wiring harness with it, and and have seen it hung off the rear frame loop to main frame upper stud with a bracket, but am not sure if that's original location. That seems to be where the wiring harness puts it anyway. There's a tapped hole for 'something' on that stud, but I don't know what goes in it. Anyone?

'66 N15 coming together


'66 N15 coming together
 
Nice colour. So the rivet counters won’t like it because it’s not original, to anyone saying so to you just remind them it’s YOUR bike and to go swivel :cool:
 
It's inspiring to me when a project starts to resemble a motorcycle, so I set the two tanks on for a look. Not original but I like it. I just pressed in the swingarm pin in and threw on some old SuzukiGS850 (13.4") shocks for garage purpose. The oil tank was painted directly, not on the cover, oh well.

The project has been an archeology puzzle, what fitting/bracket/bolt goes where and what do I have? Turns out I have most of it, and in pretty nice shape to boot. I've scoured pics high and low. I found pics of some crusty old frames that turned out to be quite helpful. I still don't know a few things, like where does the ignition switch go? I have a wiring harness with it, and and have seen it hung off the rear frame loop to main frame upper stud with a bracket, but am not sure if that's original location. That seems to be where the wiring harness puts it anyway. There's a tapped hole for 'something' on that stud, but I don't know what goes in it. Anyone?

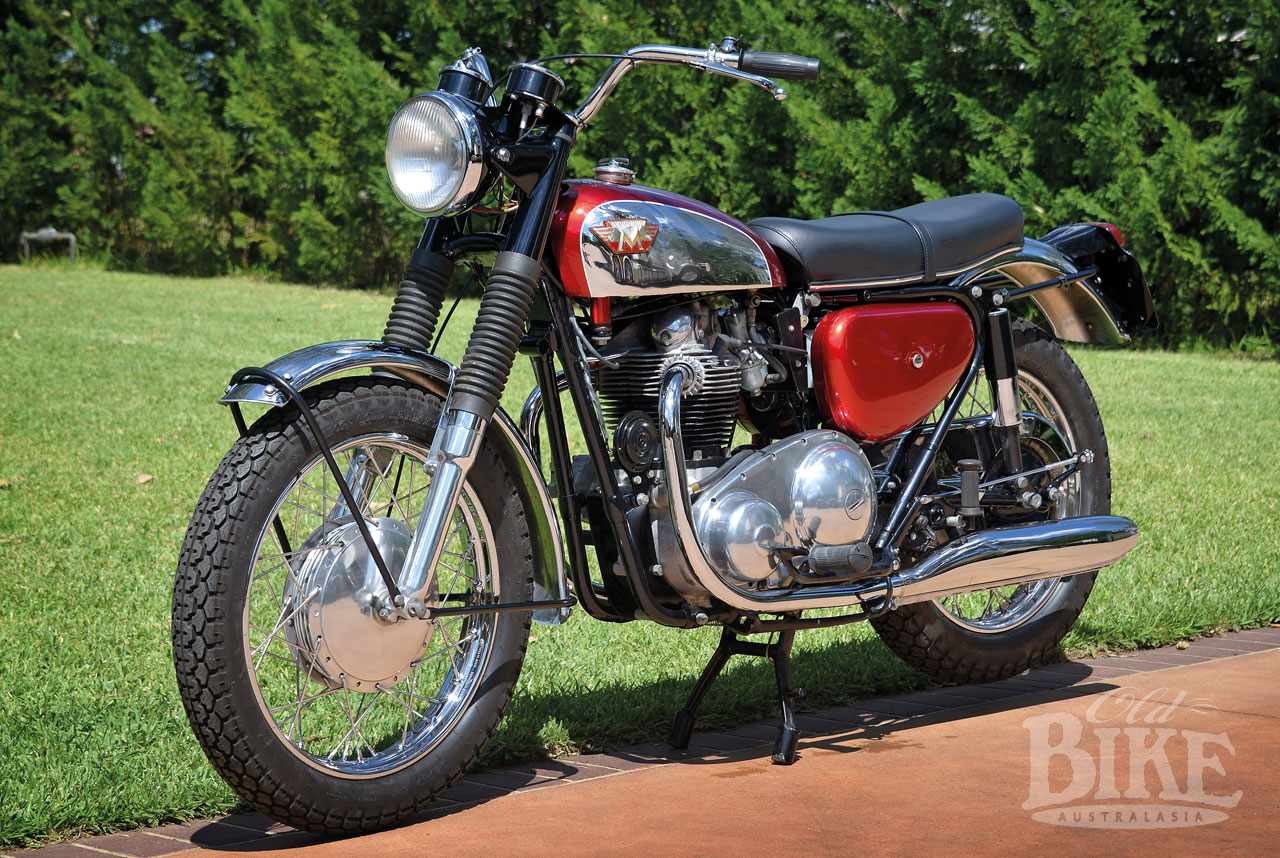
Hi. Nice paint job. Is the frame powder coated? How did you prep the tanks?

On late model G15's with coil ignition, the ignition switch is fitted on a bracket at the large upper frame/subframe stud (same position as the light switch on a late model G80CS).
You may see it here:

The tapped hole (I don't recall the size, probably a BA thread) is an earthing point for the ignition switch. Look up the 1966-70 Service manual under wiring diagrams and you will find the diagram for "Capacitor ignition 1967 models".
This wiring diagram is a bit crude, as the rest of the bike is left with battery power on. You may want to wire as per 1968-70 Commando instead, see the following diagram.

- Knut
 
Thanks Knut,

Thanks for info and advice on wiring, I will follow it, and good pic of that plate. Mine is magneto model SN 119799, and I see the diagram just above capacitor one, will check it all out. On black parts I used some Nason urethane I had on the shelf which lays down nicely. I have a friend I can ask for powder coating as he manages a shop, but I feel like I've gone to the well too many times. Anyway painting is fine, I like the results (but hate the prepping).

I am 90% sure I won't get the magneto rebuilt. I have a couple coils and bracket from Commando, and two alternator/stator units, previous owner was working on conversion and maybe has a stuffed alternator. I like the idea of the self-contained Electrex system, but from my reading it seems they may be iffy. I need someone to say "hey dummy, use X system" so I welcome advice (and in consideration of my lack of riches to spend).

As for the tank I haven't prepped them - yet. There's only light surface rust and I think a few days of vinegar soak will do it. If not I'll step up to diluted muriatic acid. I have tank prep process down pat, having done 5 tanks in the last year... ugh. A good workout with all the steps involved.

Edit: after a thousand searches on N15CS and a few on its brother, it figures that the best pics by far are of the Matchless ;)
 
Mine is a magneto model, it doesn't have an ignition switch but there is a 'kill' button on the handlebars.
 
Mine is a magneto model, it doesn't have an ignition switch but there is a 'kill' button on the handlebars.
Makes sense, I have that kill button in my parts pile. Rebuilding my magneto is still an option, I've got a fair way to go before I decide.
 
I got my pile of parts from Andover and Walridge on about March 1 but had to go tend to my ailing father (RIP). 2.5 exhausting months later and I've returned home and resumed work. I decided to do the forks as I want to have a rolling bike reasonably soon. New stanchions, bushings/seals and springs, and a good clean and they are about ready to go back together.

'66 N15 coming together
 
gpzkat
If you haven't already, I suggest you read up on valve and cap tolerances at Jim Schmitt's tech page.
Lots of expensive parts there. Cost of those fork slider extensions is a pain .... sigh.
Fork damper rods easily corrode and really should be made of a stainless steel. I've tried finding someone to make them in quantities ...... no luck so far.
Corroded rods will damage the soft aluminum caps and mess up fork rebound damping. This is general problem with Norton Roadholder forks.

- Knut
 
Thanks for the helpful info Knut I remember reading that and will take a look. The rods do have some corrosion, maybe can be smoothed out to be 'OK', not sure.

Edit: I see that I can get new damper rods valves and caps for a reasonable price (under $100 including shipping) so maybe that's the best idea here. It would mean most of the wear items (other than the lowers and damper tubes, hmm) are as new, upgrades would need to wait for a $ influx.

For some reason my saved sig doesn't add my name - Tom
 
Last edited:
You know you're a cheapskate when you make a valve spring compressor like so... Hey, it works and I didn't put an eye out.

Grind on crank is .010, so pretty, too bad it's hidden.

'66 N15 coming together


'66 N15 coming together
 
gpzkat
If you haven't already, I suggest you read up on valve and cap tolerances at Jim Schmitt's tech page.
Lots of expensive parts there. Cost of those fork slider extensions is a pain .... sigh.
Fork damper rods easily corrode and really should be made of a stainless steel. I've tried finding someone to make them in quantities ...... no luck so far.
Corroded rods will damage the soft aluminum caps and mess up fork rebound damping. This is general problem with Norton Roadholder forks.

- Knut
Dunstall used to supply alloy rods . . . . .
 
Grind on crank is .010, so pretty, too bad it's hidden.
Your crank looks nice. Has it been magnafluxed? Even though the crank probably hasn't a high mileage, I recommend you do. I've had about 10 cranks magnafluxed - about half of them had flaws (internal cracks) and were junked. New parts are available, see below.
Shafts don't shine like this normally. Did you polish them?
I guess you are going to clean out the sludge trap? If you do, you may consider upgrading the crankshaft bolts as well (3/8" or M10), and maybe replace the flywheel for a steel one.


- Knut
 
Dunstall used to supply alloy rods . . . . .
I guess you mean alloyed steel? Damper rods need to be made out of steel due to (internal) spring/rod friction, which necessitates a hard surface.
It's surprising vendors like RGM do not list a rod made of an alloyed steel.
I wonder what kind of rods Don fits in his Lansdowne damper kits?
Edit: I see that I can get new damper rods valves and caps for a reasonable price (under $100 including shipping) so maybe that's the best idea here. It would mean most of the wear items (other than the lowers and damper tubes, hmm) are as new, upgrades would need to wait for a $ influx.
Your existing damper parts can be tuned for even less, the result of which will be apparent immediately. See JS for details. Ordering class A/B/C damper valves from RGM is another solution.

- Knut
 
It was magnafluxed and polished like that by the shop. It had just a trace of sludge. I have already put it back with new bolts/studs and stock flywheel.

Thanks for advice on dampers, I'm checking into that.

Gearbox is back together with no dramas but before I cinch it all up I will get a dial indicator and measure the kickstart float. It 'seems' OK but "to measure is to know" and I'll need one further down the path anyway.

I also found a good prop stand, it was listed only as 'Vintage Matchless' w/o the model, the clue was the extender tang.

After fruitless searching I am going to get the repro battery carrier, toolbox and lid from Walridge. I found the original painter on Facebook, he had signed the tanks back in '94. He'll paint and match up his custom striping on the lid.
 
OK you wizards help me out a bit, just a sanity check. I have reassembled the gearbox and all seems fine, I can shift it through the gears with the inner cover on and get into 1st and 4th at the limits. I check the cam plate detents and 4th is perfect at full stop, 1st is harder to see, but it seems it isn't quite as perfectly centered. Could be my eyes, but anyway at full stop it's certainly in 1st gear. It's all well lubed and operating correctly as best I can tell.

When I move the quadrant arm without the index plunger screwed in, it's fine as long as I rotate the mainshaft/sprocket. When I screw the plunger in, it gets impossible to do by hand, I have to lever it. OK fine, that seems understandable, so I put on the outer cover with the ratchet plate in an 'assumedly' correct position, and the shift lever doesn't budge when spinning the mainshaft/sprocket. By testing the setup in the inner cover it sure seems that the ratchet is working right - springs are good (nearly touching that pawl).

I am zeroing in on one step that seems to be a hint regarding positioning of the ratchet plate vs the quadrant. Note, I have been reading others, Stuart Gaunt, Old Britts and watching a 'Motor Oil & Beer' video on Youtube, which is very helpful and complete. None really says anything helpful on this. One guide says select 2nd gear, another says neutral and neither ever gets back to 'why'. So, finally my question is, referring to the picture:

What positioning should I have when putting the cover on - does it matter? It would seem to. Select neutral in the gearbox and center it like shown (is that neutral setting)? Or select second gear? Something else?

'66 N15 coming together
 
Last edited:
Well, I just went stock on the forks, we'll see how they go. Hey they are the 'legendary' Roadholders, no? I'll figure out the gearbox, just needed a break, I double checked and nothing's wrong. I grabbed a 1/2" bore MC off eBay for $25, it's from a Yamaha scooter. I don't have lots of money to spare and it looks good, very clean and tidy I think.

It's got a few things non stock but should function well, it's just what I can pick up on a budget and make work, then I can improve what I need to down the line. The yoke crown nut arrives Monday, mine is a 26 TPI one that was in the pile, but I had to get a new yoke and it's late 60's Commando and needs 28 TPI. Other than that everything lines up but it's a bit of a jumble.

'66 N15 coming together


'66 N15 coming together
 
OK you wizards help me out a bit, just a sanity check. I have reassembled the gearbox and all seems fine, I can shift it through the gears with the inner cover on and get into 1st and 4th at the limits. I check the cam plate detents and 4th is perfect at full stop, 1st is harder to see, but it seems it isn't quite as perfectly centered. Could be my eyes, but anyway at full stop it's certainly in 1st gear. It's all well lubed and operating correctly as best I can tell.

When I move the quadrant arm without the index plunger screwed in, it's fine as long as I rotate the mainshaft/sprocket. When I screw the plunger in, it gets impossible to do by hand, I have to lever it. OK fine, that seems understandable, so I put on the outer cover with the ratchet plate in an 'assumedly' correct position, and the shift lever doesn't budge when spinning the mainshaft/sprocket. By testing the setup in the inner cover it sure seems that the ratchet is working right - springs are good (nearly touching that pawl).

I am zeroing in on one step that seems to be a hint regarding positioning of the ratchet plate vs the quadrant. Note, I have been reading others, Stuart Gaunt, Old Britts and watching a 'Motor Oil & Beer' video on Youtube, which is very helpful and complete. None really says anything helpful on this. One guide says select 2nd gear, another says neutral and neither ever gets back to 'why'. So, finally my question is, referring to the picture:

What positioning should I have when putting the cover on - does it matter? It would seem to. Select neutral in the gearbox and center it like shown (is that neutral setting)? Or select second gear? Something else?

'66 N15 coming together
Pretty sure when I assembled my box it was in the neutral position .
With all the gears/shafts lubed up and a gear lever fitted you should be able to run it through all the gears by hand whilst spinning over the shafts
 
Pretty sure when I assembled my box it was in the neutral position .
With all the gears/shafts lubed up and a gear lever fitted you should be able to run it through all the gears by hand whilst spinning over the shafts
It's all good, buttoned up and shifting fine. I think the alignment is not possible to mess up. I noticed a small hole in the inspection cap, think that may be a mod to relieve pressure. Anyway, now comes the engine.

'66 N15 coming together
 
OK you wizards help me out a bit, just a sanity check. I have reassembled the gearbox and all seems fine, I can shift it through the gears with the inner cover on and get into 1st and 4th at the limits. I check the cam plate detents and 4th is perfect at full stop, 1st is harder to see, but it seems it isn't quite as perfectly centered. Could be my eyes, but anyway at full stop it's certainly in 1st gear. It's all well lubed and operating correctly as best I can tell.

When I move the quadrant arm without the index plunger screwed in, it's fine as long as I rotate the mainshaft/sprocket. When I screw the plunger in, it gets impossible to do by hand, I have to lever it. OK fine, that seems understandable, so I put on the outer cover with the ratchet plate in an 'assumedly' correct position, and the shift lever doesn't budge when spinning the mainshaft/sprocket. By testing the setup in the inner cover it sure seems that the ratchet is working right - springs are good (nearly touching that pawl).

I am zeroing in on one step that seems to be a hint regarding positioning of the ratchet plate vs the quadrant. Note, I have been reading others, Stuart Gaunt, Old Britts and watching a 'Motor Oil & Beer' video on Youtube, which is very helpful and complete. None really says anything helpful on this. One guide says select 2nd gear, another says neutral and neither ever gets back to 'why'. So, finally my question is, referring to the picture:

What positioning should I have when putting the cover on - does it matter? It would seem to. Select neutral in the gearbox and center it like shown (is that neutral setting)? Or select second gear? Something else?

'66 N15 coming together
It really doesn’t matter which gear it is in. I put the gear pointer back on temporarily so that I can steady/adjust the position of the ratchet plate with respect to the hole in the roller while fitting the outer cover.
 
It really doesn’t matter which gear it is in. I put the gear pointer back on temporarily so that I can steady/adjust the position of the ratchet plate with respect to the hole in the roller while fitting the outer cover.
Yep thanks - that sort of leapt out at me looking at it after taking a break from it for a couple days.
 
Back
Top