500 twin cranks

Peteyoung75

VIP MEMBER
Joined
Oct 5, 2024
Messages
25
Country flag
Hi all.
I’m slowly rebuilding a featherbed dominator with dynamo engine. I want to be able to ride this at 70mph without fear of it exploding.
I did some dye penetrant testing on the crank and thought I’d found a crack on the main shaft. I showed the picture to the chap who re bored it for me and he reckoned it was just a scratch and nothing to worry about. He also advised that the loose fit of the drive side main bearing wasn’t an issue worth worrying about and to just put some loctite on it.
The cranks been freshly ground to the first re-grind dimensions and the fillets ground to the correct radius.
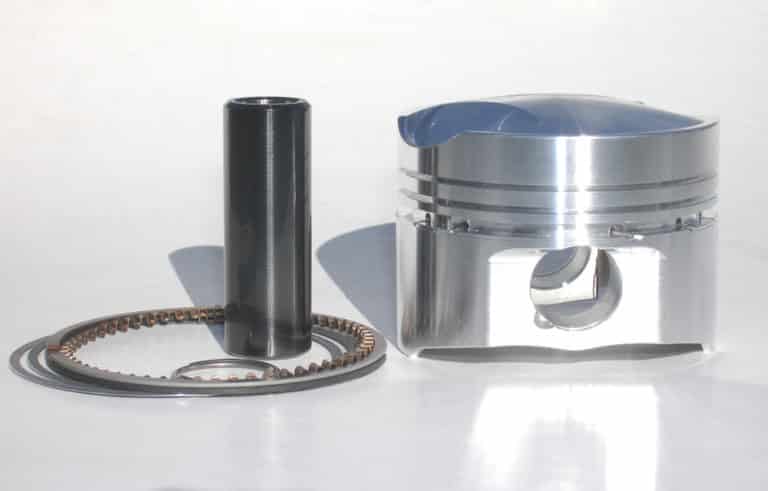
I thought it would be a good idea to upgrade to new rods. These actually weigh more than the originals. I’ve also replaced the pistons with new Gandinis which are also heavier than the originals!
All this has got me wondering about just how concerned I should be about potential crank failure and also the feasibility of buying a new crank. Seems no one is offering a new crank for the 500s or does anyone know someone who is?
What do the 500 racers do?

Apologies, I’ve had trouble digging out sufficient info from the search function.
 
Last edited:
IMG_5319.jpeg

Here’s the photo of one of the dye penetrant tests. The opinion of the engine builder was that there wasn’t sufficient dye bleed for it to be anything but a scratch.
You can also see witness marks on the mainshaft of where the bearings been spinning.
 
You could have gone the JS route and fitted longer rods and (very) light pistons.

I don’t know whether that’s a crack or not. I thought the tendency was to break right at the join to the crank cheek. That’s why it’s recommended to grind a small radius ‘undercut’ to remove the stress riser caused by that sharp angle.

The good news is that the 500 is very under stressed compared to the bigger twins, so, assuming that’s not a crack, you may be worrying too much?

Andy Molnar makes cranks, he doesn’t list the stroke you need, but it may be worth a call.
 
Thanks Eddie. I’ve message Andy Molnar but he said no. The fact there is so little availability of 500 billet cranks could back up the theory that I may be worrying too much (or nobody races them). There’s a theory in the NOC service notes that the early dynamo engines had weaker crank pins due to having larger oil ways. I’ve just acquired a cheap alternator crank which I’m having a good look at to understand if this is the case. Either way I do think the bottom end may be coming apart again.
I did consider the JS parts but at the time thought they might be overkill. Having second thoughts now but what’s done is done in that regard!
 
Back in 1980 my first Norton was a 500 Dominator. I used to thrash it senseless to try & keep up with mates on Brit 650s & Jap bikes. Never managed to break it, but in the quest for more power I rebuilt it as a 650ss, & guess what, I broke it. I have heard that the 500ss cranks had smaller diameter sludge trap drillings but it may only be a rumour.
If I was building a 500 today I would start off with the best crank I could find, have it X rayed & fit JS rods & pistons. Most after market pistons are heavier than the originals, especially the Aussie JP brand which are best used as boat anchors.
 
View attachment 121511
Here’s the photo of one of the dye penetrant tests. The opinion of the engine builder was that there wasn’t sufficient dye bleed for it to be anything but a scratch.
You can also see witness marks on the mainshaft of where the bearings been spinning.
If you have carried out the dye penetrant test correctly, thoroughly cleaning the journal, cleaning off dye from the surface (& scratches) and applying the white developer, then it is probably a crack. Try repeating the test. Also, scratches tend to be in straight lines around journals while cracks rarely are.

My old 88 dynamo crank & rods survived 7 years of short circuit racing without problems in standard Domi main bearings. Cruising at 70 is nothing.
 
So I’ve measured up the alternator crank and that has 1” oil ways which according to the noc service notes only occurred Ain the early dynamo cranks and then went to 7/8” (5/8”) for the SS so I think I’ll tell them that’s wrong.
I think I’ll pull the bottom end apart again and have another look at the crank. I want to recheck the grinding radius as looking back at some photos of it has got me wondering!
Andy Molnar reckons they’re about a year away from doing 500 cranks.
Good info about scratches being straight and cracks not.
 
Thanks people. It’s a dynamo bottom end so a dynamo crank would be preferable. I have an alternator crank here that measures up as worn standard journals so due first regrind.
The 500 cranks have a narrow flywheel that is smooth all the way around the outside except for any balance drilling.
500 twin cranks
500 twin cranks
500 twin cranks
 
If I was building a 500 today I would start off with the best crank I could find, have it X rayed & fit JS rods & pistons.
The 500 twin engine had a stroke of 72.4mm , thus I doubt JS parts can be made to fit. Journal size is equal to the larger siblings.

- Knut
 
The 500 twin engine had a stroke of 72.4mm , thus I doubt JS parts can be made to fit. Journal size is equal to the larger siblings.

- Knut
Surely it is the rod length and piston dimensions that dictate this, not the stroke?

The stroke would raise the question of rod length to stroke ratio however, I do wonder if the long rods would suit that short stroke?

He does list them:

 
I did look into JS rods and pistons. They are available for 500s but seemed overkill at the time. I’m new to Nortons and becoming more and more informed. The journal diameter on the 500s is 1.5”
 
The advantage to the smaller engines is that Jim offers ‘ultra light’ pistons and rods.

These should make for a super smooth and very responsive engine in a 500 I imagine.
 
The dynamo crank is shorter on the main shaft . It only has one key way for the sprocket then the thread for the nut whereas the alternator version has the tapered portion and key way for the sprocket, then another plain section with a key way (for the alternator rotor) and then the thread for the nut.
You can see the longer main shaft for the alternator version in the pics I posted above.
 
Back
Top