ilikevelos
FULL MEMBER
- Joined
- Jul 2009
- Messages
- 284
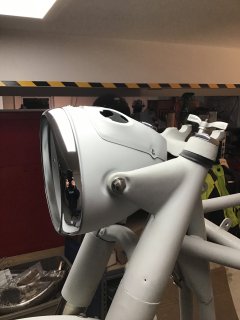
I think the problem with the fender may be that this thread is 5/16 cycle thread and not bsf. I think original thread may have been 26tpi(cycle) and not 22tpi (bsf). This may have initially caused the problem. The former owner may have used bsf or unf thread.Forks back together. Front fender ( mudguard) dry fitted . Needs a little tweaking. Lower stay mount ears on sliders pretty well butchered in thread department by previous owner - I will likely through bolt the stays rather than try thread repair.
I turned temporary bushings of plastic for the swingarm to fit it .
I have new silent block bushes but I will install them closer to final assembly. I have the original Armstrong rear shocks but doubtful of their integrity and rebuilding them seems questionable so I purchased new Girling shrouded classic units . These come with universal bushing kits . The bushes all needed facing on the lathe in order to fit the frame and swingarm mounts .
View attachment 118244
View attachment 118245
Now awaiting return of oil tank , etc from welder to start priming of those components. Magneto and dynamo shipped off to Doug Wood for rebuilding .
Cheers ! RT
I would be inclined to helicoil the fork sliders if they are not too wallowed out for the helicoil tap drill. . You can drill, tap and run in the helicoil without removing the fork from the frame and will have a stronger thread than before it was done. If there is not enough material for the cycle thread there may be for the bsf or unf thread since it has a larger major diameter.
My thoughts and can't wait to see it finished. Love these bikes.