Primary Puzzle (2010)

Status
Not open for further replies.

rvich

VIP MEMBER
Joined
Jul 25, 2009
Messages
3,181
Country flag
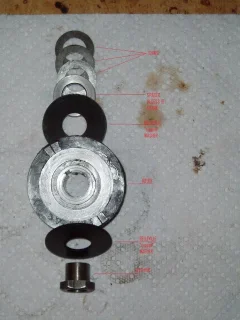
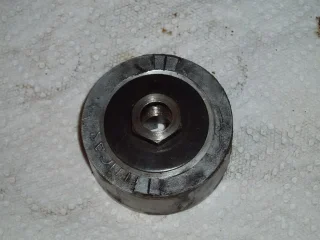
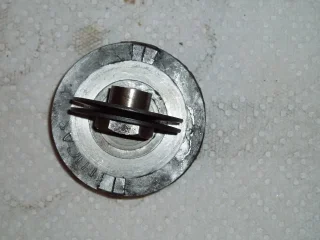
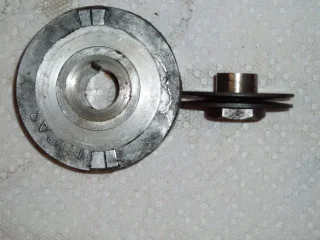
I was working on getting the primary apart last night on my 850. I was puzzled when I took the rotor off as there is a large cupped washer behind it and the spacer had the groove facing toward the crank. On my 750 I clearly remember placing the groove out to allow the key to slide into place and I don't remember any large washer behind the rotor.

The large washer isn't showing on my parts list and as for the groove...am I missing something? Did I fabricate the memory? Everything seemed to line up fine before disassembly. It doesn't do me much good to catalogue how it came apart if it isn't right!

List of parts in order of disassembly would be:
rotor nut
cupped washer (cup toward rotor)
rotor w/key
cupped washer (cup toward rotor)
spacer (with groove but facing in)
shims (three)

This leaves the sprocket ready to pull off the crank.

Thanks,
Russ
 
Check the illustration on the Old Britts website parts book section for your year/model.
 
Thanks Paul, but I have looked at it. It does not show a cupped washer behind the rotor.

The manual clearly states the assembly order as shims, spacer (with "recess" outwards), key, rotor, "fan" washer, and nut.

Nowhere does it mention cupped washers. So I guess I assume this to be a bodged assembly unless somebody is aware of something that I have missed. The manual does not differentiate between 750 and 850 in this section. This bike has not run since 1976 or 77, so whatever was done was when the bike was fairly new.

Russ
 
Some folks (me included) will shim out the alternator rotor to provide maximum interface with the stator. Otherwise they will sometimes set 1/4 recessed at the face, resulting in a reduction of charging potential due to nominally reduced electromagnetic force.

(really!)
 
My 850 had/has the parts as per the parts manual - there is no cupped washer. I'd suggest that your speculation that it was a bodge is correct though understanding WHY will probably never happen.
 
The cupped washer is a Belville washer and its a later un-official and very worthwhile mod to secure the rotor centre which has a bad habit of working loose on its shaft centre.

Mick
 
I have the belleville washer on my rotor. It does work well. Fits in the indentation of the rotor perfectly. It's like a big compression washer that holds firm. I believe it came from a 75 electric starter assembly but crosses over to this appication.

What is so confusing is that you said that yours was behind the rotor?
 
The belleville washer was never standard on any Norton that I am aware of however it was a factory approved update to help keep the rotor attached to it's center. I keep a stack of them here and use them regularly. I will use them on both sides of the rotor if it helps to center the rotor in the stator. Jim
 
comnoz said:
The belleville washer was never standard on any Norton that I am aware of however it was a factory approved update to help keep the rotor attached to it's center. I keep a stack of them here and use them regularly. I will use them on both sides of the rotor if it helps to center the rotor in the stator. Jim
You mean number 10 here?
http://www.oldbritts.com/1975_g12.html
 
No, that is the belleville spring for the starter slip clutch. Of course it may be the same size as the one used on the stator- I really don't know. I get mine from Mc Master-Carr. Jim
 
This is good news. And for the record...it was one washer on each side of the rotor. More good news, while I was tightening down my puller to get the sprocket off the crankshaft my seized up motor broke loose!

Thanks guys!

Russ
 
These are the shims/ spacers I found behind my alternator. Is yours shimmed the same?

Primary Puzzle (2010)
 
Yes, but I also have the "cupped" washers. I will post pics and dimensions over the weekend.
 
I'm not seeing how a cupped washer would do anything useful in this application. I can see using a washer to space the rotor in/out but isn't that the function of the spacers? Why wouldn't you just add spacers? Seems to me a cupped washer might allow some "flex" that shouldn't be there.

I guess I'm missing something but what?
 
mike996 said:
Seems to me a cupped washer might allow some "flex" that shouldn't be there.

I guess I'm missing something but what?


The large diameter cupped washer/s securely clamp the outer alloy part of the rotor (I think friction steering damper "star" washers have also been used for this purpose) and so help prevent the outer part of the rotor becoming detached from inner rotor sleeve. There's no "flex", as the thin spring steel washers will become fully compressed as the rotor nut is tightened.

This dodge (rather than a bodge) applies to the early type "self-destruct" rotors, and isn't necessary with the later welded rotors.
 
Ok here are the photos of the pieces as they came off the bike. I did not include the key which had the end ground off so that it would not need the recess to fit the crank.

From top to bottom, shims (3), spacer (recess toward crank), belleville washer, rotor, belleville washer, nut.


Below is how the washer looks sitting on the rotor with the nut in place.


Two shots below are an attempt to show the washer in 3D. The washers are placed over the nut with convex sides facing each other just to show depth, this is NOT how they came off the rotor. They were assembled with the cup (concave side) facing the rotor.


I am not selling this as a good idea. That will be somebody else's job. This is just to provide information in the event it is usefull to somebody else! The dimensions of the washers are 2" O.D. (51mm), and 3/4" I.D. (actually about .765 or 19.5mm)

My last question is whether or not this is one of the fabled self destructing rotors?

thanx!
Russ
 

Attachments

  • Primary Puzzle (2010)
    Rotor with Belleville washers.labelled.jpg
    54.9 KB · Views: 206
  • Primary Puzzle (2010)
    Rotor.washer in situ.jpg
    52.8 KB · Views: 200
  • Primary Puzzle (2010)
    rotor and washers.jpg
    51.9 KB · Views: 196
  • Primary Puzzle (2010)
    Belleville Washers.jpg
    60.8 KB · Views: 206
This dodge (rather than a bodge) applies to the early type "self-destruct" rotors, and isn't necessary with the later welded rotors.

Makes sense, thanks!
 
Revisiting this post after many years;

I'm unsure of what the shims behind the rotor are for. What point am I shimming to? I would guess that I want the rotor and stator faces flush or at least concentric with one another. Any ideas?
 
Actually, I just deleted my comment as I realized it was incorrect. Let me finish my coffee. LOL

Russ
 
I do not believe this is one of those self destructing rotors. I have that Belleville type srping washer on mine also. It keeps everthing nice and tight. My rotor is also machined slightly to except this washer. I think it is a great setup up and you should feel fortunate.

The shim are to take up the clearance between the enging sprocket an the rotor to make it all tight when torquing the rotor nut.
 
Status
Not open for further replies.
Back
Top