
Thanks for visiting Access Norton
- Guest view limit reached
- Create a free account (more details)
- Already a member? Click here to login
You are using an out of date browser. It may not display this or other websites correctly.
You should upgrade or use an alternative browser.
You should upgrade or use an alternative browser.
Starting 71 rebuild
- Thread starter Knucles
- Start date

Knucles
MEMBER
- Joined
- Aug 2020
- Messages
- 211
Finally after a few months I can get back on my project.
I took my cylinders , to be bored andthe head for new guides , seats and valve work .
this shop was recommended by a friend that had good luck there , but it was his first time there .
I showed them the parts and they said no problem and will be ready in 7-10 days .
Two months later , it was done.
I picked them up and discovered some damage to the bottom of one cylinder .
Their motto is ,not only are we slow but expensive likely damage your stuff .
I should have checked Yelp before .
page after page of how incompetent they are.
talked to a buddy that’s has been in the racing scene her fire ever .
he said they are the worst ever.
live and learn ?
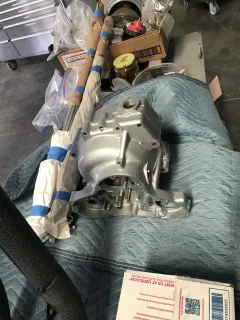
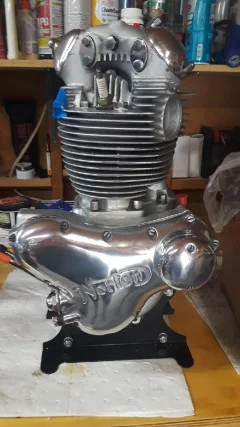
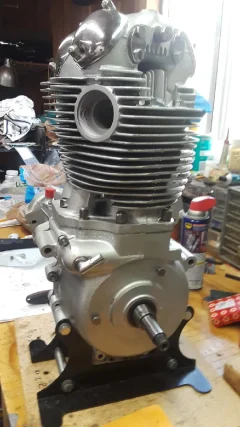
I cleaned the outside of the cylinders and head , repainted them and one ready to go to my engine builder.
will get parts to him this week , he said he will get on them .
hehas already rebuilt my front forks and transmission .
he is semi retired and does work on bikes. He was one of the mechanics at a norton dealership in the 70’s . Does good work and reasonable.
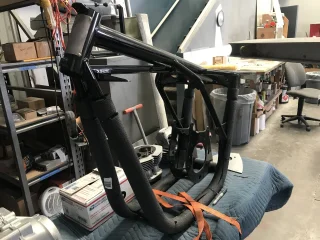
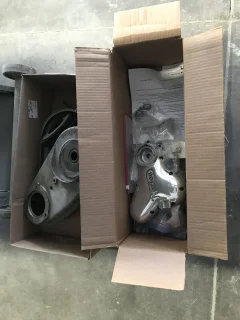
I have all the parts ready to reassemble here . Frame is ready and waiting .
I was building this norton for my wife as a gift and a surprise.
I added CNW electric start.
last night see asked me how many bikes I have .?
i said a few , she said why didn’t you tell me you hadanother Norton ?
yikes !
she saw the title come in a few months ago , but never said a word , till now .
I told her the story of the surprise and she was happy.
Now she was trying to get me to change the color of the seat and tank/side covers .
I said I had all that thought out and was sticking to it .
getting the clear title was another story .
I took my cylinders , to be bored andthe head for new guides , seats and valve work .
this shop was recommended by a friend that had good luck there , but it was his first time there .
I showed them the parts and they said no problem and will be ready in 7-10 days .
Two months later , it was done.
I picked them up and discovered some damage to the bottom of one cylinder .
Their motto is ,not only are we slow but expensive likely damage your stuff .
I should have checked Yelp before .
page after page of how incompetent they are.
talked to a buddy that’s has been in the racing scene her fire ever .
he said they are the worst ever.
live and learn ?
I cleaned the outside of the cylinders and head , repainted them and one ready to go to my engine builder.
will get parts to him this week , he said he will get on them .
hehas already rebuilt my front forks and transmission .
he is semi retired and does work on bikes. He was one of the mechanics at a norton dealership in the 70’s . Does good work and reasonable.
I have all the parts ready to reassemble here . Frame is ready and waiting .
I was building this norton for my wife as a gift and a surprise.
I added CNW electric start.
last night see asked me how many bikes I have .?
i said a few , she said why didn’t you tell me you hadanother Norton ?
yikes !
she saw the title come in a few months ago , but never said a word , till now .
I told her the story of the surprise and she was happy.
Now she was trying to get me to change the color of the seat and tank/side covers .
I said I had all that thought out and was sticking to it .
getting the clear title was another story .
Attachments
-
 A416D141-F4EF-4AC6-BC59-CD8ACDC22D2B.webp285.9 KB · Views: 554
 -
 A1185442-47EF-43FA-9E77-3D60FE2DC022.webp309.8 KB · Views: 526
 -
 5CE91BFA-B7F1-43CF-B117-3A4A246774D8.webp278.7 KB · Views: 503
 -
 66ECFCA2-CFF3-4D37-A5AA-DA7FD2B791DD.webp307.1 KB · Views: 504
 -
 A25DB0F2-FB6A-4361-BCF7-9F9A8C4A7D9A.webp140.3 KB · Views: 520
 -
 1B20F26F-D0AE-4990-93EB-0BD44860425B.webp328.6 KB · Views: 507
 -
 C748C403-D78E-48F4-9F0C-61933051603E.webp258.2 KB · Views: 573
gortnipper
MEMBER
- Joined
- Nov 2013
- Messages
- 5,521
Lucky you, you got off easy!
grandpaul
FULL MEMBER
- Joined
- Jan 2008
- Messages
- 14,129
What damage was done, and how did you fix it?...
I took my cylinders , to be bored andthe head for new guides , seats and valve work .
this shop was recommended by a friend that had good luck there , but it was his first time there .
I showed them the parts and they said no problem and will be ready in 7-10 days .
Two months later , it was done.
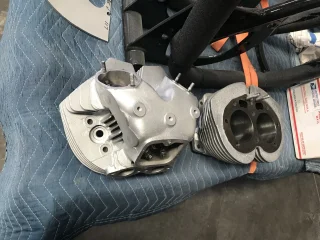
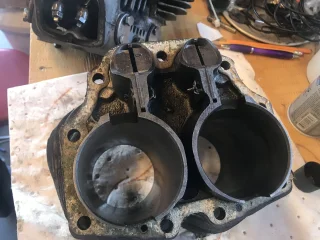
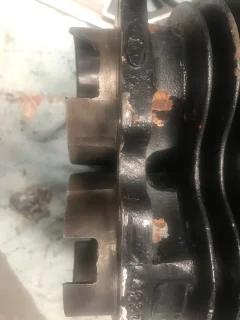
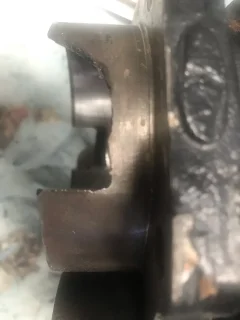
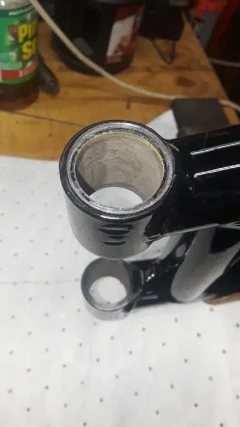
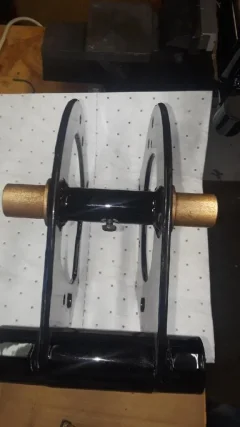
I picked them up and discovered some damage to the bottom of one cylinder .
Their motto is ,not only are we slow but expensive likely damage your stuff .
I would check over everything before re-assembly...
Knucles
MEMBER
- Joined
- Aug 2020
- Messages
- 211
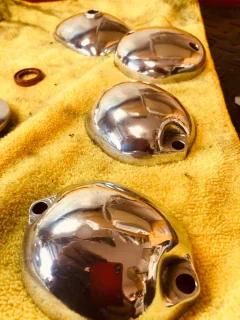
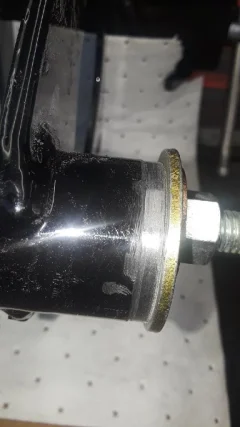
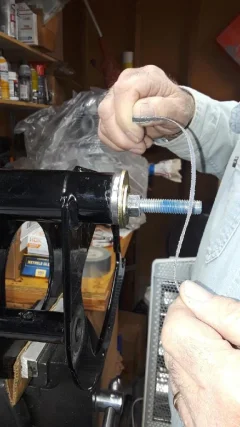
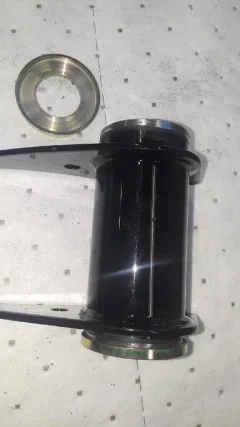
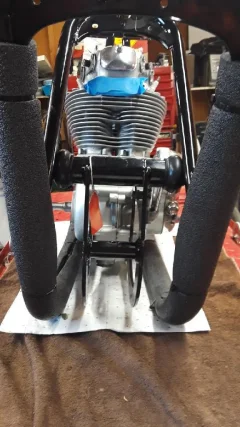
here are a few pictures
one is before the machine shop got it
two are after they broke it . I assume when clampingto fixture to machine.
one is before the machine shop got it
two are after they broke it . I assume when clampingto fixture to machine.
Attachments
gortnipper
MEMBER
- Joined
- Nov 2013
- Messages
- 5,521
And that plausible deniability is why they didn't front up to doing it.What was bad
the fact that they did not say a thing about doing it.
I did not notice until I went to shop to clean it up .
Knucles
MEMBER
- Joined
- Aug 2020
- Messages
- 211
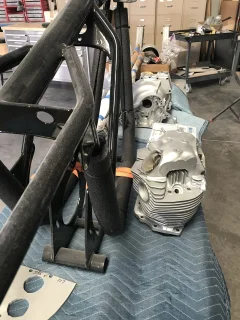
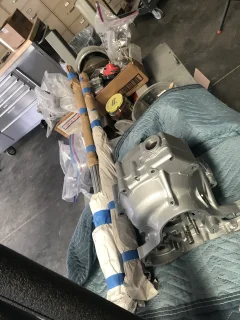
get my engine and transmission back tomorrow .
they are done , just need to pick them up .
complete rebuild of everything except the new amal carb set I bought from Marsh Ent. (On this site )
I can finally start the reassembly .
I may not start the assembly until the fall.
I have 3 longer trips planned for the next 3 months .
I have to go to Oshkosh , best flying event in the world.
then camping with my wife in her vintage trailer up to Idaho, very nice there.
then fishing in Kodiak for a few weeks.
I know , it’s terrible , but someone has to do it.
when I get my motor tomorrow , I am going to drop a BSA engine to him for a complete rebuild.
Knucles
MEMBER
- Joined
- Aug 2020
- Messages
- 211
I know , I forgot the pictures
Attachments
-
 725C83F4-6C60-4538-825E-F794AB09C933.webp84.7 KB · Views: 515
 -
 8B5DFC9B-33B3-4A91-BBB5-9C91E8FE1057.webp92.3 KB · Views: 526
 -
 94AADE2E-4451-4AC1-A2D4-A86429DFA4AC.webp103 KB · Views: 520
 -
 24978BB3-672D-4EA3-BE7E-1819A7CE0903.webp81.8 KB · Views: 484
 -
 D95B1818-D09D-4070-AD92-C8DF5C6A9D57.webp102.8 KB · Views: 502
Knucles
MEMBER
- Joined
- Aug 2020
- Messages
- 211
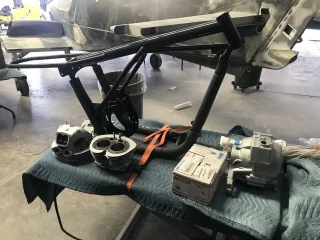
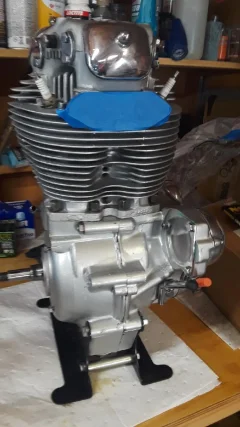
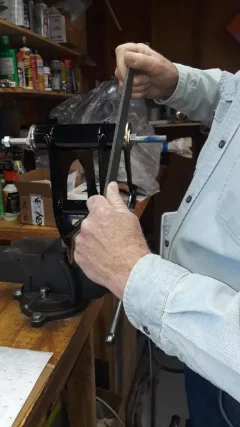
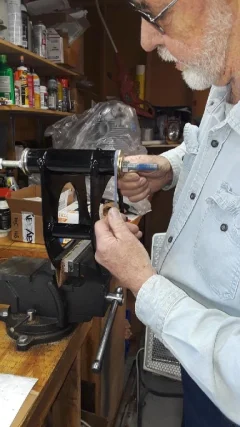
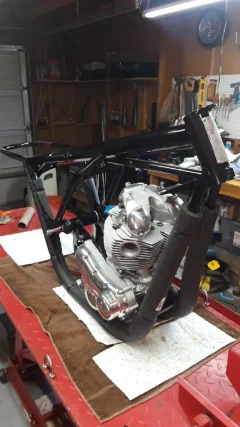
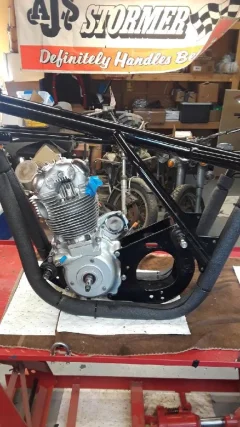
finally back at it .
laid off when last summer came along .
after waiting so long for engine machining to be done I lost interest for awhile .
I think I have every part I need to finish , except the chainguard.
all parts rebuilt and ready to assemble .
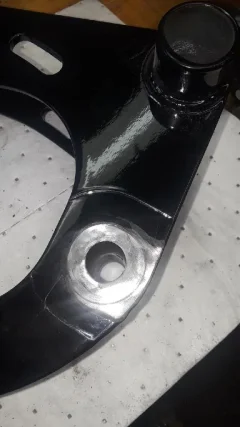
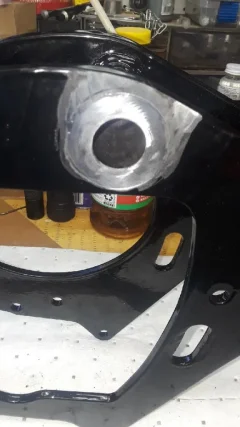
the hard part is cleaning off the powdercoating in areas.
the guys that do the powdercoating don’t really listen to what you tell them .
will post more pics as things go together .
laid off when last summer came along .
after waiting so long for engine machining to be done I lost interest for awhile .
I think I have every part I need to finish , except the chainguard.
all parts rebuilt and ready to assemble .
the hard part is cleaning off the powdercoating in areas.
the guys that do the powdercoating don’t really listen to what you tell them .
will post more pics as things go together .
Attachments
-
 88B9129C-6EAF-4BDC-B9FA-90956FDBE459.webp37.7 KB · Views: 460
 -
 EB550306-ACF4-4363-955E-E783EA1FDA7F.webp32.8 KB · Views: 429
 -
 FC3055D6-9474-4E3E-978D-4C1121DDBE1A.webp60.6 KB · Views: 444
 -
 1F534BE8-90EC-4AEF-A5FB-D17ED87701A3.webp80.2 KB · Views: 481
 -
 D230D8A5-68C9-4000-9D00-827B5AD25199.webp49.6 KB · Views: 430
 -
 6D700D88-3E1E-4D2F-A88A-0A305CE45EE0.webp52.7 KB · Views: 429
 -
 72066657-A1CD-4922-A33C-EE2478DB0752.webp52.3 KB · Views: 417
 -
 37BB57FF-5CF6-4B47-9485-F6BC511B56BE.webp67.7 KB · Views: 439
 -
 1BC20B6A-BFEB-47E7-B70C-FEED452759CA.webp52.8 KB · Views: 476
motorson
FULL MEMBER
- Joined
- Nov 2011
- Messages
- 522
Noticed all the aviation stuff in the background. I assume you have access to acid etch and alodine. I love what that does to the inside of aluminum parts like transmission covers etc. I have also experimented with the process on steel with nice results. I was specifically thinking of the inside of the fuel tank.
Cheers, Dan.
Cheers, Dan.
grandpaul
FULL MEMBER
- Joined
- Jan 2008
- Messages
- 14,129
You better not wait too long to install the horn on the battery tray, then wrestle it into place...Got a bit more done
- Joined
- Dec 2012
- Messages
- 3,723
Anyones advise on things to do in order is much appreciated
I wouldn't be to concerned about the 'horn myth.
If you are going to mount it in the stock location you simply install before fitting the rear mudguard / fender which is around the same time the oil lines to the oil filter are connected (if you have added one) along with the oil tank.
That would be around the same time as swing arm fitment and topping it off with 140 viscosity oil.
Similar threads
- Replies
- 3
- Views
- 1,254