No, easily done from the bottom. Loosed the nuts under the dust boots.
Axle & wheel out.
Remove the bolt up inside. Slap the lower leg to remove the seal, bushing.
No, easily done from the bottom. Loosed the nuts under the dust boots.
Axle & wheel out.
Remove the bolt up inside. Slap the lower leg to remove the seal, bushing.
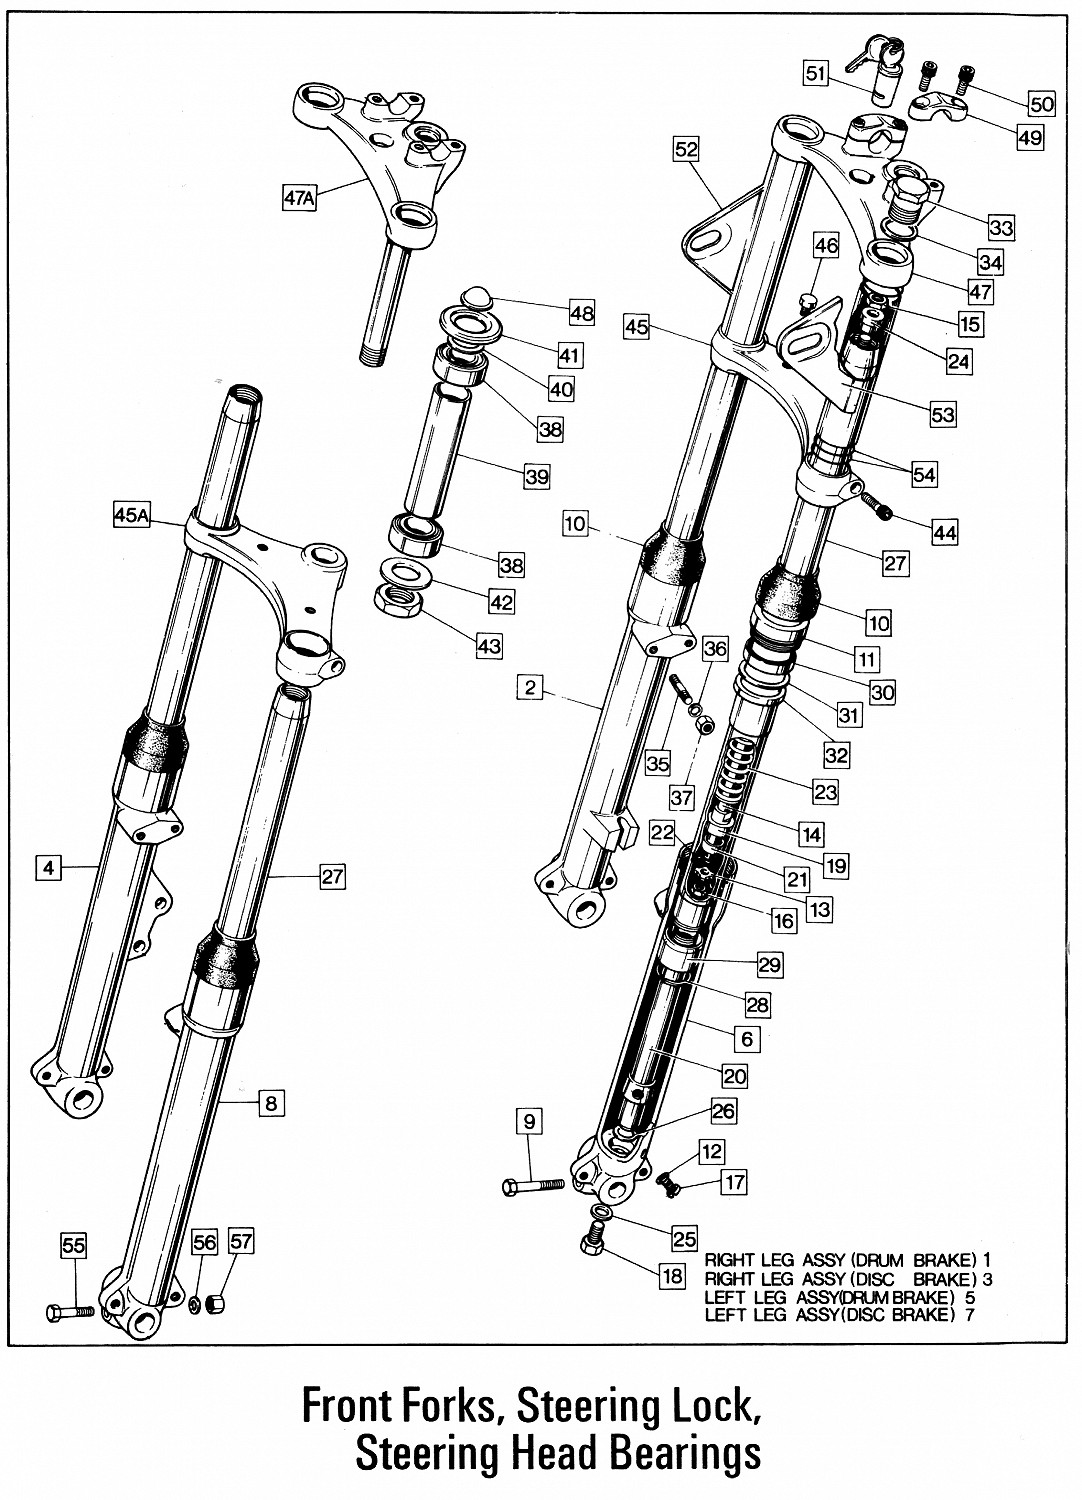
Thanks for the quick reply. Yes, I have the workshop manual. I'm reading from section G, which appears to describe complete disassembly only, therefore working from the top of the stanchion tube. How can the seal be fitted over the lower bush once you have assembled the slider with upper bush and seal?
Thanks for the quick reply. Yes, I have the workshop manual. I'm reading from section G, which appears to describe complete disassembly only, therefore working from the top of the stanchion tube. How can the seal be fitted over the lower bush once you have assembled the slider with upper bush and seal?
Andover Norton Parts are the only Norton spare parts in the market manufactured to original drawings, within the factory-approved tolerances, from the correct materials, and with the correct finish.
I have a parts manual and the AN parts diagram on my shop computer. Do I need to put all components on the stanchion tube in order and the bottom bush on last, then present the slider? If so, does the collar press the seal home when you screw it in? That seems to be the only way.
Apparently, I've answered my own question. I gently tapped the seal home with a tiny brass drift and hammer. I'll find out if it all works when I get it back on the road today. I also overhauled the brake caliper and replaced my M/C with an Andover Norton 13mm, a new stainless brake line too.
The Access Norton Website uses cookies to keep you logged in if you register.
By continuing to use www.accessnorton.com, you are consenting to our use of cookies.