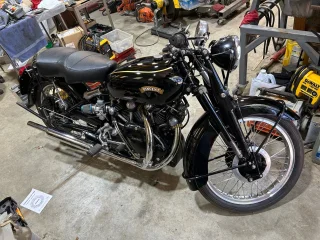
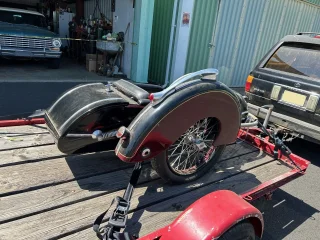
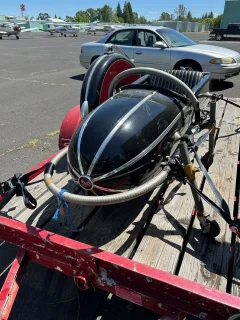
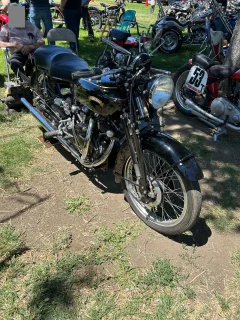
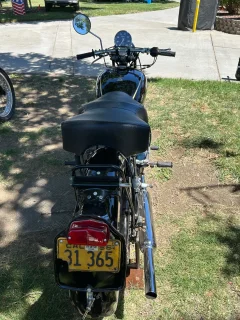
Rapide Project 2023

Went over this morning to pick up a few bits for painting, and there is a set of 2 inch Black Lightning pipes next to the machine! He says he's going to run them to show those Hardley Ferguson riders what a real machine sounds like. =:-O

No photos as my Primo membership has expired. :(
Russ
 
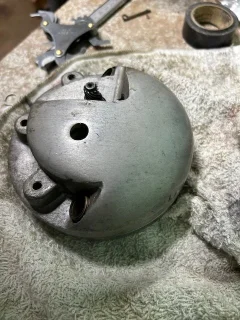
More done this past week. The seat stays, seat, rear fender and headlight are installed. The headlight switch had me stumped; when reinstalling, it would not tighten and slipped in the shell. It seems the plastic (hard rubber?) cover which carry the brass studs has shrunk over time. A second switch shrunk as well. I fiddled with it for a few hours, but the owner solved the problem with some meticulous removal of material allowing the switch halves to unite more closely.

I tried fitting his siamesed exhaust and found they just don't fit. Asking the owner when he bought them, the response was "a long time ago". My memory from the early '80's is non-fitting exhausts had been supplied and assume this is one of those sets. :confused:

Started wiring at last session; though the owner bought an aftermarket harness, a custom harness is necessary to include the electronic ignition and electric start. Though the electric start grounds the battery to the engine, I also included a system ground that bonds the UFM and headlight shell to the battery. All wires have been run and tagged. Harness will be made up at the next session.

Russ
 
Last edited:
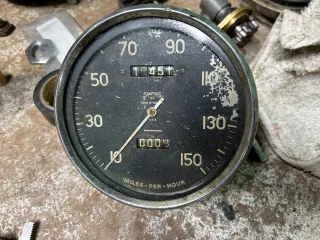
This Rapide is coming together, and tomorrow, it should be ready for its first start in 60 years! In the meantime, the speedometer is in Medicine Hat, Alberta for a rebuild. Here are the before photos. Note, the right-angle drive is missing from this speedo; VBC is supplying his last one for this build.

I'll post "after" photos when it returns to the US.

Rapide Project 2023Rapide Project 2023
 
The bike is together, but it is not ready to run. First kick, the lever did not return up; the ratchet is not releasing for whatever reason, and this may be associated with the new electric start install. Will look for the cause next week.
 
Good day all.
I also posted a similar thread in the VOC forums.

I found the ratchet assembly has insufficient clearance to allow the ratchet action returning the kickstart crank to its resting position.

IMG_0400 - Copy.jpgIMG_0403 - Copy.jpg

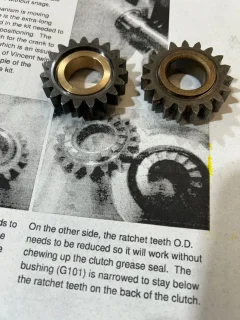
The Grosset kit came with a G46 that was recessed for the G101 bush similar to the photo in the instructions. See photos.

The G46 (left) came with the starter kit. It is recessed as suggested by the drawing included with the kit. The stock G46 is on the right. I assumed the G46 that came with the kit was ready to install, so I assumed it needed no more work for it to function.

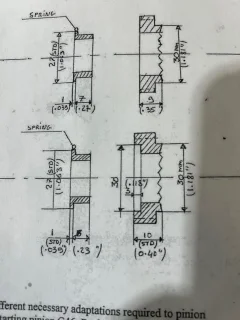
The second photo shows two suggested methods of modifying G46. The lower drawing including the recess is recommended, and the G46 provided is indeed recessed. The dimension for the G46 in the drawing is .400".

Unfortunately, there is insufficient clearance for the ratchet to function, so I wonder if I made an error in installation. The modified G46
from the kit measures about .500" instead of the .400 on the drawing. So if this G46 is further reduced, it will remove the recess. Any thoughts are appreciated, including how to reduce the thickness of G46.

Regards,
Russ
 
I received the following from Francois Grosset:

---------- Forwarded message ---------
From: Grosset, pont ricoul <pontricoul@aol.com>
Date: Tue, Apr 23, 2024 at 11:02 PM
Subject: Re: Vincent Electric Start G46 question
To: 998 cc <rt998cc@gmail.com>


Hi Russ,
The modified G46 is fine most of the time .
Your gearbox final drive shaft or its lengh if not original part, is probably slightly shimmed to the right side of the crankcases which explains this trouble .
have a dry test with no spring cup fitted, it will tell you how much space is missing .
Grinding the ears of this cup should be enough to allow space to have the rachet to work.
If not , you will have to play with the spring itself .
IF you do not have it, below he updated extra instructions /recommandations.
I hope this answer will help , kind regards, francois .

Ideally, have the opportunity to check your gearbox, why not replace the bronze bushes , shimm properly etc ...
This will allow to have your final drive shaft out (the short one that carry the chain sprocket ) .If so , fit this shaft in a lathe chuck + an old gearbox final drive bearing (or a piece of tube the same width) , the final drive chain sprocket, its big nut fully tightened , and remove a bit of material out of the final drive end , ideally say 2 mm .
This will ease you to the have (step 5) the G46AS kick start pinion rachet to work properly in the 'clutch stage', ie when the kickstart crank returns to its top stop position; The oil seal lip is sometimes protruding a bit too far out, best to machine the kickstart pinion ratchet down a bit more than 30mm , say 29. 8 mm od can avoid the lip to interfere with the ratchet teeth.
you MUST NOT need to help the kickstart crank to return to top with your hand; this rachet must be free as originally but .... you have to manage with the space !
Then , always have a fully charged GOOD battery ( YUASA YTX14 H BS, NO cheaper copies) , well setted engine ect .....
I tested many batteries and still recommend the YUASA YTX14 H BS which is 240CCA instead of ytx14bs(200CCA),both are exactly the same size but Hbs one gives 40CCA more power during the electric starter stage. Lithium ones are smaller, lighter, more expensive, interesting to fit to special sporting bikes but plan to have bigger heavy battery wires made if its length is increased, 14mm2 diameter or more..
There is no problem at all with the electric starter fitted to a well setted bike and normal use. This system was designed for very std vincent engine 25 + years ago, however many are fitted to high compression, bigger bore and stroke, it works fine with a perfectly tuned engine that starts first spark with just a kiss on the starter button. Be aware of your ignition system, more settings attention is required when twin plugs are fitted (ask about this matter if necessary), DO NOT have a manual advance, a day or another you will forget to push your ad lever to retard when having to restart after an engine stall at traffic light with a car queue at your back, or this... or that = expensive £,$,€ssss reductor gear teeth repair. Ideally, have a well setted mechanical ATD, reliable system which is not sensible to heat, voltage or amps variations. Good original magneto, points or electronic ignition having mechanical atd is the perfect choice. My ignition system- electronic spark with ATD integrated into a special body- matches perfectly with single or twins electric start equipped or not. Ask for information if needed. A few bikes having modern magneto reported having troubles, mainly when connected for twin sparks, be aware of it.
To start the engine , don't pull the throttle (this is not a jap'nese), keep(adjust) the idle speed quite high to NEVER have the engine to stall because this causes the engine to turn backwards -same as backfire etc....etc .....you need to avoid all this to save disappointment and expensive repair. Actual fuels tend to plug the carb jets when the bike stays unused for too long. CHECK well and clean your pilot jets if your engine does not iddle perfectly, BE sure of throttle cables synchronisation.
You will notice that the bike is difficult to push backward when a gear is engaged, select neutral that is supposed to be available into your gearbox to disengage gear. Of course you need to have a good clutch that does its job properly. Rearward block-up is much appreciated by riders at stop on hills and is not a cause of shear pin breakage.
Common problems caused by:
Weak or dead battery. Have the bike headlight ON and push the button, if it does not turn the engine as before, your battery is gone.
Clogged iddle jet(s), mainly during spring restart. Don't lift the throttle stops, don't pull the twistgrip to compensate it but have your carbs cleaned.
Sump level too high, if you do it sometimes in your kitchen, you should have noticed that is becomes more difficult to pull the string of your salad spinner after a few string pull when the water centrifuged out of the salad is down in the can (sump!) bottom, it does the same if your crankases level is too high: the flywheels are oil flooded and the starter motor gets the overload , so drain the sump and have a go.
If low revs cranks: could be frictions : in the gearbox, primary drive, clutch drum, sprag clutch rubbing the G66AS or inner G1 cover etc .....
The Engine Shock Absorber and a worned chain blade can be a source of trouble.
This sort of battery disconnector device can be useful for winter rests or to quickly stop an electric problem.
Some of this starter kit are still operating from original having done up to + 100 000 kms with their original shear pin, and they are over 20 years old, so the bikes they are on are performing properly for that to happen. That`s all it takes. So if you have a duff bike, you`ll soon have a duff starter !
Feel free to come back TO ME if needed instead of reading some posts and answers on the internet, I have been forwarded some of it that contained funny replies and crazy advices from, for sure people who did not understand this 'starter area', forget that way please.
Then ride your Vincent and ENJOY .
François .​
May be you already viewed these below , that's the way it should start , the eglis in the older video are hot engines perfectly tuned and are fitted with my electronic ignition .

Traditional way , Ile de Man 2003 : i am the one who finally kick start: , i fitted a starter since !
last century , before 2000 using a basic video : : no valve lifter ,all of these bikes with my ignition
19 mai 2020 : : no valve lifter
Reg Bolton racer : using valve lifter
Vincent Rapide 1000 twin, tech talk and ride out with fly past :
Another Vincent motorcycle back on the road again:
The way to 1st start a rebuilt or new built engine: New Vincent HRD engine build and first start up


Hello Francois.
This is Russ Williams in the United States. I am installing your electric start system on a 1951 Vincent Rapide. The kit came supplied with a modified G46 ratchet pinion that was supplied with the recess on the spring side. I assumed it was machined to fit without modification and installed it; however, when assembled, the ratchet is locked and will not allow the kick start lever to return to its resting position. This modified G46 measures about .500" instead of the .400" shown in the instructions. Does it need to be ground down to .400"? This will remove the recess for the spring.

In the attached photo, the G46 from the starter kit is on the left.
Thank you.
Russ Williams
California
 
I didn't realize all these video links were in Francois' reply above. If these are problematic for the forum, I will edit that post. Moderator, please advise.
Russ
 
Good news. Francois was spot on. Taking down the spring cup provided the necessary clearance.

The better news is the Rapide came to life about 2:30PM local time this afternoon. It runs very smoothly and kick-starts easily. It took about two minutes for the return oil to appear at the filler neck--it seemed like 10 minutes! It is also surprisingly quiet for a Vincent motor--it is more quiet than my Black Shadow. A short ride revealed it is very a responsive motor. It needs a bit of massagging as they all do after a rebuild, but the owner is very happy hearing this bike run for the first time since the 1960's. He thought it would never happen.

It has a few oils leaks from the oil lines that I'll deal with tomorrow. We'll attach the side car in the next few weeks, so he can ride it.

Anyway guys, it runs well. I'm hoisting a pint as I type!!

Photos shortly.

Best regards,
Russ
 
The owner shot a short video of the first start and ride. It is on youtube now, though temporarily. The link:

I kickstarted the bike as this was more of an engine test, 1. to see if/how it would run and 2, to see if it was safe to use the electric start. That is me at the helm. The smoke is from an oil leak that dripped on the front exhaust. No smoke from the exhaust. I'll install the touring fenders as soon as the oil leaks are cured.

Russ
 
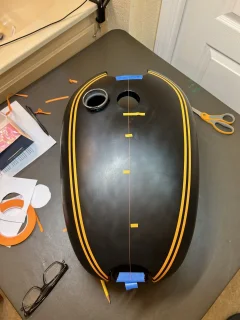
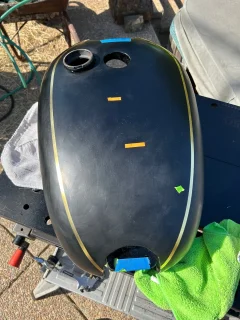
The oil leaks are gone; the fenders are now on, so the only thing left is the petrol tank. The tank on the bike in the video will not be used; the owner has two other tanks that are in better shape. I have not done gold leaf lines in 14 years, so it's like new territory.

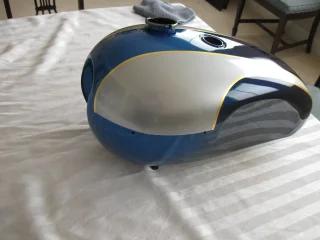
My last paint/gold leaf tank job from 2010
Rapide Project 2023
:
 

Attachments

  • Rapide Project 2023
    82 Bonneville 002.jpg
    234.9 KB · Views: 99
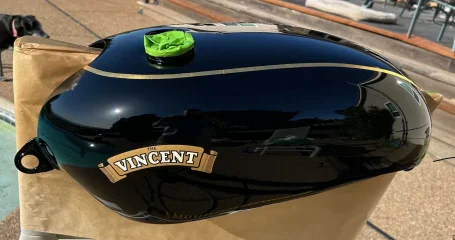
Here is the tank. I finished it yesterday. Will install on the Rapide in the next few days and go for a ride. :)
 

Attachments

  • Rapide Project 2023
    Rapidetank-layout_c.jpg
    258.8 KB · Views: 89
  • Rapide Project 2023
    Rapidetank_leaf_c.jpg
    369.9 KB · Views: 91
  • Rapide Project 2023
    Rapidetank1c.jpg
    321.4 KB · Views: 95
The tank is on. We attached a mirror taken off of a sleeping BSA A-10; with my helmet and earplugs in place, I touched the starter button, and the Rapide fired right up. After turning the Mikuni enricheners off, the rear cylinder leaned out and began missing and sputtering--a bit of flame was spitting back into the rear air filter. Engaging the rear enrichener brought back reasonable running. After going back and forth for a couple of minutes, the cylinder finally settled down and idled normally.

Oil is returning to the tank, so engaging first gear, I rode out of the shop building, through the gate and out past/along side a ford truck that was nearly blocking the dirt driveway. Out onto the road, I eased it through all four gears for the first time; all went well, and surprisingly, the shifting is relative smooth and predictable. I took it up to about 55MPH and noted easy steering and handling. The wheels were quickly aligned by eye not using a stringline.

The only possible problem noted was with the charging system; it is pegging the ammeter at about 2500 RPM. The battery is a Lithium Ion type which may be part of the problem. The battery manufacturer's literature states the charge rate must not exceed 8 amperes. Charging is by Alton single-phase and Tri-Spark regulator.

The brakes are spongy and need to bed down a bit.

Returning from the ride, it took about five minutes before the Rapide marked its territory with a spot of oil.

All in all, the owner is very happy and was calling his friends to come over to see the machine.
Rapide Project 2023

Regards and cheers!
Sipping a glass of Shieldaig 21
Russ
 
We're at the final phase of the project--the sidecar.
It is a nice Steib, and it is an older restoration that only needs a little wash and polish. The previous owner had it attached to his Vincent, and it came with all of the attachment hardware.

I have never fitted a sidecar; does anyone know of instructions on how to re-fit the Steib to a Vincent? I could probably reason it out, but a drawing would be better.

Steib-3c.jpg

Steib-1c.jpg
Regards and cheers.

Russ
 
Well....
We were attempting installation of the Steib sidecar earlier in the week and almost had it dialed in when the front mounting clamp broke. It must have had some hidden damage. The owner is relieved it happened now instead of at 60 MPH.

This weekend was the Fort Sutter Chapter of the Antique M/C Club of America's show and swap in Dixon, Ca. We brought the Rapide down and parked under a shade tree with other nice British, American, Japanese and other iron. There were five Vincents there including two "Vindians". Only a few Nortons including a "barn find" Interstate. Lots of American machines from the 19-teens on up including many project bikes.

We rolled up with the Rapide on a "tilt trailer", so a few folks gathered to see how I'd manage getting the Rapide onto the pavement. No problems, but there was astonishment when I hit the starter button! Overall, the Rapide was well-received.

Met some great people including a few "new" folks who own Vincents.

Wish I'd taken more photos of the meet.

Regards and cheers!
Russ
Russ
 

Attachments

  • Rapide Project 2023
    Dixon-Vin_mod.jpg
    737.4 KB · Views: 86
  • Rapide Project 2023
    Dixon-Vin-2.jpg
    580 KB · Views: 78
Last edited:
My brother has raced Vincent sidecars in classic speedway. His comment was 'every bolt seems to be a special', Phil Irving was involved in designing Vincents and Velocettes. In both cases, the owners seem to be more in the hands of the dealers.
 
An update.

The Youtube video is back up.


It was too hot this summer to work in the shop. No more progress with the sidecar, though the owner found a replacement bracket in Germany via epay.

In August, the owner asked me to put some miles on the Rapide. The pilot jets were a bit lean, so my box of Mikuni bits came to the rescue. On the ride, I took it very easy at first but later had it up to 70 or so. The engine is very smooth and crisp. During the ride, I stopped at my home for lunch and to show the wife what has taken these past months to build.

The weather pattern is beginning to shift back toward fall temps, so the sidecar should be on soon. Met with the owner this morning; at this point, he is undecided on building the Black Shadow. With the exception of the girdraulics (which need rebuilding), the Shadow is completely dismantled right down to the crankpin. Time will tell.

Regards and cheers.
Russ


s
 
Still building the Rapide. My wife came down with Covid, so I have not been back to work on the bike in a week.

Making progress; I rebuilt the two dampers and now have the UFM, gridraulics and RFM on.

A setback? When mounting the timing side rear footrest plate, one of the long engine bolt/studs was too short! I was thinking the owner had used the the wrong bolt when he put the cases together in '69. The completed primary drive had to come apart to check the bolt. Tapping the bolt out, I realized it was the correct bolt just not tapped home. It turned out to be a good thing because that bolt had not been sealed, nor had the others. They are now.

The Borrani Rims are laced/trued--just need to drill the valve stem and security bolt holes and put the tires (tyres) on. While shimming the rear wheel bearings, one of the bearing races fell out in my hand! Will check the fit next week and may refit it using Loctite 620. Relined brake shoes from the Spares Company are in the brake plates.

During my time away this week, I built a variable voltage power supply to do some electroplating. The plan is to experiment using fine beadblasting media on original fasteners to somewhat replicate the orignal cadmium plate using nickel. We'll see how it works.

More photos soon.

Russ
In the US cadmium plating is still possible. I use some guys in cleveland that do a lot of aerospace work. Alternatively, although I have not done it, Caswell has a whitening agent to be added to zinc plating to replicate cadmium. There have been a few favorable reports in the amca mag about it. When I don't have an original fastener, I use the commonly available stainless ones and blast them to make them flat. They are too grey as compared to fresh cad but cad greys with time to converge the color difference. The blasting makes the gloss reasonably the same.

I am restoring two rapides (a touring C and a B that is will be somewhat customized) now and really enjoying the builds.
 
Back
Top