
Thanks for visiting Access Norton
- Guest view limit reached
- Create a free account (more details)
- Already a member? Click here to login
You are using an out of date browser. It may not display this or other websites correctly.
You should upgrade or use an alternative browser.
You should upgrade or use an alternative browser.
First time going deep – Gear Box.
- Thread starter NickZ
- Start date
NickZ
VIP MEMBER
- Joined
- Oct 31, 2018
- Messages
- 508
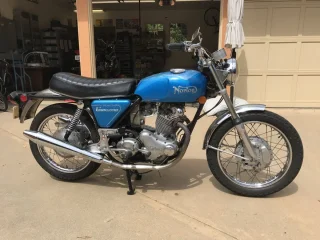
So, a year & a half ago I revived my 1971 Roadster that I bought in 1973. It was my only mode of transportation until 1976, and a frequent rider after that until 1981 when I parked it after I took it in to a shop for a tune up and instead they removed the head and cylinders, telling me it needed rings. I went and picked it up like that, knowing that I could do my own ring job if it really needed it. Well, life got in the way, and I never touched the bike, except to move it with me when I moved. For 38 years it looked like this….


NickZ
VIP MEMBER
- Joined
- Oct 31, 2018
- Messages
- 508
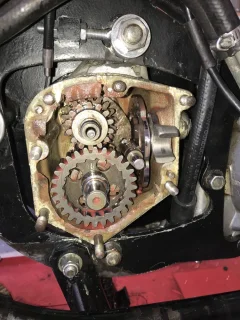
As I related on another thread, a short while ago, near the end of a ride, my kick start lever stuck in the full down position when I tried to start it. I got it home and found the problem, which was a loose kickstart shaft bushing (the one that goes in the inner case) which led to a ground up pawl plate.
NickZ
VIP MEMBER
- Joined
- Oct 31, 2018
- Messages
- 508
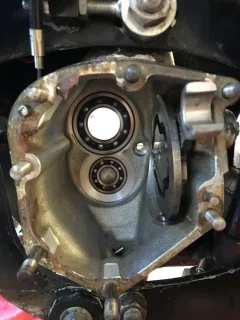
To this point, I had never gone past removing the outer cover of the gearbox. Now that I had the inner cover off, I figured I had better replace the layshaft bearing. Heard a lot of scary stories about that and since the bike was only 2 years old when I bought it, I assumed that the PO had not done it. I know it hadn’t been done since I have owned it.
When did that fault become identified and communicated?
And, since I was doing that, I might as well do a gearbox overhaul, i.e. everything out and inspected, bearings, bushes, springs, seals & gaskets replaced. I have the AN gearbox overhaul kit (06.7279) that I bought for a different project bike, so I though I might as well dive in to new waters and learn how to service the AMC gearbox. I bought the Hemmings DVD, I ordered some special tools and I was on my way.
NickZ
VIP MEMBER
- Joined
- Oct 31, 2018
- Messages
- 508
The Kickstart shaft bushing was allowing the pawl to travel over the top of the pawl plate and it eventually jammed into the edge of the plate. I think that is why it hung up. So I definitely need a new kickstart shaft inner cover bushing and a kickstart pawl plate. The bushing is in the parts diagram (04.0473) but the pawl plate is not on the diagram. I guess because it is part of the inner cover assembly. Well, I knew if I posted the question, LAB would immediately tell me how to find it. But I figured, maybe I can find it. So a search on AN of all thing ‘pawl’ brought it to my screen as 04.0071, and in stock. Bingo!
NickZ
VIP MEMBER
- Joined
- Oct 31, 2018
- Messages
- 508
Next issue:
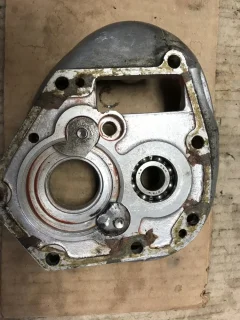
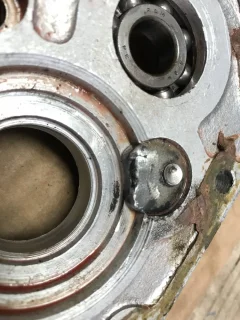
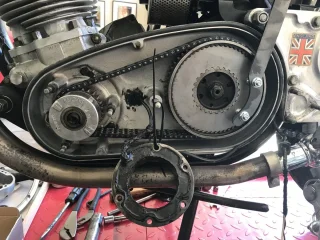
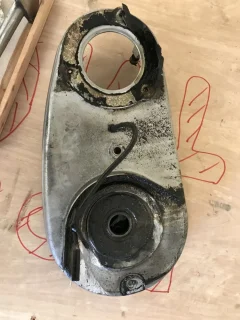
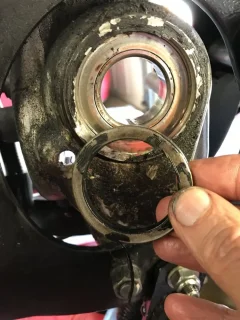
It never dawned on me before when I have had the outer cover off, but it is now obvious to me that someone had removed, or at least attempted to remove the inner cover before. The lock ring has some serious punch marks on it and the alloy that holds has a lot of dings as well. The lock ring came off for me quite easily, using the AN tool. So, has someone been in this gearbox before me???
It never dawned on me before when I have had the outer cover off, but it is now obvious to me that someone had removed, or at least attempted to remove the inner cover before. The lock ring has some serious punch marks on it and the alloy that holds has a lot of dings as well. The lock ring came off for me quite easily, using the AN tool. So, has someone been in this gearbox before me???
Attachments
NickZ
VIP MEMBER
- Joined
- Oct 31, 2018
- Messages
- 508
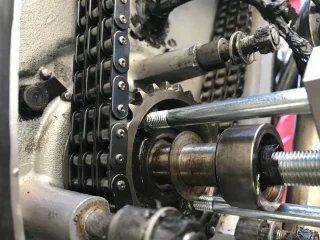
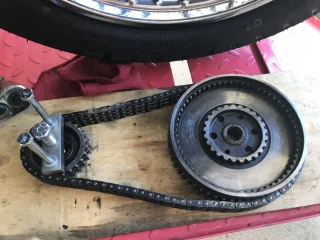
Next, I removed the primary chain, engine sprocket & clutch basket. Never did this before either, but with the puller tool and the clutch locking tool it went pretty much as the workshop manual said, which I do not find happens very often with Nortons. Oh, there was the clutch locating circlip, which I had to ask for help to get off. Also, it seemed like it took a lot of force from the puller tool to get the crankshaft sprocket off its shaft and when it gave, the spacer was propelled sharply into the tool.
Of concern, the clutch fixing nut was only finger tight. Clutch has been working fine in spite of that.
Of concern, the clutch fixing nut was only finger tight. Clutch has been working fine in spite of that.
Attachments
NickZ
VIP MEMBER
- Joined
- Oct 31, 2018
- Messages
- 508
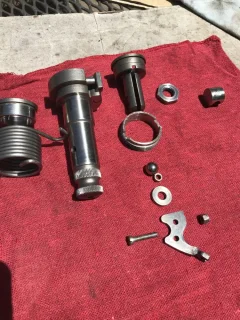
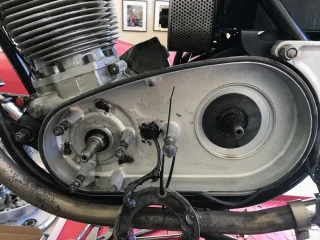
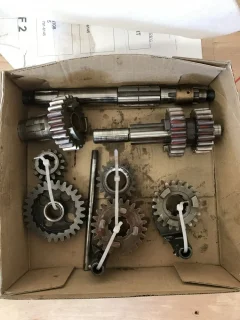
Next, removed the inner chaincase and the drive sprocket and began disassembling the gears. I removed & marked the gear pairs, selectors and shaft. I removed the spacer and oil seal on the left side of the gearbox.
Attachments

NickZ
VIP MEMBER
- Joined
- Oct 31, 2018
- Messages
- 508
I was unable to loosen the bolts on the cam plate plunger, quadrant and cam plate spindles. With the gearbox on the bike, I just couldn’t get good access and they seemed like they were taking a large amount of force without moving at all. Those items seem to be functioning well, nothing feels loose and what I can see of them looks fine. So I have decided not to risk stripping anything trying to get those fasteners off so I plan to leave them as they are.
Attachments
NickZ
VIP MEMBER
- Joined
- Oct 31, 2018
- Messages
- 508
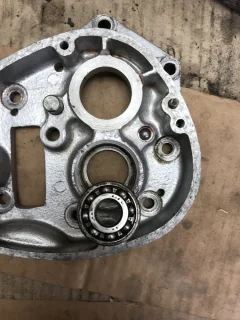
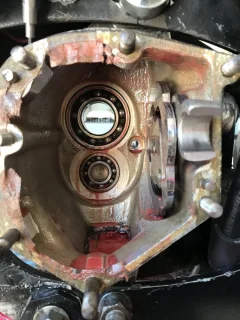
Next, removed layshaft bearing with blind bearing puller & heat gun.
Installed the new roller bearing. When I pulled the new bearing out of its package, I guess I wasn’t careful enough, and the inner race popped out before I could see which way it was oriented. I’m not sure I put it back the way it came. I hope that does not matter, cause its in there like that now.
Installed the new roller bearing. When I pulled the new bearing out of its package, I guess I wasn’t careful enough, and the inner race popped out before I could see which way it was oriented. I’m not sure I put it back the way it came. I hope that does not matter, cause its in there like that now.
NickZ
VIP MEMBER
- Joined
- Oct 31, 2018
- Messages
- 508
I removed the sleeve gear bearing with a drift from the left side. Putting the new bearing in has turned out to not be that easy. With the gearbox on the bike, the bearing is in a vertical plane and I have been unable to get the bearing started squarely in its housing. I am having a shouldered drift fabricated, and hopefully that will work.
NickZ
VIP MEMBER
- Joined
- Oct 31, 2018
- Messages
- 508
NickZ
VIP MEMBER
- Joined
- Oct 31, 2018
- Messages
- 508
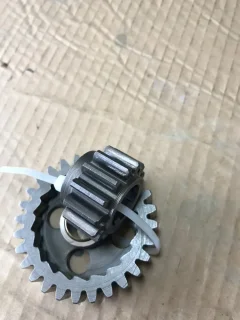
I removed the 2 sleeve gear bushes and 2nd main gear bush for replacement. A new 1st layshaft gear bush will come installed in the new gear. I plan to leave the 3rd layshaft gear bush as is because I can detect no play at all in it, and I can’t figure how to get it out anyway.
NickZ
VIP MEMBER
- Joined
- Oct 31, 2018
- Messages
- 508
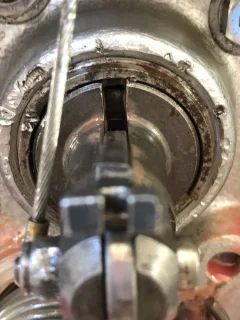
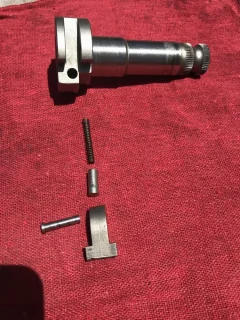
I was unable to remove the bush that is inside the kickstart shaft using any of the standard methods. I tried heat & banging on wood block. I tried heat and a blind bearing puller. I tried the hydraulic method. Eventually I had to have it lathed out. The new one was pressed in.
Similar threads
- Replies
- 10
- Views
- 1,121