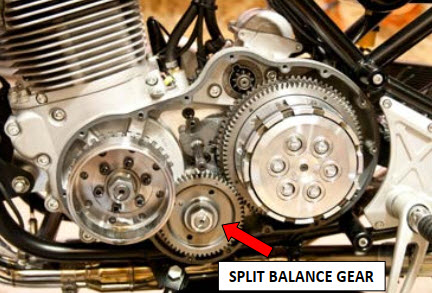
Norton 961 Split Balance Gear Spring Replacement and Tension Setting
Download the complete PDF version using the green download button at the top right of this page for an illustrated Norton 961 guide covering split balance gear spring replacement and correct tension setting. This workshop reference shows how to remove the split balance gear, replace the internal tension spring and set the gear preload correctly before reassembly.
The guide begins with removal of the retaining bolts and rotor clip, followed by separation of the split gear components and installation of the new tension spring against the locating dowel. It then explains how to reassemble the gear and confirm that it moves freely without forcing the spring.
Later pages show the specialist positioning tool, tension wrench and gear jam tool used to correctly index the split gear. The procedure explains installing the position tool one tooth to the right of the dimple, applying spring tension until the dimple aligns with the position stud and locking the gear in place before reinstalling the bolts.
Contents Include
- Norton 961 split balance gear spring replacement
- Removing the balance gear retaining bolts and rotor clip
- Separating the split balance gear assembly
- Installing the new tension spring
- Checking free gear movement after reassembly
- Position tool, tension wrench and gear jam tool references
- Correct one-tooth setup beside the dimple
- Aligning the dimple with the position stud
- Avoiding over-travel and spring stretching
- Locking the gear before final bolt installation