Fettling a Norton Commando 750

Joined
Mar 21, 2025
Messages
19
Country flag

Introduction​

I’ve inherited a Norton Commando 750 from my dad. He’s still alive and kicking, but he’s moved on to sports cars and passed the bike down to me. The bike is in good running condition and has developed a nice patina over the years. My plan is to mainly ride and enjoy it, but I’d also like to make some improvements—particularly around safety and rideability. I’m also hoping to gradually return the bike to a more original appearance, as it’s currently set up in a café racer style.


0MrhMK3.jpeg


I’ll use this thread to document and share the progress I make as I fettle, fix, and improve the bike.


The bike was produced in 1970 and imported into Norway in 1994. Between 1994 and 1996, it passed through the hands of three different owners. In 1996, it was purchased by the individual who eventually sold it to my dad in 2000. My dad rode the bike fairly regularly from 2000 until we moved abroad in 2006. After that, the bike was put into storage. From around 2010 onward, he would occasionally take it out to start and ride briefly, but it hasn’t seen any meaningful use since 2006.


Quite a bit of work has been done to the bike over the years, mostly by the previous owner before my dad. In terms of the engine, the camshaft was honed, the engine main bearings and seats were replaced, and the oil pump was flattened. The valve controls, valves, pistons, piston rings, and gudgeon pins were all replaced. The magneto/distributor chain was changed out, along with the gaskets, seals, and exhaust lock rings.

On the intake side, the throttle valves were re-sleeved, and the original air filter box was replaced with a K&N air filter box. The gearbox had its gaskets, seals, and bushes replaced, and the primary chain drive was converted to a belt drive system.

The frame and body received a number of modifications: the rear suspension was swapped out for adjustable Koni units, and the tank, seat, and handlebars were replaced with Dunstall, Manx, and Vincent-style components, respectively. A quick twist throttle was installed, and the front and rear isolastics were replaced with Vernier units. The headsteady was changed to a Norvil racing version, and the front wheel bearings were also replaced.

Electrical upgrades included the installation of a Boyer electronic ignition system and rectifier, along with a modern H4 headlamp unit. Additionally, the tachometer and speedometer were both serviced.

On the frame and body, I plan to mount Kegler swing arm clamps—a modification strongly recommended in Norman White’s restoration book for improving stiffness in the cross tube. I also want to patch some of the paintwork on the frame and engine, and reattach the center stand.

Electrically, the wiring harness needs a complete rebuild. It currently has frayed and mismatched connectors, splices, and general messiness that could lead to future issues.

The throttle cable and wire need replacing, and the carburetors will be swapped for new Amal Premier units. The current carbs are slightly warped and have sticky slides. They were probably re-sleeved too tightly.

In the brakes, wheels, and tires department, the current Avon RoadRider tires look fine but are from 2009, so they’re well past their safe service life. I’ll replace those along with the brake shoes, which date back to 1999. I’m also considering adding a front brake stiffening kit, although I’ll first assess whether new shoes and a good adjustment will make that unnecessary. Additionally, I want to add a rear brake safety spring and replace the front brake cable with one that includes a rear brake light switch.

Finally, the instrument bezels and lenses need replacing. At some point, something was dropped on the gauges, denting both bezels and cracking one of the lenses.
 
I decided that one of the first tings to do was to all the oil on the bike: engine, gearbox, forks and swing arm. I soon discovered that the swing arm has been greased at some point when I inserted a hypodermic syringe containing oil into the swing arm. When i removed it it was coated in grease. Time to open it up and have a look.

Fettling a Norton Commando 750


So, packed with grease. That means that the first major job on the bike is to disassemble the swing arm, clean, re-oil, polish and reassemble. Might as well order some Kegler clamps and it those as well. Removing the spindle went well. Fortunately, there was so much grease in the swing arm that is has prevented anything from rusting. Only some slight corrosion on some parts which should be easy to remove with some polishing.

Extraction of the Oilite bushing using a home made puller made out of a socket, a length of threaded rod and some bolts.

Fettling a Norton Commando 750


I dont have the time to work on the bike again until next week. Hopefully the the Kegler clamps have arrived from Holland Norton Works by then,
 
Two things...the SA bushes need to be replaced as the pores will now be clogged with grease and the whole point is to have oil soak into/through the material. Noted you plan to fit a front brake light switch....note the "period correct" in-line switches don't seem to be much good...I tried one recently on a Velocette from TLS drum and found it changes the lever feel significantly. towards the mushy side of things. A better option I'm planning is to find a brake switch of a scooter or classic dirt bike for example and work out a way to mount it on the lever perch.
 
Your list looks good to me. I have a 70 commando myself, but it's highly modified so you wouldn't be able to tell from looking at it. The kegler clamps are a must for our bikes. I chased a snake-like ride for decades before I became aware of and then installed the kegler clamps on my bike.

Personally, I like the rear sets on my bike instead of the more forward stock footpegs I modified the aftermarket brake lever spring that is for the forward controls to work with the rear sets, although I don't think the brake lever on the rear set would hit the ground like the stock lever would if the cable breaks. Still, it's a good safety feature.

I have a later model headlight shell, which you seem to have also. I found an LED headlight bulb that draws less amperage than a halogen and is very bright. I bought it elsewhere 10 years ago, but a lot of people recommend the Paul Goff site for LED headlight bulb replacement.

http://www.norbsa02.freeuk.com/goffyWhyNotLEDs.htm

Honestly, I like the look of your bike. I'd keep the handlebars and maybe just get offset risers for them to raise them an inch and pull them back and inch. The fuel tank looks like it's from the fiberglass tank era. It's beautiful, but if it's glass, I would change it. I switched my bike to an interstate metal tank. The roadster tanks just don't hold enough fuel for my liking. That's all up to you.

It's a beautiful bike as it is right now. It might not be the most comfortable riding position, but it sure is pretty.
 
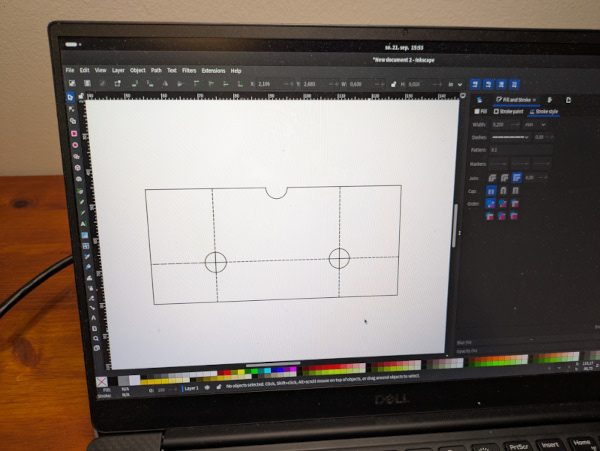
I have finally found some time to work on the Commando. The Kegler clamps arrived by the end of July, but I had a hard time sourcing a 1/4 inch drill bit to drill the swing arm pivot tube. I created a template in a vector design program to make sure I placed the holes correctly.
Fettling a Norton Commando 750


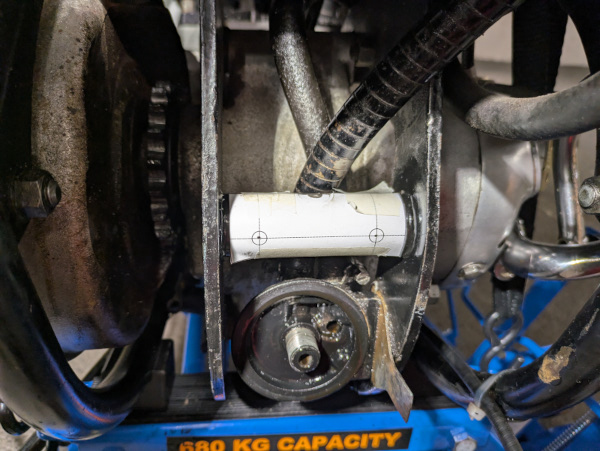
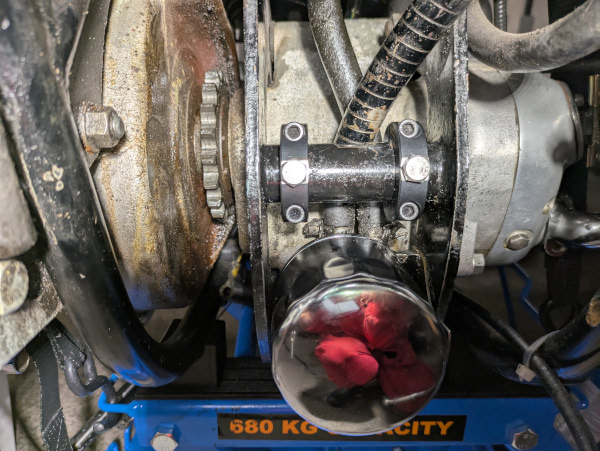
I punched the marks, used some cutting oil for lubrication and drilled the holes and fitted the clamps.
Fettling a Norton Commando 750


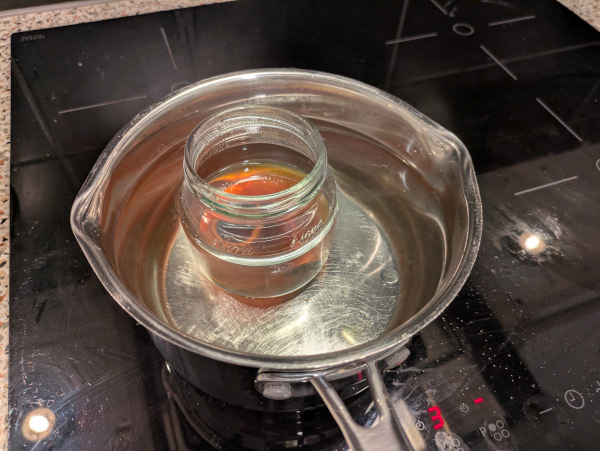
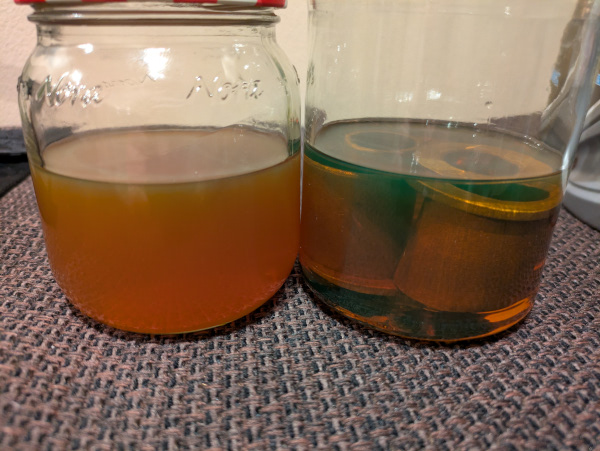
The Oilite bushings were heated for 10 minutes in a water bath to 80 °C to expel old oil, then placed in new, cold EP90 oil. Quite a difference between the heated and cold oil.
Fettling a Norton Commando 750


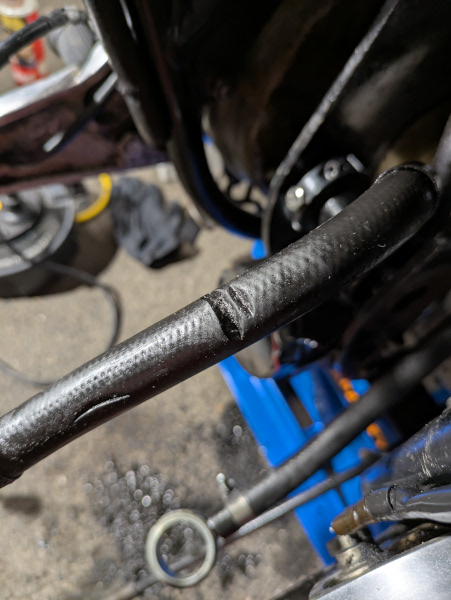
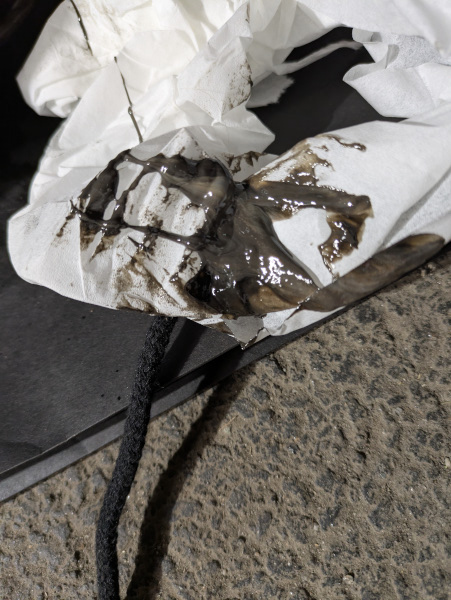
I also decided to change the engine oil. Turns out there was a lot of sediment in the oil tank which took quite some time and shaking to remove. I also discovered that the return hose fro mthe oil filter was almost sawed through. So changed that as well.
Fettling a Norton Commando 750


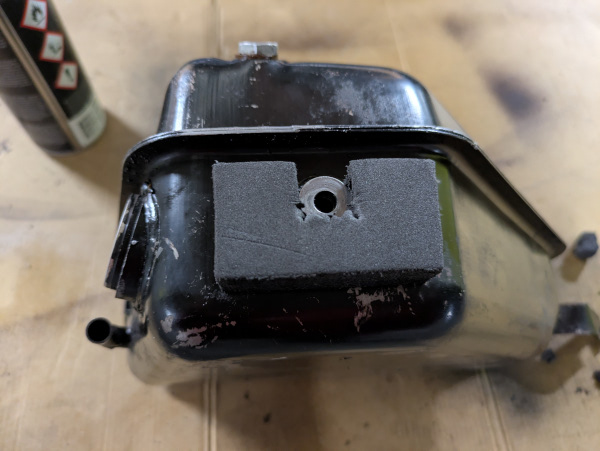
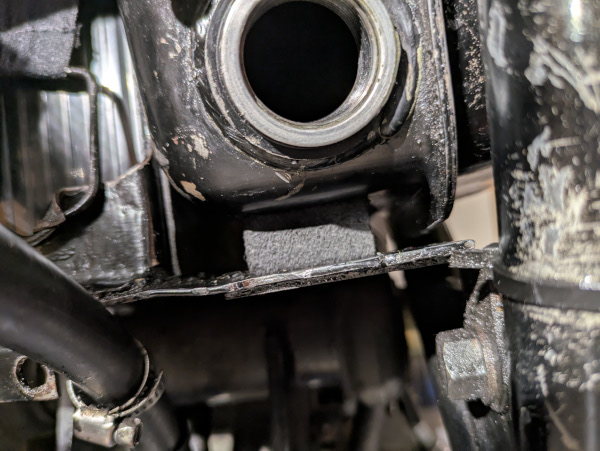
I also glued some dense EVA foam to the underside of the oil tank, and to the side of the battery tray.
Fettling a Norton Commando 750


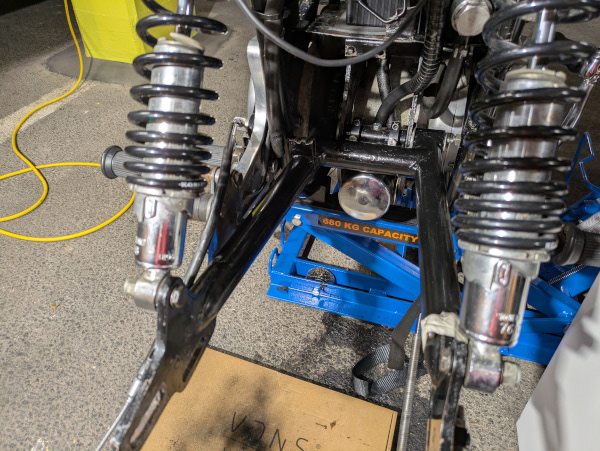
Finally I pushed the bushings into the swing arm, replaced the oil seals, reinserted the spindle and put everything back together.
Fettling a Norton Commando 750
 
Last edited:
I have finally found some time to work on the Commando. The Kegler clamps arrived by the end of July, but I had a hard time sourcing a 1/4 inch drill bit to drill the swing arm pivot tube. I created a template in a vector design program to make sure I placed the holes correctly.
Fettling a Norton Commando 750


I punched the marks, used some cutting oil for lubrication and drilled the holes and fitted the clamps.
Fettling a Norton Commando 750


The Oilite bushings were heated for 10 minutes in a water bath to 80 °C to expel old oil, then placed in new, cold EP90 oil. Quite a difference between the heated and cold oil.
Fettling a Norton Commando 750


I also decided to change the engine oil. Turns out there was a lot of sediment in the oil tank which took quite some time and shaking to remove. I also discovered that the return hose fro mthe oil filter was almost sawed through. So changed that as well.
Fettling a Norton Commando 750


I also glued some dense EVA foam to the underside of the oil tank, and to the side of the battery tray.
Fettling a Norton Commando 750


Finally I pushed the bushings into the swing arm, replaced the oil seals, reinserted the spindle and put everything back together.
Fettling a Norton Commando 750
Not sure why you bothered heating the old bushings...no telling if they've had grease run through in the past and best to just renew them, no?


Write your reply...
Back
Top