Removing bezels from instrument clocks

Joined
Mar 21, 2025
Messages
16
Country flag
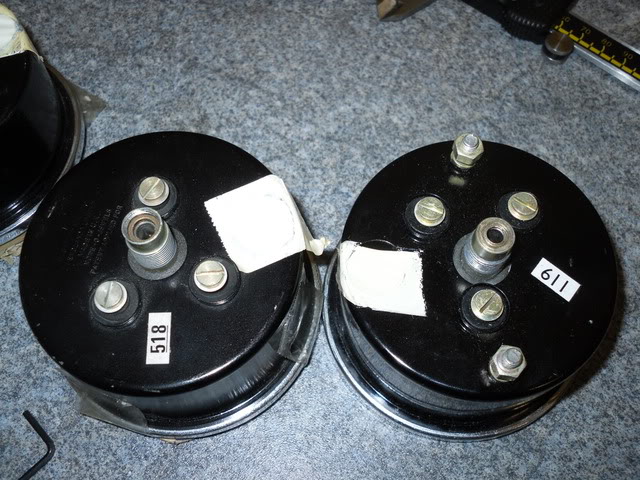
I need to replace the bezels on my speedo and tacho clocks on my 1970s Commando. At some point during storage something has hit the top of both clocks, creating a dent in the bezel of both and fracturing the lens on one. Below are pictures of the most damaged clock, the other has a smaller dent in the bezel.

Removing bezels from instrument clocks


What is the best way to remove the bezels without damaging the aluminum clocks? I guess this depend on them being crimped or threaded. If they are crimped, I have seen videos of people gently prying them off using small, flat screwdrivers. However, if they are threaded, I guess I will have to remove them some other way as I fear prying them off will damage the threads.
 
I just did mine and it was successful.
Your can lever the crimp away with a screwdriver as the crimp is soft. The bezel, glass and rubber seal will all come off.
I did some internal speedo lubrication without taking the needles off. Also cleaned up the inside of the housing so no little paint bits would
float up onto the glass when the crimp was being hammered as below.
Be careful what you decide to clean the dials with. Brakeclean will dissolve some paints.
The new glass I used came with the seals needed.
To recrimp, I put the gauge with new bezel in place with seals, face down on a piece of cork on
a thick piece of plywood. Then I used a wood clamp placed under the plywood and on the speedo output
to compress the bezel rubber gasket carefully and not too much to crack the glass.
Then, using a 3/8th inch socket extension flat female end, I went around the bezel and hit it at 45 degrees to make it start to
bend towards the right direction.
After it was all in the right direction, I then hit the crimp vertically down to crimp tightly.
The result looks fine once the speedo is back in its pod.

PM me if you need more info

Dennis
Thanks for telling me how you did it.

I designed a 3D printed holder which I think will help me with the crimping. The crimp edge of the new bezel should just clear the top of the plastic and therefore be easier to fold down. I plan on using a small screw clamp to compress the rubber gasket. Now I only have to order the parts.

Removing bezels from instrument clocks
 
The holder you made needs to be soft or have some rubber or cork in it.
Or else when you compress the bezel to speedo body, the bezel may get crushed as
all the force will go through the high point on the bezel which is an edge

The rubber seal that I got with my new glass was shrunken a bit so I had to stretch it for a couple of days before assembly.
Now is a good time to lube the assembly. Besides oiling what I could see internally with a hypodermic, I lay it flat bezel facing down and filled the speedo output hole to the brim with oil and rotated the output drive square now and then hoping oil would slowly weep down into the assembly. Which it did.
No flicker in gauges now!
Dennis
What kind of oil did you use?
 
I think it was 90W I had sitting around. I figure thick is better to try keep it in place, but that any that gets in place is a good thing.

By the way, when you clamp it, the seal has to fit within the bezel surround. If it seems to be a little small, you can warm it in boiling water
for a bit and it will be very flexible to get pushed into place.
I used a very, very, very! little rubber grease on the part of the seal that the bezel contacts with to ensure it all fit together and compression would be successful.
Dennis
(My supplier in Canada has the glass and two seals in a kit in case you can't find it)
 
The holder you made needs to be soft or have some rubber or cork in it.
Or else when you compress the bezel to speedo body, the bezel may get crushed as
all the force will go through the high point on the bezel which is an edge
I angled the inside of the 3d printed holder such that the outer camfer of the bezel is supported. Hopefully this will distribute the pressure and make sure the high point does not take all the force.
 
One last thing!

What I should have done when I had the gauges out of their cases, is to strip off the white reflective paint inside them and respray. The paint was flaking badly all over.
Not doing this meant that when I had the gauge upside down, and was hammering the bezel crimp, a couple fo flakes worked their way down (somehow) onto the glass. I am thinking that maybe they will vibrate off the glass while I ride but that hasn't happened yet...
They are small so I will get over it if they never disappear!
Dennis
By the way, I put LED pilot bulbs in place of their incandescent and I can actually read the gauges at night!!
Thanks for the tip. I will check the the white paint when I remove the bezels. I already have replaced the incandescent bulbs with LEDs. They make a big difference.
 
I saw that the inside housing white paint was flaked everywhere but did not think of the consequence that hammering the crimp would loosen them..
 
Heres a thread that was posed previously containing alot of info. When I did mine I found paint can openers (free at the Home Depot) to be the best tool to remove the bezel. I then made a tool like the first Smiths tool pictured with cork, lazy Suzan bearing, sliding door roller and threaded rod to install the bezel afterwards. I'll see if I can find it and post a pic.
 
It gauls me that the chronos have a screw on bezel and you have to stand on your head and have special tools to do up a magnetic. So the magnetic never gets lubricated and then fails. All to save how much and require
special tools? Absolutely perfect explanation of why the motorbike industry failed in UK. Add up all the
'how cheap can we go' missteps and there you are.
Veglia, anyone?
 
Heres a thread that was posed previously containing alot of info. When I did mine I found paint can openers (free at the Home Depot) to be the best tool to remove the bezel. I then made a tool like the first Smiths tool pictured with cork, lazy Suzan bearing, sliding door roller and threaded rod to install the bezel afterwards. I'll see if I can find it and post a pic.
I also made one of these bezel rollers with a roller cam follower I had laying around and it worked great. Doesn't help much for those without a lathe though.
 
I cut my bezel at an angle, then made a brass ring with the ends overlapped & soldered to press over the bevel to hold it i place.


Write your reply...
Back
Top