Norton Villiers Commando 1968 Re commissioning an adventures at 30

Are early/late frames that different? Mine tracks inside (behind) that rear frame upright...
(Mind you, I run a single carb, so perhaps your filter might preclude that route)
 
Last edited:
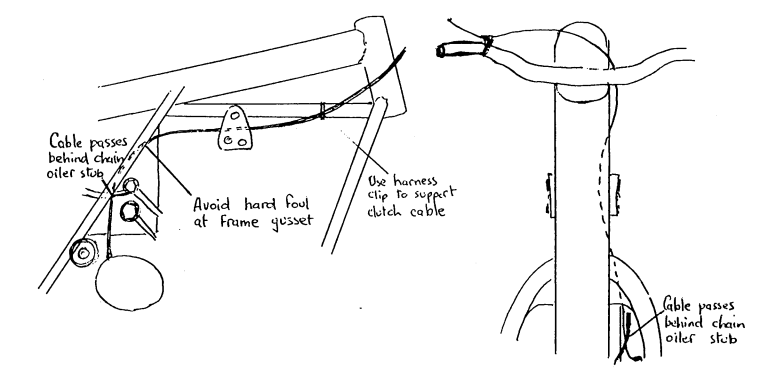
I followed the cable run in the inoa tech notes.

The cable would normally pass below the frame bracing plate alongside the air filter as here in Norton Service Release No.12...
Norton Villiers Commando 1968 Re commissioning an adventures at 30

...not over the frame tube as drawn in the INOA notes.
 
Thanks Lab re routed the cable, just working through checking everything clutch wise, does anyone know the length of the pushrod adjuster I think from memory it was 22/32" but cant remember exactly dad came in just as I was about to write it down. At the moment it's as though the inner cable is to long but thinking that's more to do with the clutch pushrod adjustment.

At the mo I've got the following bits.

bar rise 2.5" measured from centre top of bar to top of bars where the levers go. Not sure what the correct measurement is for the original 68 bars.

inner clutch cable 49" cable outer 45"

pushrod 9 13/16th

Think there's a few things going on with the clutch so just working through checking what's what going to measure the stack height in the morning. Make sure the lifting finger is in the right position to although looking back at old pictures the adjuster was nearly all the way in from the PO with the locknut barley on. Which I think is giving me excess inner cable length at the lever as the finger is sitting up with way to much freeplay in the lifting finger. Noticed as well that the previous owner has fitted the switch and the clutch lever on the wrong side of each other,


Does anyone know if the levers are even Commando ones solid alloy levers? Think I'm gonna try and get at least the correct early clutch one this week.

Need to order a new grommet for the case so the stator cable can go through current has gone hard.


Norton Villiers Commando 1968 Re commissioning an adventures at 30
 
Last edited:
inner clutch cable 49" cable outer 45"

pushrod 9 13/16th

Both the clutch cable and pushrod seem correct.
The actuator arm certainly looks overadjusted
Does anyone know if the levers are even Commando ones solid alloy levers?

They're not the correct Amal lever assemblies. The choke lever should also be attached to the brake lever assembly.


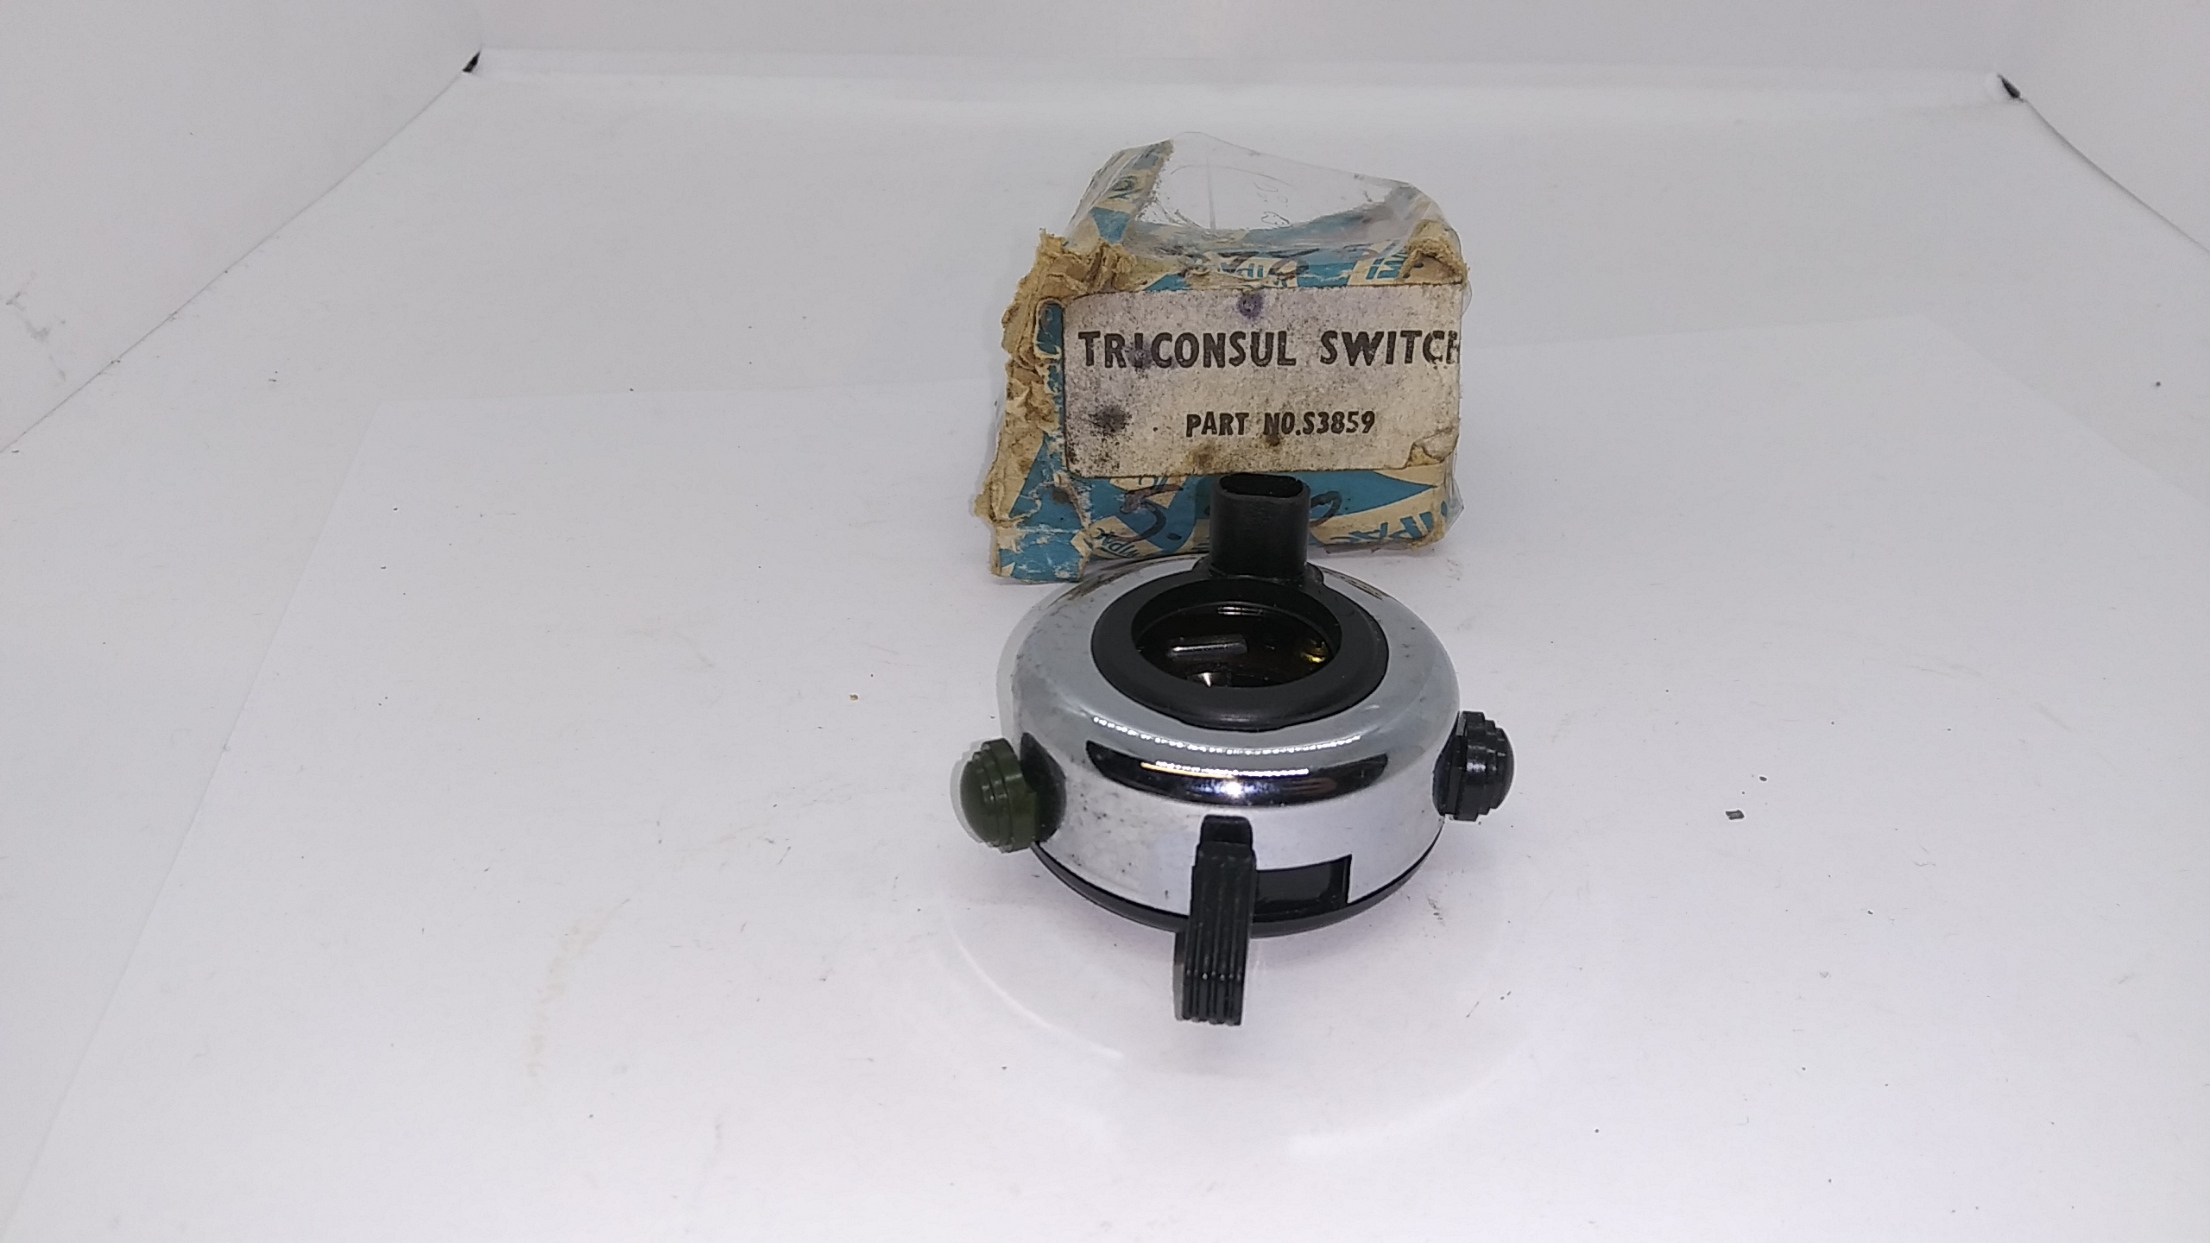
The switch cluster would normally be a Triconsul (however, they are currently unavailable) that one looks like a Tricon (as a Triconsul normally has a green and a black button) and against the handlebar grip.

 
Thanks mate really appreciate the reply saving up for some levers at the moment. I might order a new pushrod adjuster this week see if that helps something is certainly amiss.

I might get a new clutch lever to start with as well can always get the combined lever further down the line.

All interesting getting to the bottom of stuff like unpicking a puzzle always an opportunity to learn.

I have got the 68 NV riders handbook to which shows the control layout just been flicking through it.
 
Last edited:
I might order a new pushrod adjuster this week see if that helps something is certainly amiss.

Yes, something's not as it should be because the actuator arm looks set far too high so appears overadjusted at the cable to compensate for wear or some other part not being correct.

Maybe the wrong size ball bearing in the lifter, worn operating roller and sleeve or the roller sleeve could be missing?
 
Thanks mate I can see me popping the outer cover off the gearbox next week, I've not been into it yet. Judging by the way the rest of the bike was wouldn't suprise me if something is missing wrong or worn.
 
Did a bit of poking around this morning pulled the clutch operating lever down out of position and I can't see any visible sign with a camera in there of the ball bearing is it captive to the operating body and the end of the shaft looking at the drawing on Andover and can't be slotted down the pushrod tunnel?

To get the 3mm of freeplay Norman recommends in his book the adjuster is all the way in to the diaphragm so something has to be missing.

Clutch operating Roller is in place.

Looks like I know what I'm up to this week :) think ill get a new operating lever to
 
Last edited:
Did a bit of poking around this morning pulled the clutch operating lever down out of position and I can't see any visible sign with a camera in there of the ball bearing is it captive to the operating body and the end of the shaft looking at the drawing on Andover and can't be slotted down the pushrod tunnel?

It's a 1/2" ball bearing between the operating lever and the pushrod which you won't see without removing the lifter mechanism.

Clutch operating Roller is in place.

Yes, but is the sleeve inside the roller?

Looks like I know what I'm up to this week :) what's the thought on the new operating levers any benefit over the old ones?

Probably not if the pivot radius is the same as the original because it affects the clutch lift if not.
 
I think I'm right in saying that even if you had a 'pattern' lever with a greater radius than the 7/8 OE fitted, the clutch would still function properly but pull at the lever would need to be greater, and less movement needed for full lift...
I.E:
That wouldn't be your problem....
LAB??
 
I guess at least If I pull it to find out today we shall have an answer, that's a point Lab I don't know the sleeve is in.

One benefit I guess is if I pull the outer cover I can do all the springs while I'm in.

I'll go measure the pivot on the levers now and see what it is. Edit 1" between lever and perch bolt centres.
 
I think I'm right in saying that even if you had a 'pattern' lever with a greater radius than the 7/8 OE fitted,

Should be 1.1/16" though, not 7/8".
 
Just to check I'm doing it right because we can all have moments

Gearbox cable disconnected

Adjuster slack clutch side, go in till resistance felt, back off half a turn then come back for light resistance. Check 3mm of play at lifter end in gearbox then hook up cable if I'm reading normans book right. Adjuster is all the way into the diaphragm plate.

If i do it another way which I know isn't right cable on lever slack Adjust till 3mm of play in lifting arm an light resistance on Adjuster then take out freeplay at lever got a working clutch but heavy and the nut just goes on which is how it was when I got the bike but I'm not happy that it's got no adjustment and that something could be missing so thinking bacon sarny then pull the cover
 
Just pulled it can see the ball bearing gonna have a mess with the adjuster now I can see clearly. The arm is miss aligned with the cover hole so gonna order the tool for that when I order new springs and gaskets tomorrow

Norton Villiers Commando 1968 Re commissioning an adventures at 30
 
Doing it Norman's method with the cover off 3mm free play at the lifter
Norton Villiers Commando 1968 Re commissioning an adventures at 30

Somethings gotta be short or worn gonna undo the lock collar and fit a new one with the tool so I can measure it all.
 
Adjuster slack clutch side, go in till resistance felt, back off half a turn then come back for light resistance. Check 3mm of play at lifter end in gearbox then hook up cable if I'm reading normans book right. Adjuster is all the way into the diaphragm plate.

In my opinion, the only way there can be "light resistance" is if all play has been removed from the lifter mechanism. I can't see how there can be light resistance and 3mm of lifter play at the same time.

What I do is fully slacken the cable at the handlebar adjuster and with the pushrod adjuster locknut slackened (so the cable is fully slackened at the lifter, no need to remove it) screw the adjuster in until all play is removed from the lifter arm then back off the adjuster about a third of a turn and tighten the lock nut, then set the handlebar free play.


Doing it Norman's method with the cover off 3mm free play at the lifter

Somethings gotta be short or worn gonna undo the lock collar and fit a new one with the tool so I can measure it all.

Yes, something seems wrong for the adjuster to be screwed that far in.

Also check it has the Commando operating lever...

..., not Dommi/Atlas which results in less clutch lift.
 
Back
Top