Knocking / rattling inside primary drive case + backfire

Thanks all. There are several issues running here in one thread, so I'll try to keep things organised:

Primary chaincase inner retaining bolts
- Attached is a photo of one of the inner primary chaincase retaining bolts. You’re right marshg246 and L.A.B.. These look like normal washers, and I'll get the correct locking tabs ordered (thanks for the link).
Knocking / rattling inside primary drive case + backfire


Stator
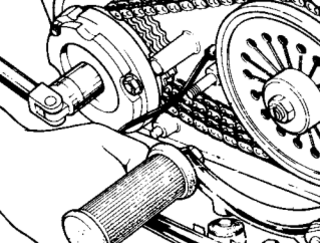
- I've flipped the stator and removed the copper wire, as shown here. Is this now correct?
- Unfortunately, when torquing up the stator bolts (to 20Nm as per the workshop manual) one of the bolt threads let go and the nut started spinning. I suspect it was already stripped because I didn't give it much at all - maybe 10-15Nm. I'll give it a try with some loctite and if not I guess I'll have to source a smaller nut and cut a new thread. More for the to do list!
- I'll check the gap with a feeler gauge as suggested.

Knocking / rattling inside primary drive case + backfire


Clutch adjustment
- Thanks L.A.B. - I'll look up and carry out a pushrod adjustment first.

Electrical issue
- I'll isolate the handlebar to see if that's the problem. Great idea texasSlick, thanks.
 
Last edited:
Thanks all. There are several issues running here in one thread, so I'll try to keep things organised:

Primary chaincase inner retaining bolts
- Attached is a photo of one of the inner primary chaincase retaining bolts. You’re right marshg246 and L.A.B.. These look like normal washers, and I'll get the correct locking tabs ordered (thanks for the link).
Knocking / rattling inside primary drive case + backfire


Stator

- Unfortunately, when torquing up the stator bolts (to 20Nm as per the workshop manual) one of the bolt threads let go and the nut started spinning. I suspect it was already stripped because I didn't give it much at all - maybe 10-15Nm. I'll give it a try with some loctite and if not I guess I'll have to source a smaller nut and cut a new thread. More for the to do list!
Those studs are readily available, part 06.0386, and inexpensive.
 
I don't know to be honest. I always struggle to evaluate chain tension. Do you think it is too tight?
Looks fine to me - maybe a little loose. You are supposed to have 3/8" of total up and down movement in the middle of the top run. You need to turn the engine and check at several locations and make sure the tightest is 3/8"
 
Ok thanks both - 1 vote for tight and 1 vote for loose :)

I'll do my best to measure 3/8 at the centre point when I get that far (still on the electrics at the moment).
 
- I've flipped the stator and removed the copper wire, as shown here. Is this now correct?

Yes.
Knocking / rattling inside primary drive case + backfire

Thanks L.A.B. - I'll look up and carry out a pushrod adjustment first.

Although the information in the factory manual section C35 says to unscrew the adjuster "one full turn" from contact with the pushrod, I prefer to back off the adjuster by 1/3 to 1/2 a turn.

Ok thanks both - 1 vote for tight and 1 vote for loose :)
Total up and down movement as you were only pressing the chain down in the video.
 
Ok thanks both - 1 vote for tight and 1 vote for loose :)

I'll do my best to measure 3/8 at the centre point when I get that far (still on the electrics at the moment).
After measuring, if you decide it is too tight or too loose, you'll need to read how to adjust the gearbox. It can be frustrating to get right without the right procedure.

If you measure a little under or over 3/8" just move on - ain't no spaceship!

To measure, I raise the chain and put the end of a ruler on the center of one of the pins. Then holding the ruler steady push down on the chain and see how far down the center of that pin moves. Some people miss-read thinking the manual means 3/8" up AND 3/8" down - it doesn't mean that!
Ah I see. I'm glad you clarified that. I was measuring the deflection down from rest, not going up first! Thanks.
 
Although the information in the factory manual section C35 says to unscrew the adjuster "one full turn" from contact with the pushrod, I prefer to back off the adjuster by 1/3 to 1/2 a turn.
I agree - it just needs a small gap and a full turn seems too much to me. A full turn works, but having the extra lift of less is good.
 
For the stator stripped thread, is it the stud or just the nut that stripped?
If adjusting primary chain, if in doubt keep it on Monday loose side. Too tight can do bad things. After any adjustment, you also need to set the drive chain tension to rear wheel.
For blowing fuse, got to isolate and test with test lamp or multimeter. I found a short inside the big five connector rubber multi block. The rubber had torn deep inside with no visible indication from outside. It allowed shorting between two connectors within. I eliminated that block and now use a series of doubles and single connectors. Much easier to fit them under tank as well.

Note: To post images directly in forum posts, you need to be a VIP member (see the membership section). Otherwise you need to upload to some other image hosting site, then paste an image link here to display in a posting. Was surprised to see you sucessfully posted a video. Usually these must be on places like YouTube and linked here to see/play.
 
Update after a morning working on the Norton:

Electrical issue
Fixed. It was the contacts/solder joints of the handlebar controls shorting on the shiny new chrome handlebar. The old handlebar was painted in what I guess was non-conductive paint. The solution was to wrap a section of the bar ends in insulation tape prior to refitting the handlebar controls.

Clutch nut / push rod adjustment
The adjustment screw was in too far, touching the push rod. I’ve adjusted it correctly, but can’t find a torque specification for the locking nut. Does anyone know what torque this should be?

Primary chain tension
Measuring deflection up & down I think it’s just over 1/2 inch - so definitely a bit loose. I’ll tighten this but not by much. I’d rather have it too slack than over tight.

Stripped stator nut
Turned out to be a slightly stripped nut, not the stud. I reversed the nut and was able to torque it ok. New studs and nuts will be ordered this week though, just in case.

Stator gap
The search for my feeler gauges continues…
 
I found my feeler gauge set. It’s in mm.

I understand the correct stator gap is 8 thousandths of an inch, which I believe is 0.2mm

I’ve got 0.2mm clearance all around, except for one section that is 0.15mm. Do you think this is ok or is some adjustment required?
 
Do you think this is ok or is some adjustment required?
No, adjustment required, I work to 10 thou minimum all the way round with the crank turned to different positions. Skimming a few thou off the OD of the rotor or the ID of the stator can achieve this.
 
I found my feeler gauge set. It’s in mm.

I understand the correct stator gap is 8 thousandths of an inch, which I believe is 0.2mm

I’ve got 0.2mm clearance all around, except for one section that is 0.15mm. Do you think this is ok or is some adjustment required?
You'll find varying opinions on this, but I consider 0.008" (.203mm) to be the minimum. When checking be sure your feeler gauge is all the way in. Sometimes the stator is slightly cocked due to slight differences in the lengths of the spacers. Sometimes, just moving the spacers will fix it. It is very common for the tightest to be at about the one o'clock position.
 
Update after a morning working on the Norton:

Electrical issue
Fixed. It was the contacts/solder joints of the handlebar controls shorting on the shiny new chrome handlebar. The old handlebar was painted in what I guess was non-conductive paint. The solution was to wrap a section of the bar ends in insulation tape prior to refitting the handlebar controls.

Clutch nut / push rod adjustment
The adjustment screw was in too far, touching the push rod. I’ve adjusted it correctly, but can’t find a torque specification for the locking nut. Does anyone know what torque this should be?
The next time you're in the handlebar control, look more carefully. There should be no need for insulation so something is a miss.

The nut is there to lock the screw in place - doesn't need much torque. To answer most torque questions go here: https://www.gregmarsh.com/PDFDocs/Norton Commando Torque.pdf
 
Thanks. I've tightened the nut to 15Nm. Seems right.

Finally got the engine running, with the primary chain cover off:


The knocking is still there, and seems to be coming from the stator area. Related to the 0.15mm clearance perhaps?

I've not adjusted the chain yet. Seeing it running it definitely looks a bit loose.

On the upside, it seemed to tick over pretty nicely. I need some positives at this stage!
 
Back
Top