A matching speedo is on my list of to buy thingsI'd just go for a matching pair, without worrying too much about the year; as you will have seen from the discussion, very few people know what your bike should have. And those that do wouldn't approve of the 18" wheels, the crankcase breather, and the rearsets. I think its something like 2% of Norton owners try to keep them original.
Mine is a 1970 fastback, now interstate, and when I need to replace something I try to go for the best that is available, which is rarely the original 1970 part. When my speedo or tachometer fail, I will definitely go for these https://legendary-motorcycles.com/product-category/gauges-brackets-speed-rpm/ . Not original, but they seem much better.
You are using an out of date browser. It may not display this or other websites correctly.
You should upgrade or use an alternative browser.
You should upgrade or use an alternative browser.
1969 Commando revitalization.
- Thread starter Jackman
- Start date
I too like that there are people who keep it original, but I couldn't be in that 2%. It means, when you need a part, you could choose something that has been improved to overcome problems in the original, or you could go for something that was adequate and cheap enough to help profits in the 1970s.I get the part of improvement through upgrades. I get the part of keeping them original as they left the factory. It is nice the 2% do try to keep them original for interest in comparing.
Brakes are the obvious area for improvement, I'm staying with my drum brake, because that was what was on the bike when I rode it all over Europe in the 1970s/80s, but I've replaced the rusty parts on the outside with stainless steel copies, and on the inside, its modern friction pads, the brake stiffening kit from later models, modern ceramic lube and a nylon lined brake cable. So it looks original, but will perform much better.
As you have the AN sump plug with the little screw on it, draining the sump should be a breeze.The Norton Commando learning curve I’m slowly getting it. Very glad to have not blown out a crank seal . I might get the anti sump valve or just pull the plug next Spring and refill the tank, going to think on it.
BTW, your bike probably has no external filter? Adding one is a very sensible upgrade. Note hose size difference.
- Knut

Motorcycle parts and spares for Norton motorbikes - Genuine Andover Norton Spare Parts - Andover Norton Motorcycles Parts - Original Andover Norton Parts
Motorcycle parts and spares for Andover Norton motorbikes: Andover Norton manufactures and supplies all Genuine Factory Spare Parts for Norton motorcycles built before 2002.
andover-norton.co.uk
The filter kit will be added at some point for sure  .
.
I replaced the sump plug with a Jim Schmidt crankcase vent (no drain plug) which is supposed to pump the oil back to the tank the amount of oil it pumped back is what surprised me , next year I’ll pull the vent hose and drain the sump.
I’ve seen the anti sump valve but I’m not sure I want to add that one still thinking about it.
With the Jim Schmidt crankcase breather you shouldn't have a problem with wet sumping. The bike will still wet sump, but it won't be a problem because surplus oil will be pumped back to the tank through the breather.The filter kit will be added at some point for sure.
I replaced the sump plug with a Jim Schmidt crankcase vent (no drain plug) which is supposed to pump the oil back to the tank the amount of oil it pumped back is what surprised me , next year I’ll pull the vent hose and drain the sump.
I’ve seen the anti sump valve but I’m not sure I want to add that one still thinking about it.
For my '70 I've bought exactly the same breather as you, expecting it to fix multiple problems at once.
Yes the Jim Schmidt breather does pump the oil back but a lot of oil pooled in the crank in 4 months time so I just might add the anti sump valve. I really like the Jim Schmidt breather it got rid of the ugly breather hose on the left side of the engine  .
.
About to order 19 inch Avon Roadriders so I can ride this season holding off on the 18 inch wheels for a season or two.
About to order 19 inch Avon Roadriders so I can ride this season holding off on the 18 inch wheels for a season or two.
Bought new Amal’s took old carbs off found the Allen head bolts are worn out so going to order new bolts for the install. Those Allen bolts are tough to fit a wrench too I cut down a wrench (Allen key) it’s still a pia .
Attachments
- Joined
- Nov 20, 2004
- Messages
- 20,168
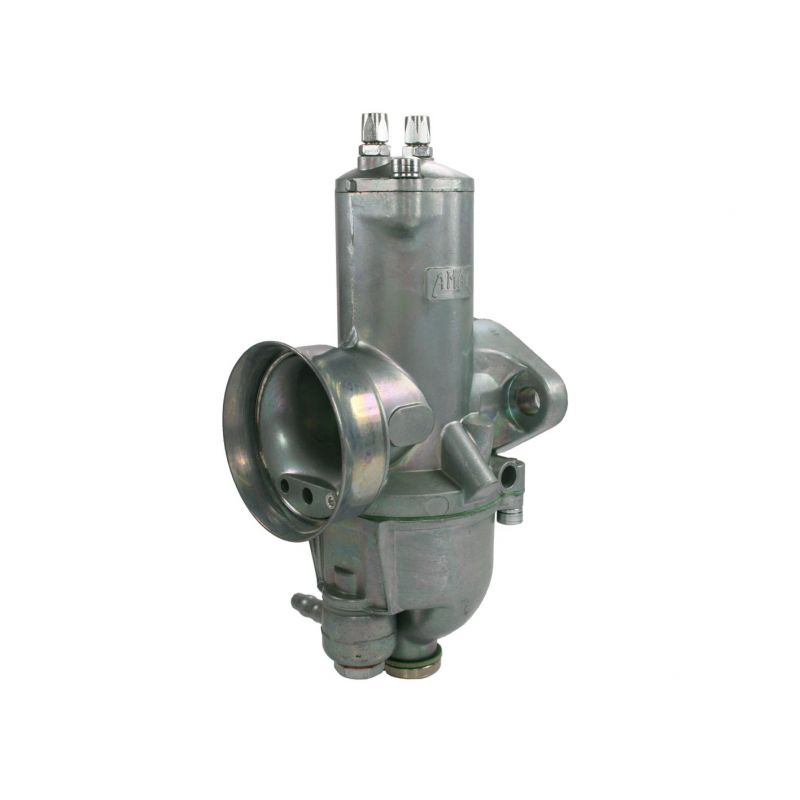
Anyone want to id the old carbs?
Right side is a R 930. 11
Already identified as a BSA Victor carb in December 2021.
1969 Commando revitalization.
Intro and my new to me Norton. Hello all thanks for having this awesome forum :cool:. I'm jack and this is my new ride . I'm 60 years old have owned a lot of motorcycles over the years and was a mechanic at several Japanese and one HD dealerships at present I'm a truck driver closing in on...
Carburettor for a BSA B44 Victor Roadster 1967-68 - The AMAL Carburetter Company
<div class="std"> <div class="std"> <p>This carburettor is built to the original specification and comes supplied with:</p> <p>3 Cutaway Slide</p> <p>230 Main Jet </p> <p>106 Needle Jet</p> <p>Pilot Bush</p> <p><em><strong>Alteration Not
Early LH Commando 750.Left is a LB 930. 31

Carburettor for a Norton Commando 750cc 1969 | | AMAL Carburetter | AMAL Carburetters
Carburettor for a Norton Commando 750cc 1969
Neither is threaded for velocity stacks my new carbs are threaded.
If you unscrew the adaptor sleeves then you should find they are.

Motorcycle parts and spares for Norton motorbikes - Genuine Andover Norton Spare Parts - Andover Norton Motorcycles Parts - Original Andover Norton Parts
Motorcycle parts and spares for Andover Norton motorbikes: Andover Norton manufactures and supplies all Genuine Factory Spare Parts for Norton motorcycles built before 2002.
andover-norton.co.uk
Last edited:
Is there better tools or better bolts that would make bolting the intake easier? Here’s what I’m using for wrenches a cut down Allen head along with a ball Allen head , they help but if there’s a better way please help me out  .
.
Attachments
- Joined
- May 7, 2005
- Messages
- 6,891
As well as cutting the allen key down as you have done then heating and bending the long section will improve the clearance.
 www.accessnorton.com
Carb manifold bolts (2014)
OK - showing my newbie colors here... Trying to remove old Amals to install new carbs from JSE. The space between the front and back intake manifold flanges is VERY tight, and I cannot get any of my allen wrenches in there. So I am not even sure of what size to get when I head over to HF. And do...
After you shorten the "short" leg of the allen wrench, heat/bend the long section so it angles back when the short end is in the bolt head. It makes it much easier to position/use.
Are you still planning to go to 18" ? People who went 18" to get better tyre choices now seem to be moving back to 19"Yes the Jim Schmidt breather does pump the oil back but a lot of oil pooled in the crank in 4 months time so I just might add the anti sump valve. I really like the Jim Schmidt breather it got rid of the ugly breather hose on the left side of the engine.
About to order 19 inch Avon Roadriders so I can ride this season holding off on the 18 inch wheels for a season or two.
marshg246
VIP MEMBER
- Joined
- Jul 12, 2015
- Messages
- 4,322
Should only be one bolt. Completely install one side (I do the timing side). Then it's only the inside of the other side. I use these two sets and nothing more:Before I checked for replies I cut down another allen and between the two allen keys that I have I slowly tediously got everything snugged . Next time I'll bend a wrench as you suggest,, such a pia for two little bolts.....
- Joined
- Dec 30, 2003
- Messages
- 3,671
The side covers are correct for ‘69 and ‘70 S type and roadster. The pin stripes were put on parallel to the top edge. That’s a common mistake even with the ‘71 onward side covers. Side cover pin striping was not done on the 750 models anyway.Welcome aboard.
Some preliminary observations:
1. Many owners eliminate the chokes as they tend not to be needed for cold starting (just give a good tickle prior to cold firing & keep revs up a little for first few minutes) and can lead to problems if they slide down while riding (usually from a too loose choke lifter lever or from forgetting which way to move the lever etc ;-) ).
2. The right side covers look odd, askew, not square to the upper frame rail?
3. Seems to have a non-stock kick start lever...extended length and angled, not curved like stock. Many folks replace stock with a MarkIII kicker which looks more like yours I believe. If it gets you a good kick feel and you're not after full authenticity, then your fine.
Tornado
VIP MEMBER
- Joined
- Dec 5, 2017
- Messages
- 4,627
I've used this micro ratchet bit driver to get at the manifold bolts...still a bit tedious, might work better with shortening length of the hex bit so to give clearance as bolt backs out of hole.Is there better tools or better bolts that would make bolting the intake easier? Here’s what I’m using for wrenches a cut down Allen head along with a ball Allen head , they help but if there’s a better way please help me out.
Those Amazon tools are what I used , the inner bolts were a pia I could hardly get a bite or a turn. Probably just me being a newbie next time I’ll be ready for itShould only be one bolt. Completely install one side (I do the timing side). Then it's only the inside of the other side. I use these two sets and nothing more:
Darn I have that set wish I hd seen your post earlierI've used this micro ratchet bit driver to get at the manifold bolts...still a bit tedious, might work better with shortening length of the hex bit so to give clearance as bolt backs out of hole.
View attachment 114517
Yes absolutely but decided to get the bike turn key ready before I spend 2,000 dollars on wheels. It’s going to happen eventuallyAre you still planning to go to 18" ? People who went 18" to get better tyre choices now seem to be moving back to 19"


