1968 Commando rescue

Joined
Jul 26, 2014
Messages
128
Country flag
Hi all

Before I start here is the motive for starting this thread...

I bought this bike in October 2013 when my wonderful wife gave me a bunch of cash for my birthday... to be honest I think she just didn't know what to get me and she thought this'll be an easy out. How wrong she was...

So now it's 2017 and the project is still not finished, in fact you could probably say it has stalled. So the idea is if I start a rebuild thread it will inspire me to get on with it.

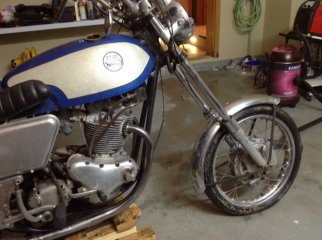
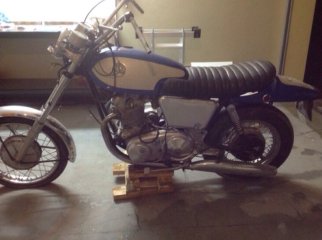
I will start with the purchase. I have always wanted a Commando and a 68 fastback, in my opinion, is the best looking of them all. So I had been looking for a while and this one came up on Craig's list in Colorado.Took a gamble and sent $2500 half way around the world to guy called "Augie" with the hope I would get my dream bike some time after. Have to say Augie turned out to be one of those "salt of the earth" kind of guys that we run into not often enough these days. He went out of his way to get the bike shipped to me and sent me pictures of it being loaded and couldn't have been more helpful.

The wait began... and in mid January 2014 the long anticipated call arrived. My bike is on the dock in Dubai yah but customs won't release it as it is a bike brand that is not recognised in the UAE road transport database.. oh f**k. To cut an incredibly long and frustrating story short, after 2 week of negotiations with the UAE customs my bike is on its way to me. The first and only Norton in the UAE?

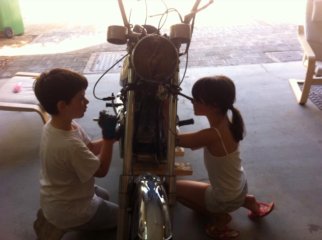
I remember the night very well. From Dubai docks to my home in Abu Dhabi is normally a 1 hour drive but that day it was raining, now for a country where it rains maybe once every couple years this is a disaster. 7 hours later my bike arrived at 10:00 pm. Here at last. Put it to bed and it would have to wait till the morning. I wasn't allowed to start without my kids help, although it did get a good staring at for a couple of hours that night.

Was it Xmas morning already. Sure felt like it. Not quite. Had to wake the kids up to help dad unwrap his present. That never happens at Xmas.

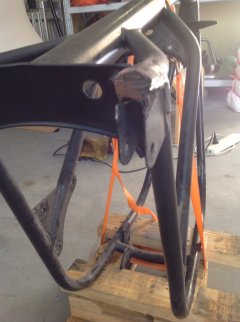
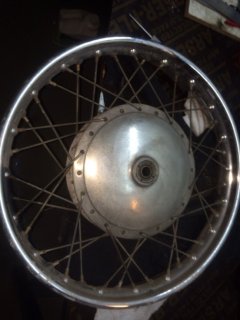
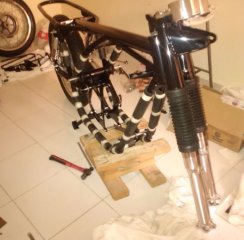
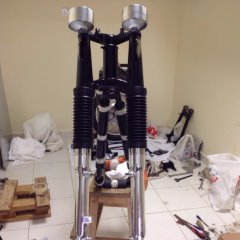
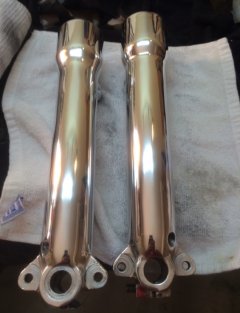
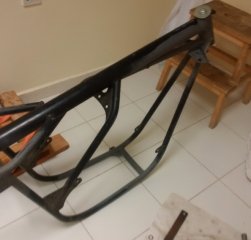
Lots of pictures and the strip down begins with my restoration "team"
 

Attachments

  • 1968 Commando rescue
    IMG_1812.JPG
    80.1 KB · Views: 2,231
  • 1968 Commando rescue
    IMG_1810.JPG
    103.4 KB · Views: 2,145
  • 1968 Commando rescue
    IMG_1809.JPG
    120.8 KB · Views: 2,196
  • 1968 Commando rescue
    IMG_1808.JPG
    88 KB · Views: 2,246
Love the pic of the children cleaning the bike! Great looking machine too. What's your plan?
 
grandpaul said:
This should be a fantastic thread! Welcome.
+1 Good looking bike Dean, great starting point for a project since it seems to be complete. I look forward to future posts on your rebuild thread. :mrgreen:
 
Tin Man said:
Love the pic of the children cleaning the bike! Great looking machine too. What's your plan?

The plan is to take it back to original with any of the improvements from the later models that will make it more user friendly.

Kids not cleaning. They are wrenching, one side each. I was just taking photos, bagging and labelling. They are both petty good on the tools. Plenty of lefty loosey righty tightly lessons. In fact the boy is a better welder than I am...
 

Attachments

  • 1968 Commando rescue
    IMG_1816.JPG
    64.9 KB · Views: 2,026
  • 1968 Commando rescue
    IMG_1815.JPG
    67.7 KB · Views: 2,051
Awesome! Love it! My 3 yo girl is keen on wrenches and helping, but hasn't quite grasped how they really work that well yet.
 
I am gonna follow your build closely. I am rebuilding the same bike in Syracuse NY. Hope to learn something.
 
gortnipper said:
Awesome! Love it! My 3 yo girl is keen on wrenches and helping, but hasn't quite grasped how they really work that well yet.

Start them early. I remember my son "helping me" at about the same age. I was adjusting my front brake and he was playing with my socket set down the back of the bike when I was finished I was packing up and half of my sockets were gone. When I asked him what happened to the sockets he pointed at the exhaust. Had to pull off the silencer of to get the sockets out.
 
qside said:
I am gonna follow your build closely. I am rebuilding the same bike in Syracuse NY. Hope to learn something.

Hi qside

Would like to see some pictures. Put some up here. Mine is S/N 128372. Is that close to yours?

Cheers
D
 
Dean said:
gortnipper said:
Awesome! Love it! My 3 yo girl is keen on wrenches and helping, but hasn't quite grasped how they really work that well yet.

Start them early. I remember my son "helping me" at about the same age. I was adjusting my front brake and he was playing with my socket set down the back of the bike when I was finished I was packing up and half of my sockets were gone. When I asked him what happened to the sockets he pointed at the exhaust. Had to pull off the silencer of to get the sockets out.

The best was when my oldest girl was almost 3 and I was putting on my nicely resprayed Interstate tank, and she said she wanted to help. It was a hot summer day, so I told her to go inside and ask her mom for a beer and bring it to me. Came back open and full. Best bike assist every by a 3 year old.
 
Ok so the bike is in big chunks and can now see what I have. I keep a notebook for my restorations and keep all my notes in 1 place. In the back I write down all the parts that I need.

I start with the frame first then suspension then wheels so I can get a rolling chassis to hang everything else on.

Once I got the frame out I could see it needed a lot of work to get it right. It still had the "widow maker frame and there was a lot of extra material welded around the headstock so strong indications it was cracked. Also the rear loop was bent and some ugly welds around the shock mounts that needed looking at.

First I removed the extras around the headstock and crack tested the down tubes and spine. Sure enough the RH down tube was cracked about 3/4 around. Ground out the crack and welded it up then made up a lower 1" diameter tube to go under the spine as in the later frames. This meant I had to replace the tank and coil mount which I got from AN. All welded up... good to go.

Next the rear loop. I chopped off the good aft piece to use later and then chopped out the damaged/bent pieces. Someone in the past had beaten a piece of solid bar in to slice the rear frame on and made a right hash of it. I had to chop off the shock mounts to get in to repair the damage so would need to make new ones. I made the outer ones as per standard but made the inner ones from thicker material and extended to support the rear loop.

Frame done.
 

Attachments

  • 1968 Commando rescue
    IMG_1182.JPG
    154.6 KB · Views: 1,946
  • 1968 Commando rescue
    IMG_1180.JPG
    164.3 KB · Views: 1,913
  • 1968 Commando rescue
    IMG_1178.JPG
    146.6 KB · Views: 1,953
  • 1968 Commando rescue
    IMG_1427.JPG
    127.7 KB · Views: 1,949
  • 1968 Commando rescue
    IMG_1817.JPG
    107.3 KB · Views: 1,960
Outstanding !! That '68 sure got lucky when you became the new owner. :mrgreen:
 
Now that I had made a start on the frame the aim was to get all the black parts ready for powder coating. As I didn't have a side stand i went with the later version. This requires the later x brace to be welded in to support the later style mount.

Following the philosophy of improving the early frame with some of the later models upgrades I also modified the rear engine cradle to take the MK 3 style cotter pins.

Another mod that I had read was worthwhile was bracing the swingarm. I made up a simple jig to stop it distorting while it was welded.

Now the items were ready for powder coating next job was to rebuild the wheels. This is one of my favourite jobs. More on that later.
 

Attachments

  • 1968 Commando rescue
    IMG_1819.JPG
    115.5 KB · Views: 1,750
  • 1968 Commando rescue
    IMG_1820.JPG
    80.3 KB · Views: 1,706
  • 1968 Commando rescue
    IMG_1821.JPG
    100.8 KB · Views: 1,737
  • 1968 Commando rescue
    IMG_1822.JPG
    95.4 KB · Views: 1,729
  • 1968 Commando rescue
    IMG_1823.JPG
    76.2 KB · Views: 1,714
Ok next up is the wheels, one of my favourite jobs.

It is almost like meditation and you get a fast feel good going from old and crappy to new and shiny very quickly.

Went for alloy rims and stainless steel spokes from Devon rims in the U.K. Great service.
 

Attachments

  • 1968 Commando rescue
    IMG_1863.JPG
    108.9 KB · Views: 1,362
  • 1968 Commando rescue
    IMG_1862.JPG
    116.1 KB · Views: 1,360
  • 1968 Commando rescue
    IMG_1861.JPG
    90.2 KB · Views: 1,386
  • 1968 Commando rescue
    IMG_1860.JPG
    101.1 KB · Views: 1,366
  • 1968 Commando rescue
    IMG_1859.JPG
    85.4 KB · Views: 1,372
Wow, what an undertaking! Good luck with the project. I built a 68 Commando out of parts I bought at swap meets and off Ebay. Actually, it is now a 68 through 74 Commando, but built as a 68 to the casual observer.. As you are aware, the 68 Commando has a lot of parts unique to that year.

I was working outside of Appleton, WI headed west on Route 10 when I came across a motorcycle dealer shop selling Nortons, Triumphs, and Benellis - all of which were out of business, So I pulled in. There was a fantastic showroom with a few Nortons, a couple of Triumphs, and a NOS Benelli SEI with 6 miles on the clock. Oner of the Nortons was a 68 in the original British Racing Green (with the moon badges). Turns out it was the owner's bike and not for sale. I told him I was looking for a fastback. He said he didn't have any, but he had the next best thing. He took me up to the loft where he had a set of 68 Commando bodywork, tank, seat, rear and the black inner rear fender. In the Grenadier Red with the moon badges. The rear was slightly sun faded, but the rest was pristine. Turns out the owner back in 70 traded in the fastback body parts for a set of the new Roadster bits. So I bought the Fastback parts.

Now what? Having the body, I had to build a motorcycle under it! I took the easy way out and build up the Commando on a 73 850 frame. Improved handling, better center stand and prop stand, etc. So I started sourcing 68 Commando bits. The unique primary cover. The early motor with the points behind the barrels. The sand cast footpegs. I still am looking for a sand cast kick starter. A gearbox from a 74. I used the later rear wheel and hub, but kept the dish and plugs from an early bolt on hub for the looks. The only thing to distinguish it from a genuine 68 by the eyeball is the later center stand. Since many owners replaced the widowmaker frame, that is not a big deal to me. And the numbers don't match, of course. I call it my "ItzaBitsa".

It is running and looking good. It is currently up on my workbench as I am replacing the Dunlop Rims with a pair of Akront rims and new tyres. I will be more than happy to answer any questions you have. I will post some pictures when I go down to the garage and take them.

1968 Commando rescue

1968 Commando rescue

This is actually an 850 rear hub disguised as the bolt on hub:

1968 Commando rescue
 
Hi Commandodave

Did you have any issues with using the later centre stand with the early style pipes and silencers.

This is the setup I am planning to use on mine.

Thanks
Dean
 
Ok so now the frame repairs are all done I took it to a local engineering firm that had a large surface table and checked the frame over. It had a bend in the lower tube where the side stand was. As I didn't have the side stand for it I cut the lug off and changed it for the later type. I then went through it and checked all the dimensions. Only needed a couple of small tweaks to get it squared away.

Then off to the powder Coaters who did a nice job and cheap. About $100 usd for all the parts. Then rebuild the forks following Mick Hemings write up from the Jampot magazine. Great resource. Starting to look like a bike again. The extended forks had an extension to the damper rods that just unscrewed but the stanchions were longer than standard. They were in really nice condition so I got them cut down to the standard length.
 

Attachments

  • 1968 Commando rescue
    IMG_1951.JPG
    121.1 KB · Views: 904
  • 1968 Commando rescue
    IMG_1950.JPG
    112.1 KB · Views: 926
  • 1968 Commando rescue
    IMG_1948.JPG
    93 KB · Views: 923
  • 1968 Commando rescue
    IMG_1945.JPG
    83.5 KB · Views: 920
Time to have some fun and start on the motor. After stripping down and inspection I had a good idea of what was needed. Major items were the normal stuff like new bearings, pistons, etc so started off with the bottom end. The conrods were corroded and took a bit to clean up but came up nice. The other thing that was a concern was corrosion marks on the big ends. So after stripping and cleaning the sludge trap the crank got a -0.010" grind which cleaned it up nicely.
After reading up I saw that there was a lot of talk about the breather not being great so blanked off the camshaft breather and fitted one of the CNW ones.
Then paint the crankcases and assemble.
Sweet.
 

Attachments

  • 1968 Commando rescue
    IMG_1977.JPG
    78.1 KB · Views: 756
  • 1968 Commando rescue
    IMG_1970.JPG
    85.1 KB · Views: 796
  • 1968 Commando rescue
    IMG_1969.JPG
    69.6 KB · Views: 764
  • 1968 Commando rescue
    IMG_1971.JPG
    85.2 KB · Views: 805
  • 1968 Commando rescue
    IMG_1973.JPG
    107.5 KB · Views: 716
Back
Top